How to Run Windows Software on Mac Without Bootcamp?
When you need to run Windows software on a Mac, but don’t want to install the Windows OS on the Mac startup disk with Bootcamp, you can use AOMEI Partition Assistant to create a portable bootable Windows device, boot your Mac from it and load the Windows software on Mac successfully.
By Dervish / Updated on May 12, 2023
Why need to run Windows software on Mac?
Nowadays, many people would like to buy a Mac book at home due to the great design and software ecosystem of Apple. But Windows still has its captivating features and software, like Windows Office, helping people to work efficiently and conveniently.
Therefore, you might need to run Windows software on a Mac book sometimes, especially when you need to work with Windows Office from home, or want to play games designed for Windows PC. To get rid of this dilemma, you can install a Windows system on your Mac via Bootcamp. But, it will occupy some precious space on the Mac startup disk, which may influence your Mac loading and running performance, so it is not the best solution to running Windows software on Mac.

How to Run Windows Software on Mac without Bootcamp?
To run Windows programs and software on a Mac book without installing Windows by Bootcamp, you can use the tool, AOMEI Partition Assistant Professional. It provides the “Windows to Go Creator” , allowing you to create a bootable Windows 10, 8, 7 USB to load Windows system on a Mac, and it has the following benefits:
● It doesn’t take any space on your Mac boot disk: AOMEI Partition Assistant stores Windows operating system on an external device, so it doesn’t take any space on your Mac startup drive.
● It takes less time: Other tools, like Bootcamp Assistant, require you to download some files for supporting Windows during the process while AOMEI Partition Assistant doesn’t need it, so it is faster.
● Windows and Apple PC are both supported: It not only allows you to create a Windows 10, 8, 7 external media to load Windows OS on a Mac computer but also can help you boot into familiar Windows OS on other Windows computers, even the brand new one without any OS installed on.
You can download the Demo edition and follow the steps below to see how to run Windows software on a Mac with it.
✍Preparations:
-
Get a Windows PC, and download Windows ISO file on it.
-
You need to prepare a USB flash drive or other external drives. And USB 3.0/3.1, and SSD produced by famous manufacturers can ensure a faster process and better performance.
-
Back up the USB beforehand if there are some important data on it because the USB needs to be formatted.
Step 1. Install and launch AOMEI Partition Assistant Professional on the Windows computer, click “Tools” in the top toolbar, and choose “Windows To Go Creator”.

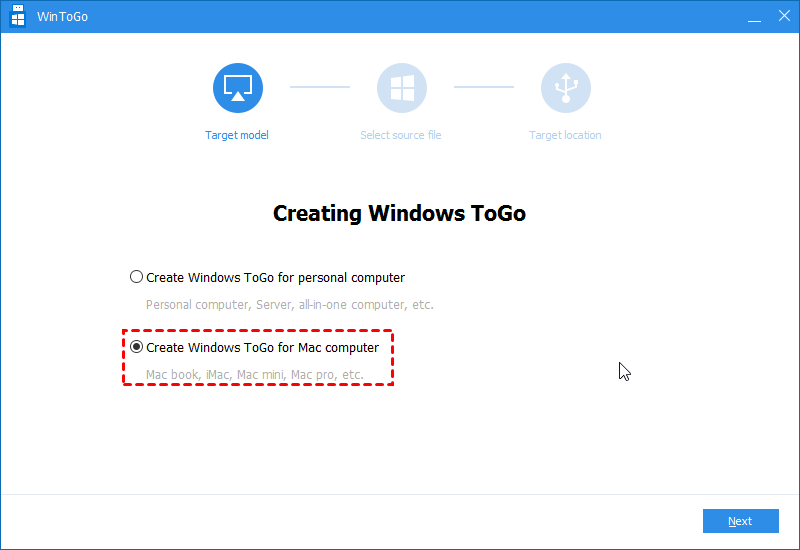
Step 2. In the Windows To Go window, choose “Create Windows To Go for Mac computer” and click “next”.
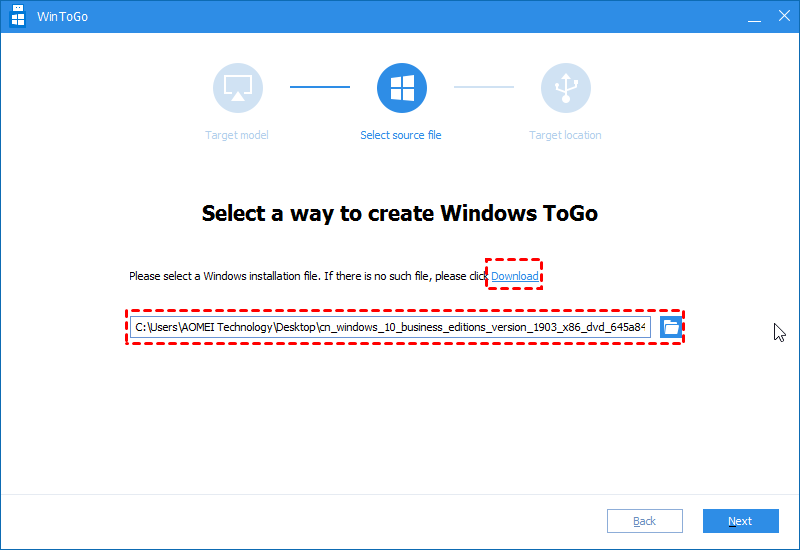
Step 3. Choose a Windows installation file as the source file. And click “Next”.
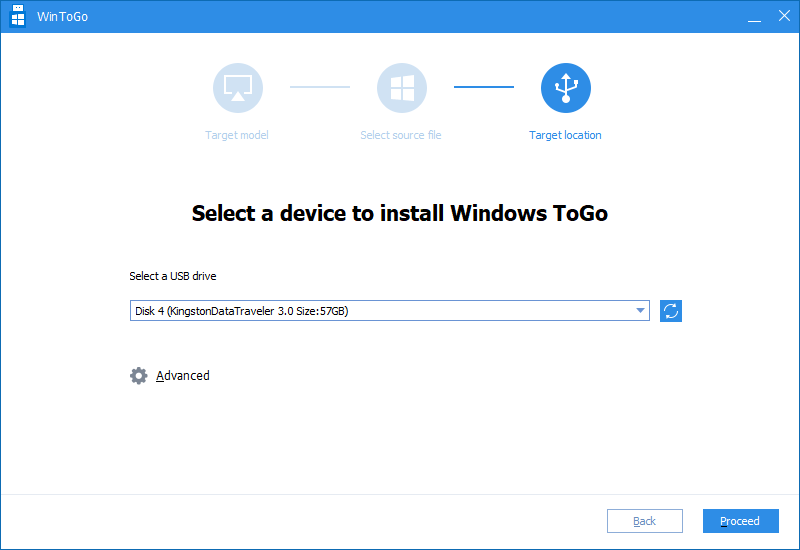
Step 4. Then select the USB as the target device, and you can click “Advanced” to set the startup information, and click “Proceed”.
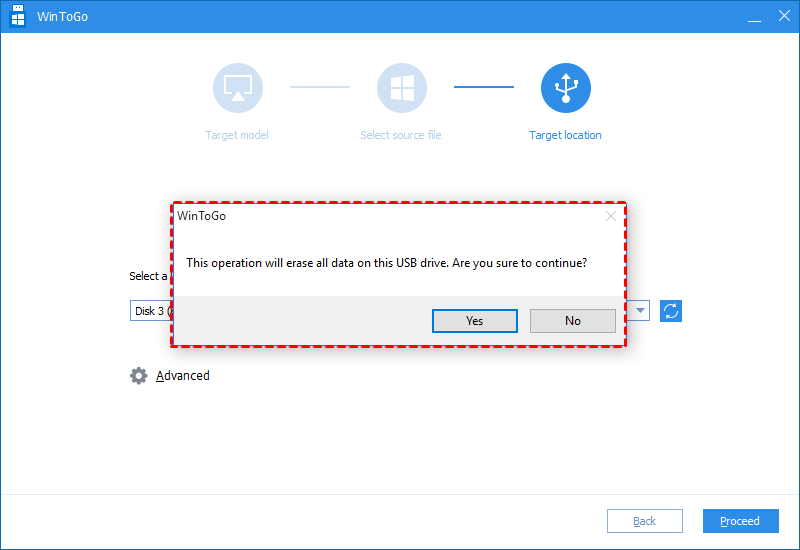
Step 5. Then it will send a message that the USB drive will be formatted, and click “Yes”.
Wait for the program to be completed. Then you can insert the Windows USB to a Mac and follow the next part to load Windows on a Mac book.
Step 6. You need to set the USB as the boot device after you insert it to your Mac computer.
● Connect the USB to your Apple’s PC, and power on it. Then click the Apple icon to launch “System Preferences”.
● When the “System Preferences” opened, just click “Startup Disk”.
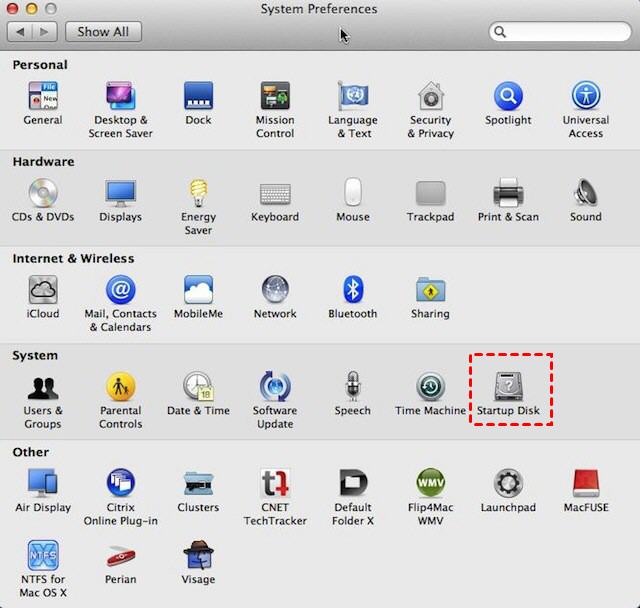
● Choose the bootable USB from the listed of available disk. Next time you start up Mac, it will load the Windows system, and you can run Windows software on the Mac book.
✐Addition: temporally run Windows on Mac
If you just want to run Windows on Mac for just one time, or temporally use the Windows OS, follow the steps:
1. Connect the Windows USB, and turn on your Mac.
2. Press and hold the “Option” key, you will see all the bootable devices will be listed on the screen.
3. Use mouse or arrow keys to choose the Windows USB flash drive, then the Mac will be started from it for this time.
Conclusion
See? With the help of AOMEI Partition Assistant Profesional, you can run Windows software on a Mac book, including MacBook Air, MacBook Pro 13, MacBook Pro 16. And if you don"t need to run Windows programs on your Mac one day, you can also use it to unboot the USB. Besides, this software is also able to clone USB, clone partition, transfer OS to SSD, recover deleted partitions, convert MBR and GPT without deleting partitions and more.