Easily Create a Portable Server Bootable USB Within 3 Steps
“Windows To Go Creator” provided by AOMEI Partition Assistant Server can help you quickly create a portable Windows Server on USB, so that you can use your own familiar Windows Server environment on other computers.
By Dervish / Updated on December 4, 2024
What is a portable Server USB?
A portable Windows Server USB is a very handy tool that allows you to take a Windows Server operating system on a USB or external hard drive anywhere and boot into your familiar Server environment on any other computers, even a brand-new computer.
It provides a secure environment for those people who are working remotely or from a shared PC. And some software or games have special requirements for operating systems, a portable bootable Server USB can also help a lot. Then how can we gain such a Server USB? Continue reading and learn more information about the portable partition manager download.
A reliable tool to create a portable Server USB
To make a portable bootable USB drive with Windows Server OS stored in, you need the help of third-party software. Here, we would like to share a reliable and all-inclusive tool called AOMEI Partition Assistant Server. It is able to help you create a portable Server USB securely and quickly. And it has a lot of advantages including:
-
It supports Windows Server and other Windows systems. AOMEI Partition Assistant allows you to create not only Windows Server systems like Windows Server 2025, 2022, 2019, 2016, 2012 (R2), but also all editions of Windows 10/8/7 portable USB.
-
It allows you to operate with no footprint. You can insert a Server USB to a friend’s computer to run Windows Server without worrying about information leakage. Because when you boot up the computer from the portable Windows Server USB, the host system will be offline, they don’t disturb each other.
-
It can create portable Server USB without ISO file. AOMEI Partition Assistant can help you to create potable Server USB with the current system. So you don’t need to download the Windows Server ISO file.
Tutorial: create portable Server bootable USB by 3 steps
You can download the demo version and follow the next part to see the steps to create a portable Windows Server on USB pen drive.
Preparations:
-
A USB flash drive that larger than 13 GB. It could be other external storage devices like HDD, SSD.
-
A computer that is running Windows Server.
-
Backup your USB stick if there are some important data on it because Windows To Go operation will format USB drive.
-
Download the Server ISO files if you plan to create bootable Server USB drive from ISO.
Step 1. Insert the USB to your computer, and open AOMEI Partition Assistant, click “Tools” in the top toolbar, and choose “Windows To Go Creator”.

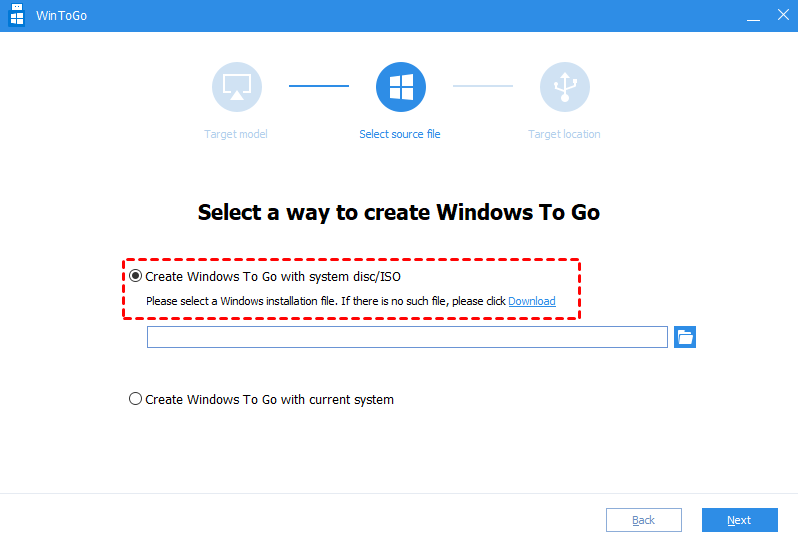
Step 2. In this Window, select a way to create a portable Server USB. Here we select“Create Windows To Go with system disc/ISO”, select the corresponding ISO files and click "Next".
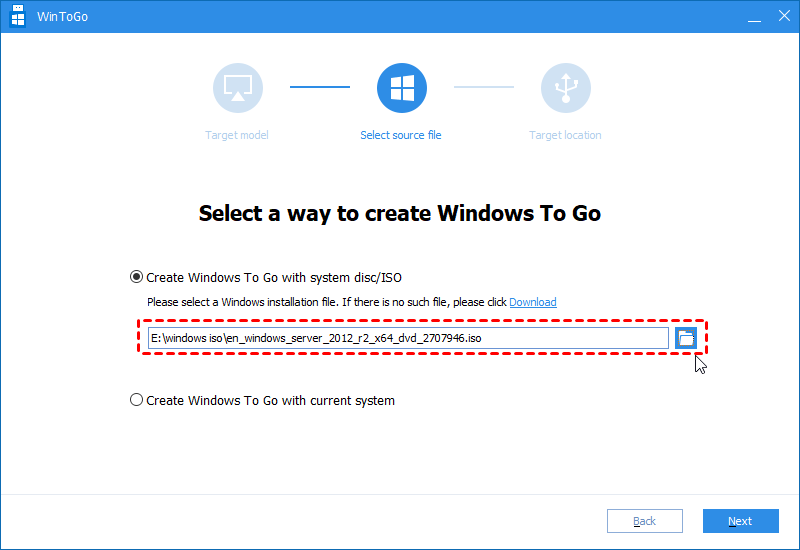
✍Tip: If you don't have related Windows Server ISO files, you can choose "Create Windows To Go with current system" to copy your current Windows Server partition to USB for a portable USB boot drive. This requires that your USB is larger than the Server partition on your disk.
Step 3. In this window, you need to select USB as the target location. Besides you can also choose an HDD or SSD as the target location, then click “Proceed”.
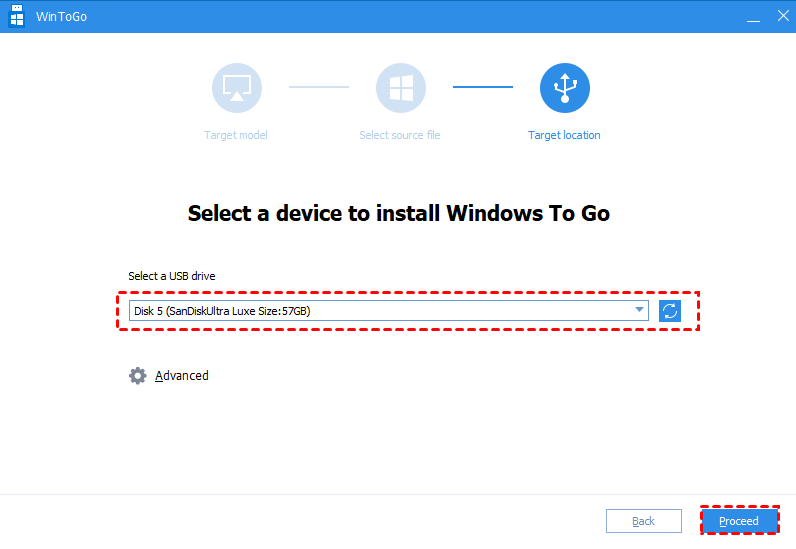
When the operation is over, you would have a portable Windows Server USB device. Unplug the USB, you can boot Windows Server from other computers.
How to boot Server from portable USB drive?
Now, you can insert USB to other computers to use your own Windows Server. But to boot up from USB successfully, you also need to set the USB as boot drive when the computer starts up.
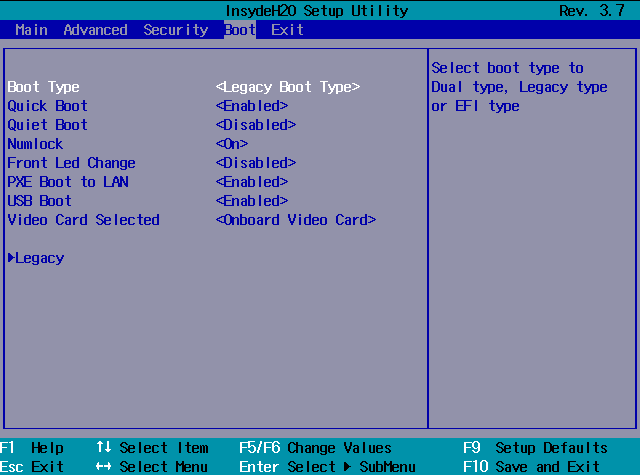
Step 1. Insert the USB into computer, and start the computer. Press Setup key to enter BIOS (commonly the Setup key is F1, F2, ESC).
Step 2. Enable the “USB Boot” to set the USB as boot drive under the Boot Menu.
Step 3. Then press “F10” to leave BIOS. Then your computer will be booted up from the USB drive.
Conclusion
This is how to create a portable Windows Server USB. With AOMEI Partition Assistant, you can create a portable Windows Server USB. Besides, if you encounter boot issues, you can utilize AOMEI Partition Assistant to create bootable media and find a way to fix the boot problem such as fixing MBR in Windows PE environment.
If you want to use AOMEI Partition Assistant on unlimited computers within one company, you can use Unlimited Edition, then you can save a lot of money.