How to Move Lenovo Recovery Partition in Windows 10, 8, 7?
Need to move Lenovo recovery partition to another disk? This post will show you how to perform it easily.
By Dervish / Updated on May 12, 2023
Content Navigation
What is Lenovo recovery partition and why it to another drive?
Lenovo recovery partition contains important files that allow your Lenovo to boot into Windows recovery environment to restore it once the computer has some irreparable issues. So the recovery partition is very important. In some situations, you may need to move the recovery partition to another hard drive.
● Keep the recovery partition files: Sometimes, a computer can encounter some boot issues because of corruption of hard disk, even including the recovery partition. And you can move recovery partition to a USB drive or new hard drive to make a preparation for this.
● Free up some space: Although the recovery partition takes up little space, you probably want to free up space as much as you can. And you start to consider if you need to delete the recovery partition. Actually, you can move the recovery partition to another drive or USB flash drive as a backup before deleting it for releasing more space.
Follow this article and learn how to move Lenovo recovery partition in Windows 10/8/7 safely.
Steps to move Lenovo recovery partition to another drive
Here I recommend a disk management tool to help you move it-AOMEI Partition Assistant Standard. In a few clicks, you can move the recovery partition to another disk with “Clone Partition” feature. Besides, if you need it, you can also move partition on its disk.
Now, let’s see how it works.
Step 1. Download the AOMEI Partition Assistant, install and open it. Right-click the recovery partition and click “Clone Partition” on the drop-down menu.

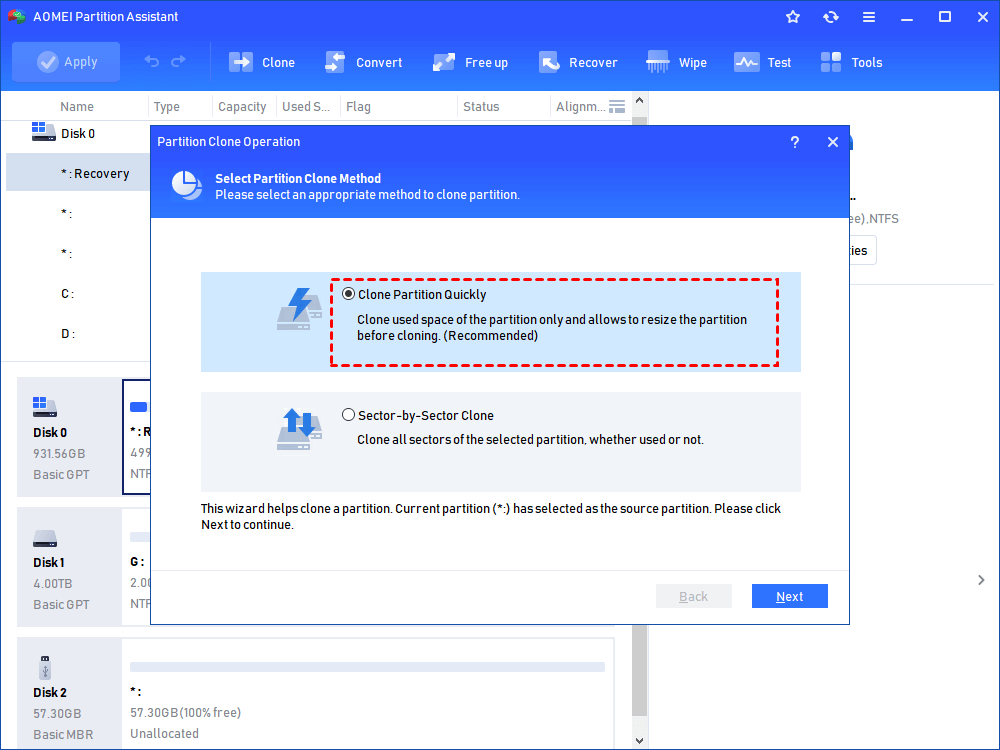
Step 2. Now choose a partition copy method. In this example, we choose “Copy Partition Quickly” that just clones used space of the recovery partition.
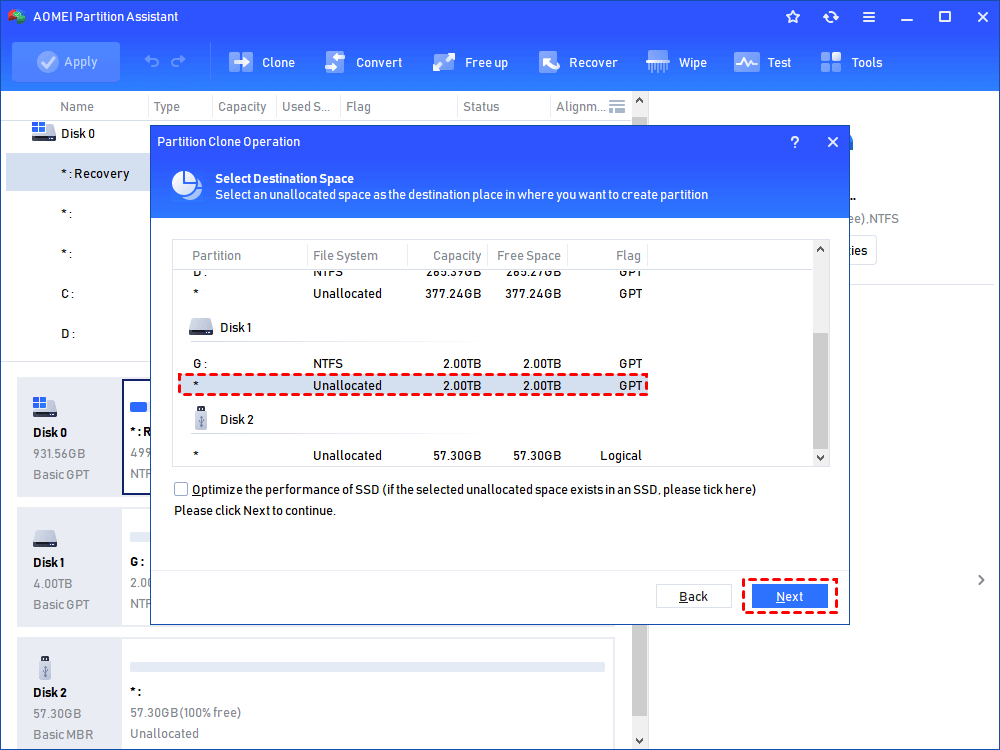
Step 3. And choose an unallocated space of the destination disk. Then click “Next”. If there is no unallocated space, you can also resize partition to gain unallocated space.
Step 4. And you can resize the partition on the destination disk. Then click “Finish”.

Step 5. Then you will see the main interface, and click “Apply” > “Proceed” to start moving Lenovo recovery partition.

Just wait a while, the recovery partition will be cloned to another hard disk. Then you can remove the original recovery partition from your disk by deleting recovery partition.
◆ If you need to move recovery partition in one disk
In some situations, you may need to move recovery partition within the hard disk. For example, when your C drive is full, you can extend the C partition with unallocated space with Disk Management.
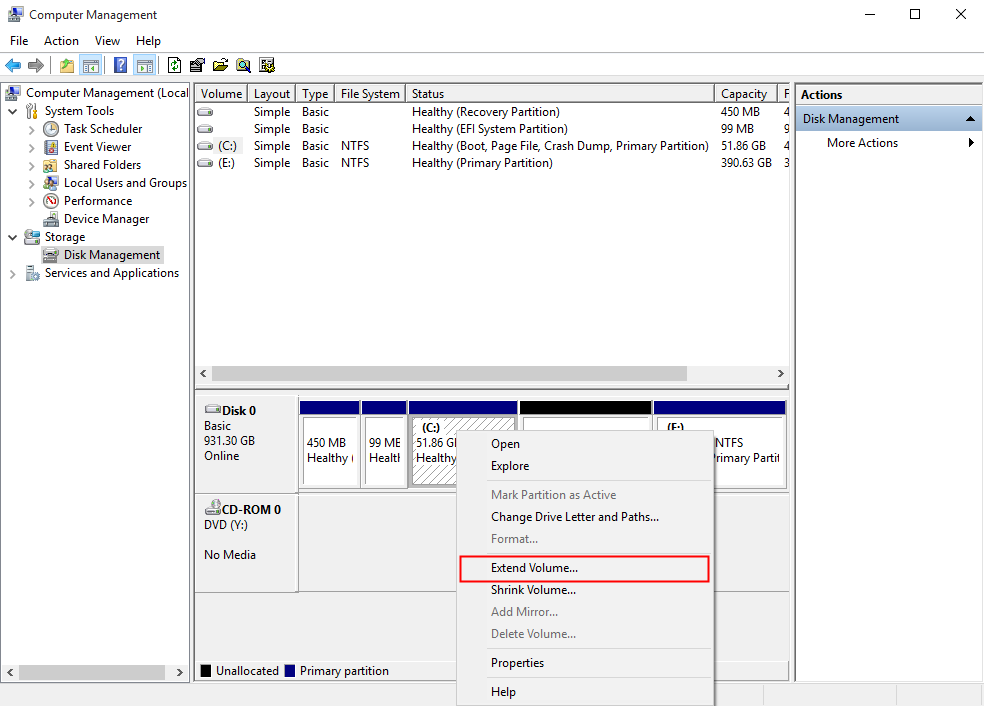
But if there is recovery partition between C partition and the unallocated space, you will find the "extend volume" will be greyed out. Thus you can use AOMEI Partition Assistant to move recovery partition to make the unallocated space right behind the C drive. Then you will be able to extend C partition successfully in Disk Management.
Or you can use “Merge Partition” feature of AOMEI Partition Assistant, which can directly merge C drive and unallocated space regardless of the unallocated space location.
Additional tutorial: How to boot into recovery partition?
Here we provide an additional tutorial of booting into the recovery partition, so you can use it to fix some PC problems. Firstly, insert the SSD, HDD, USB, or other storage devices that contains recovery partition into computer.
✍Attention: restoring your computer would set it to factory default settings, which would make all the apps, pictures, videos, and personal files gone, you can back up your files beforehand.
◆ Windows 7 operating system
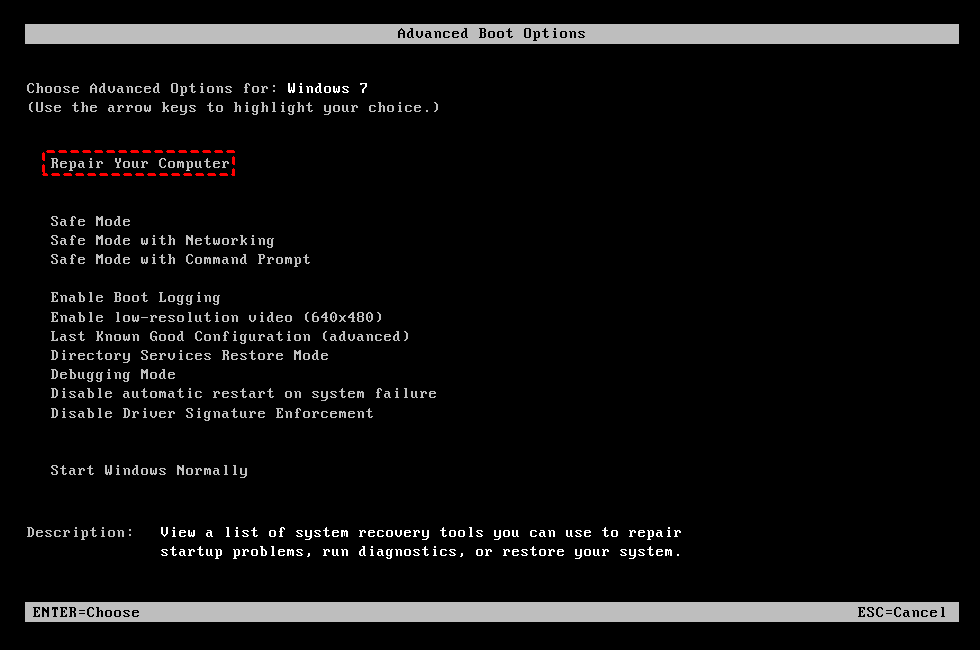
Step 1. Restart your computer, when you see the Lenovo logo, click “F11” to enter Advanced Boot Option.
Step 2. In the menu, choose “Repair Your Computer” with arrow keys.
Step 3. Then “System Recovery Options” will be shown on the screen, and click “Next”.
Step 4. Follow instructions and click “Lenovo Product Recovery”.
◆ In Windows 10/8/8.1 operating system
Step 1. Click “Start” on the desktop, and go to “Settings” > “ChangePCSetting” > “Updateandrecovery” > “Recovery”> “Get started”.
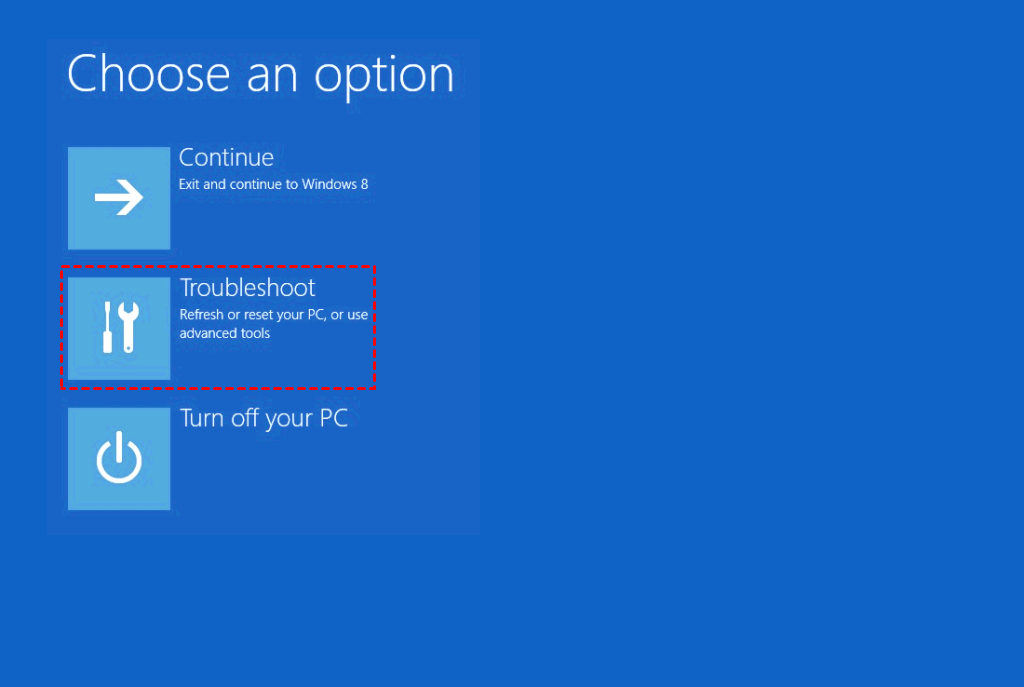
Step 2. And the computer would enter the Recovery Options after restarting. Click “Troubleshoot” > “Reset this PC” and you will see two options- “Keep my files” and “Remove everything”.
✍ Note: If your Lenovo recovery partition is kept in USB flash drive, you need to enter BIOS to set the USB flash drive as boot drive. And click “Troubleshoot” > “Recover from a drive”.
Step 3. There are two options, choose “Just remove my files” to remove settings and apps but keep personal files, or choose “Fully clean the drive” to clean all of drive.
Then just wait for the process to be complete.
Conclusion
Within simple steps, you can move Lenovo recovery partition to another drive easily or on one disk with AOMEI Partition Assistant. It can help you manage your disks with simple operations and features.
What’s more, there is Professional Edition for you to perform some advanced and complex operations like extending system partition, spitting partition, allocating free space.