4 Solutions to Low Disk Space on Recovery D Partition
If you are an HP owner, there are chances that you’ll encounter the problem of low disk space on recovery D partition after using the computer for a period of time. So, this time, I’ll give several pragmatic and easy solutions to recovery d partition running out of disk space issue.
By Michael / Updated on August 29, 2023
Question
When I work on my HP ENVY Dv7-7227, a popup message “D Recovery Drive is running short of space” every 5 minutes or so. How to fix it because it’s really bothering.
- Question from Chris
What’s Recovery Partition?
Generally, a recovery partition is a partition on a hard disk that stores data including system backup image files and system restoration files. With all these files, the recovery partition can be used to restore your system back to its factory settings when users face system crashes or other glitches. There’re 2 kinds of recovery partition. The first 1 is the Windows recovery partition and the other is the computer supplier’s recovery partition. They have different sizes but a similar function.
The Issue of Low Disk Space on Recovery D Partition
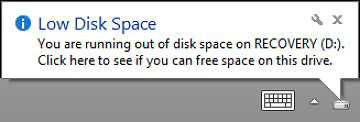
If you’re an HP owner, sometimes, you may be prompted with this warning “you’re running out of space on Recovery D”. Then, you navigate to Windows File Explorer and find the D drive’s bar is actually red. Why does this recovery partition low disk space warning periodically pop up?
In fact, the recovery D partition is much smaller than average partitions and if you store files to it or a backup or restore program uses this recovery D partition to store files, the partition could become full quickly. So, never store files on this kind of partition and the only files on it should be related to system recovery.
4 Solutions to Low Disk Space on Recovery Drive D
How to solve “running out of disk space on recovery D Windows 10?” When it comes to this issue, the first thing coming to your mind must be Windows’ inbuilt Disk Management with which you’re able to extend partitions.
-
Solution 2. Turn off System Protection to D Partition More Space
-
Solution 3. Unhide Protected Operating System Files for Deletion
-
Solution 4. Run Disk Cleanup to Free up Space on Recovery D Drive
Solution 1. Extend Recovery D Partition
Option A. Use Disk Management
This method is useful only if there is unallocated space adjacent to the D partition and the partition is of NTFS file system. If all the requirements are satisfied, you can proceed to the following steps.
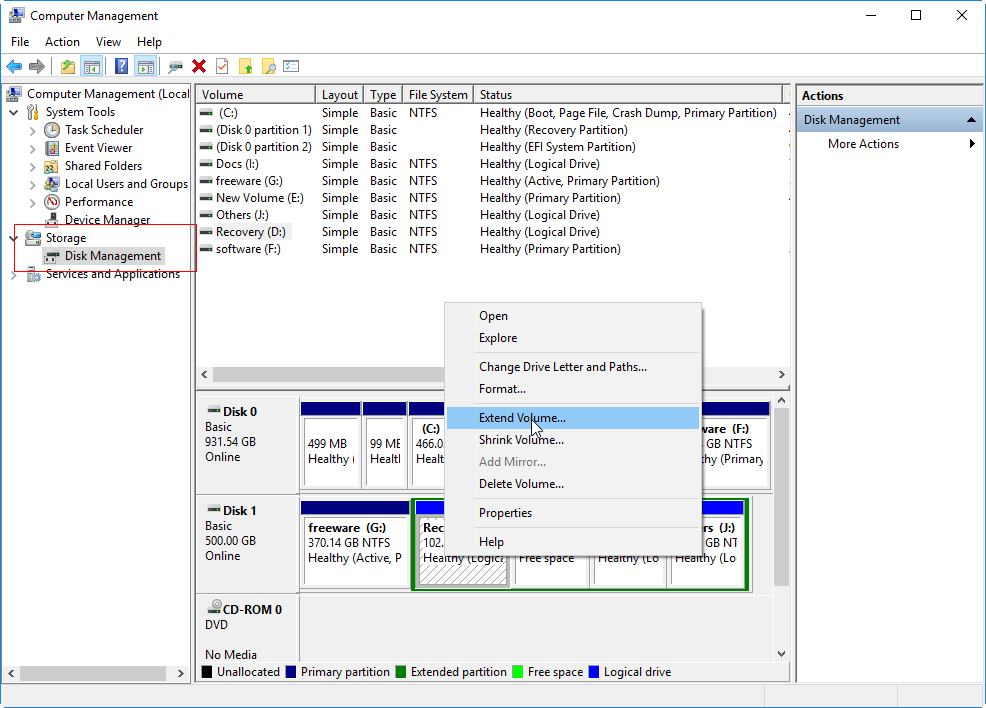
1. Right-click on This PC on desktop and select “Manage”.
2. Locate “Disk Management” on the left in the popup window and click on it.
3. Right-click on the D partition and select “Extend Volume”.
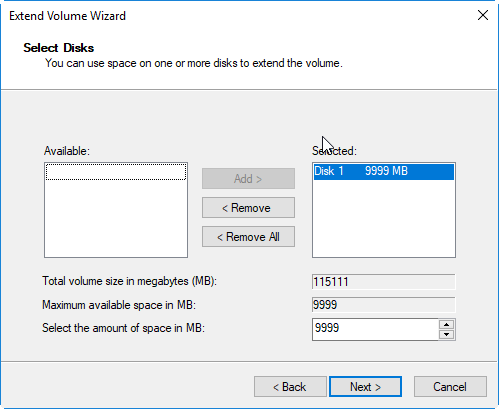
4. Hit “Next” and customize the amount of space in MB.
5. After that, hit “Next” > “Finish”.
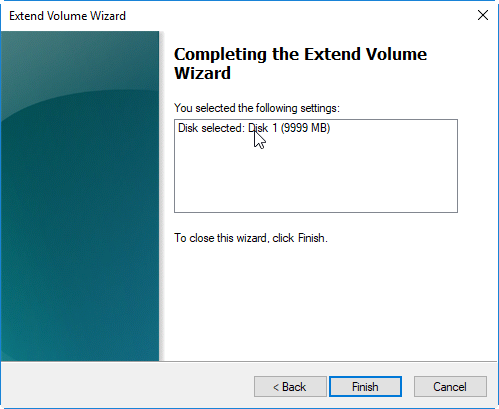
Now, return to “Disk Management” and check whether the D partition is bigger.
Note: If the requirements are not met, you have to convert the drive to NTFS or back up first and then, delete the partition next to the D drive to get extra unallocated space,
Option B. Use Powerful Third-Party Software
When using Disk Management, the partition can be extended only when there is a piece of unallocated space adjacent to it and the partition itself is NTFS. In this case, many users are seeking a better alternative without these limits.
This time, AOMEI Partition Assistant Professional might be your best choice. You’re enabled to extend recovery partition D with its inbuilt Extend Partition Wizard. Then, even if the partition and the unallocated space aren't adjacent or the partition is FAT32, the extending process can be performed as normal. Meanwhile, you can still enlarge the partition by using the features of “Merge Partitions” and “Allocate Free space”.
It’s time to download the best Disk Management software demo to have sufficient recovery D partition space.
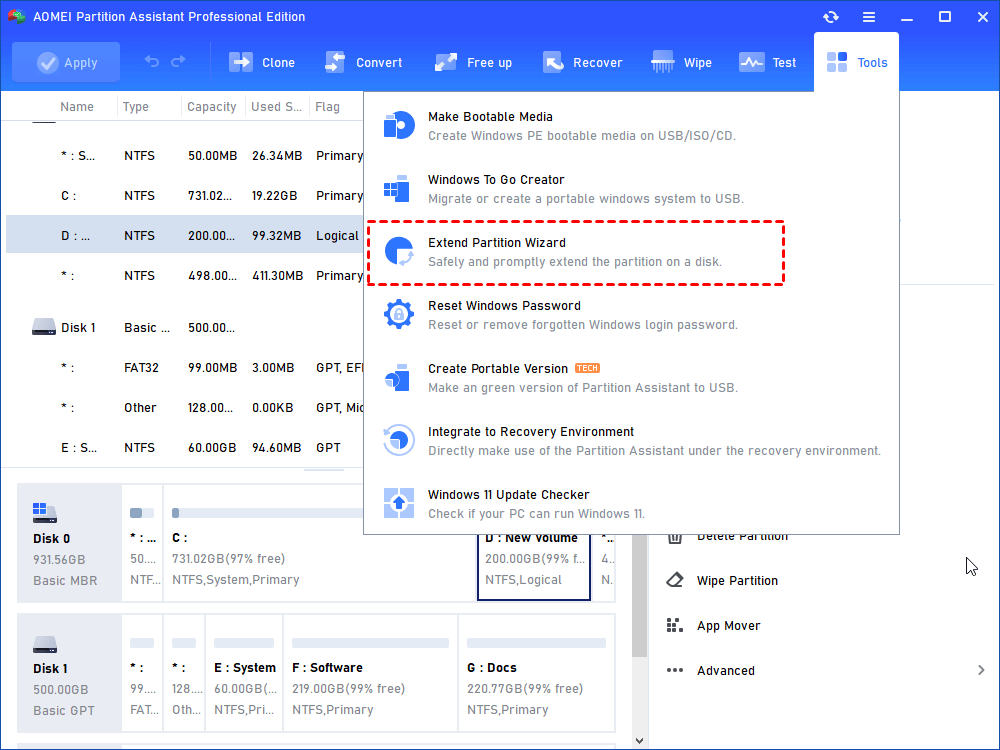
Step 1. Install and launch the program of AOMEI Partition Assistant Professional and then, all your disks and partitions will be listed. Locate the recovery D partition first.
Step 2. Click "Tools" in the upper toolbar and choose "Extend Partition Wizard".
Step 3. In the popup window, select “Select any partition from any hard disk to extend”.
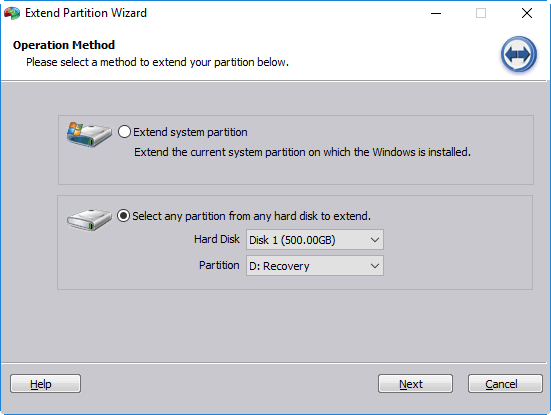
Step 4. Choose the hard disk where the recovery D partition is and select partition D. Hit “Next” > “Next”.
Step 5. In this step, you’ll need to select the partitions to shrink to release extra space for the D partition. After that, hit “Next”.

Step 6. Drag the blue bar towards the right side to extend the partition and hit “Next” > “Proceed”.
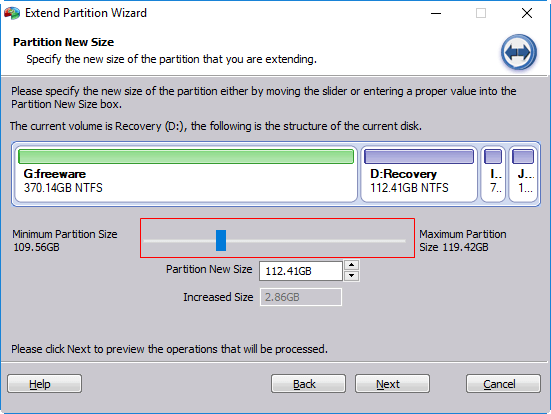
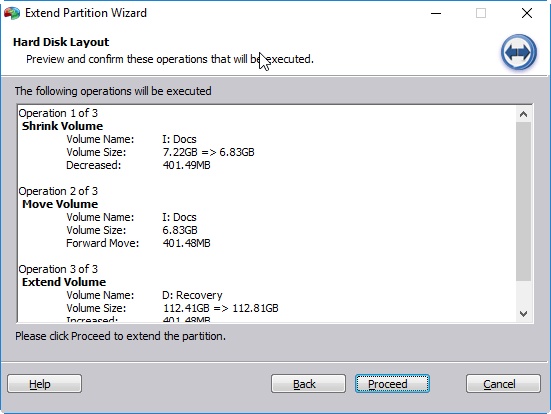
Now, the extending process has started, and just wait several seconds before finished.
Solution 2. Turn off System Protection to Give D Partition More Space
System Protection enables users to undo the changes they’ve made on their computer. Every time a change is made, a restore point will be set up and when they encounter a system crash or any other issues, they can restore their system to the previous state with the restore point.
System Protection seems to be a useful and necessary feature for computers’ safety. However, over time, the data of restore points can occupy plenty of space on the recovery D partition, and finally, the partition gets clogged up. By turning off system protection, no restore points will be created anymore and all existing restore points on the drive will be deleted which saves quite a lot of space.
1. Type “system protection” in the search box and hit “ENTER”.
2. Under “Protection Settings”, check whether the protection of the D partition is on or off.
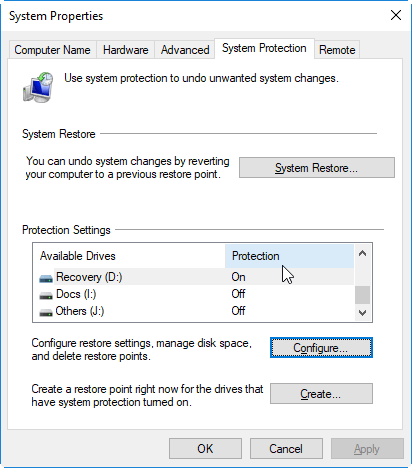
3. If it’s on, then, hit “Configure” and tick off “Disable system protection”.
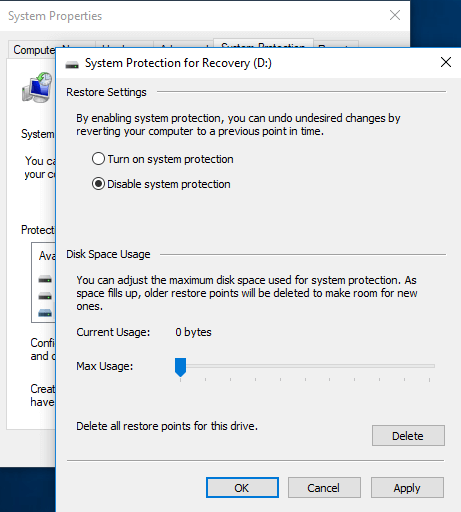
4. Hit “OK” to get it done.
Solution 3. Unhide Protected Operating System Files for Deletion
When you’re faced with “low disk space on Recovery D Partition”, you might as well try unhiding protected OS files on this partition to see whether these files occupy space and decide whether or not to delete them.
1. Double-click on “This PC” and enter Windows File Explorer.
2. Click on “View” > “Option” > “Change folder and search options”.
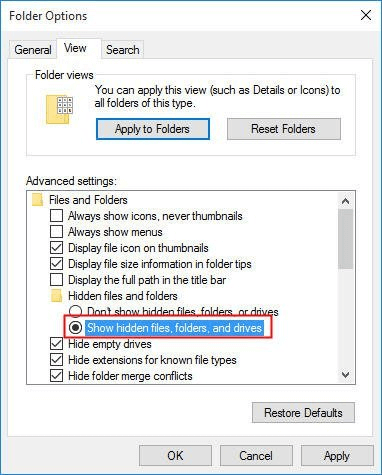
3. Click on the “view” tab.
4. Under “Advanced settings”, tick off “Show hidden files, folders, and drives”.
5. Uncheck “Hide protected operating system files (Recommended)”.
6. Go to the D partition and delete unnecessary files.
Solution 4. Run Disk Cleanup to Free up Space on Recovery D Drive
Disk Cleanup is a free program by Microsoft Windows which is designed to free up disk storage space on a PC’s hard drive. This program is able to analyze the hard drive for files that are not useful anymore and then, remove them.
1. In the search box on the taskbar, input “disk cleanup” and hit “ENTER”.
2. Select the partition you want to clean and hit “OK.
3. Tick the files you want to delete and hit “OK”.
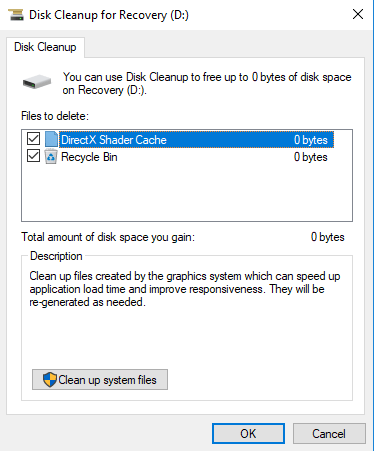
4. Wait several seconds before the process is accomplished.
Bonus: How to Disable Low Disk Space Warning on Windows 10/8/7?
If you don’t want to remove any files from the recovery D partition nor extend its partitions, you might as well consider disabling the low disk space warning.
1. Hit “Win+R” and input “regedit” to bring the registry editor.
2. Click on “OK” to enter it.
3. Then, follow this path HKEY CURRENT User\Software\Microsoft\Windows\CurrentVersion\Policies\Explorer.
4. Check whether there is “NoDiskSpaceChecks”. If it’s not there, right-click your mouse and then, click “New” > “DWORD” and name it as “NoDiskSpaceChecks”.
5. Finally, right-click on this item and change the value from 0 to 1. Now, the warning is forbidden.
Conclusion
In the post above, I think you’ve learnt what to do when faced with low disk space on the recovery D partition. Every solution has its own disadvantages and hopefully, you can choose the best one in your mind based on your own needs. As for me, I prefer the tool in solution 1 Option 2 – AOMEI Partition Assistant Professional – for its user-friendly state and easy-to-use tools. I love this software because it brings me so much convenience – I can finish every task within only several steps! More than extending the partition mentioned above, this software also supports other features including recovery partition deletion and partition split. For commercial purposes, you should switch to AOMEI Partition Assistant Server.