[Full Guide] Burn ISO to USB Bootable For Windows PCs
How to burn ISO to USB bootable? This post will give a comprehensive guide. You will easily get a portable bootable USB after reading.
By Irene / Updated on January 13, 2025
Need to burn ISO to USB and make it bootable
An ISO file is a common format used to store data from CDs, DVDs, or Blu-ray discs, often containing operating systems. Many users choose to burn an ISO file to a USB drive for various practical reasons:
- Portability: Create a bootable USB drive that can be easily carried and used to boot any computer.
- Convenience: Installing an operating system from a USB drive is faster and easier than using a traditional installation disk.
- System Recovery: A bootable USB can help fix severe system boot issues.
With the release of Windows 11, many users are eager to explore its new features, however, these updates come with higher hardware requirements, which may make it challenging for older devices to upgrade. One the other hand, for users upgrading from Windows 10, common concerns also include: Is Windows 11 better than Windows 10? and What if I don’t like Windows 11 after upgrading?
Although these problems can be fixed in various ways, for example, rollback to Windows 10 from 11, the more effective and simple method is to create a bootable USB drive with the Windows 11 ISO file. This allows you to try out the new system without permanent changes. If you're unsure how to burn the ISO file to a USB drive, keep reading—this guide will share the process step by step.
How to make a bootable USB with ISO image?
Although Rufus is a popular tool among computer users, some may face issues like the "Rufus Windows To Go missing" problem. As a result, many look for a reliable alternative. AOMEI Partition Assistant is an excellent and easy-to-use freeware that includes a Windows To Go feature, offering greater convenience and efficiency compared to Rufus.
One of its key advantages is wide compatibility, allowing users to create a Windows To Go drive on Windows 7, 8, 8.1, 10, or 11 with simple steps. Additionally, it has flexible USB drive requirements, giving users more options when choosing storage devices.
Beyond creating a bootable USB for Windows ISO, AOMEI Partition Assistant provides a variety of disk management features. Users can migrate the operating system to an SSD for better performance, move installed apps to another drive to free up space, recover lost data, and much more—all in one software package.
The Best Windows Disk Partition Manager and PC Optimizer
Part 1. Download Windows ISO files
To burn ISO to USB and make it bootable, you need to first get the file. Let's take Windows 11 ISO files as an example.
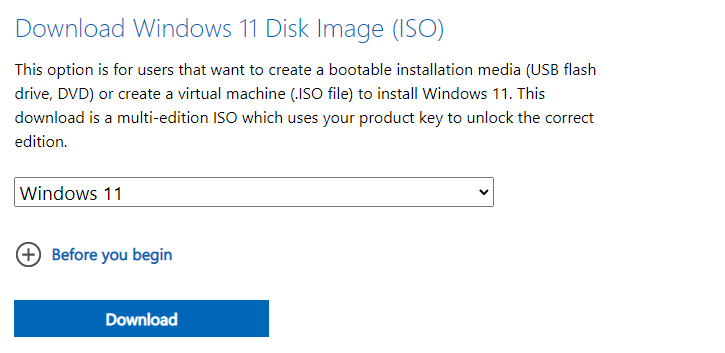
Step 1. Download the Windows 11 ISO files from the Microsoft official website when you enter the website. Choose “Download Windows 11 Disk Image (ISO)” > “Windows 11 (multi-edition ISO)” in the drop-down menu.
Step 2. Hit the “Download” button and configure the settings according to your needs for the Windows 11 installation. Then select “Confirm” to begin to download.
Part 2. Burn Windows ISO to USB
Download, install and open the handy tool, AOMEI Partition Assistant, for creating a bootable USB with ISO files.
Step 1. Connect the USB to the computer. Wait for it to be detected. If it failed, you can read the solutions for reference.
Step 2. Launch the software. Click “All tools” > “Windows To Go Creator” in turn.

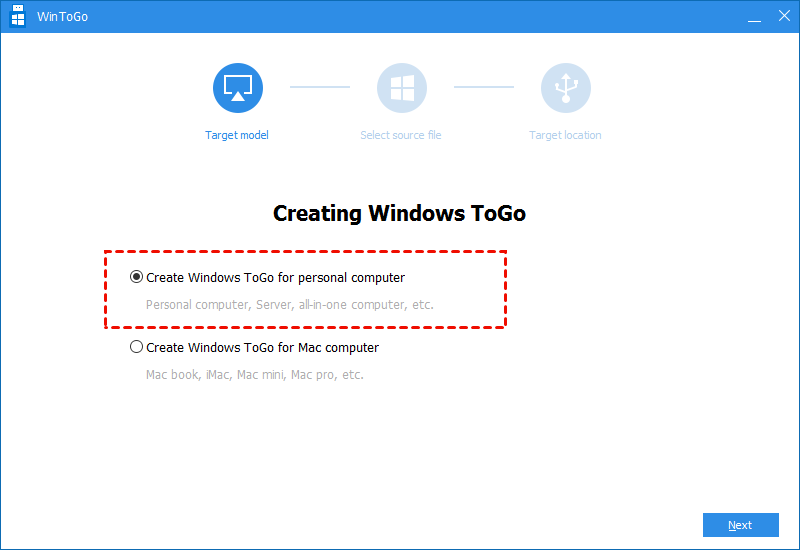
Step 3. Click “Create Windows To Go for personal computer” > "Next”. You can click the second option “Create Windows To Go for Mac computer” if you are a Mac user.
Step 4. Press “Create Windows To Go with system disc/ISO”. The Windows ISO file will be detected automatically. If not, please select the folder icon to manually click the target file with pressing “Next”.

- Note:
- If you need to create Windows To GO with the current system, please move on to the Tip part.
Step 5. Select the USB drive as the target and click “Proceed”.
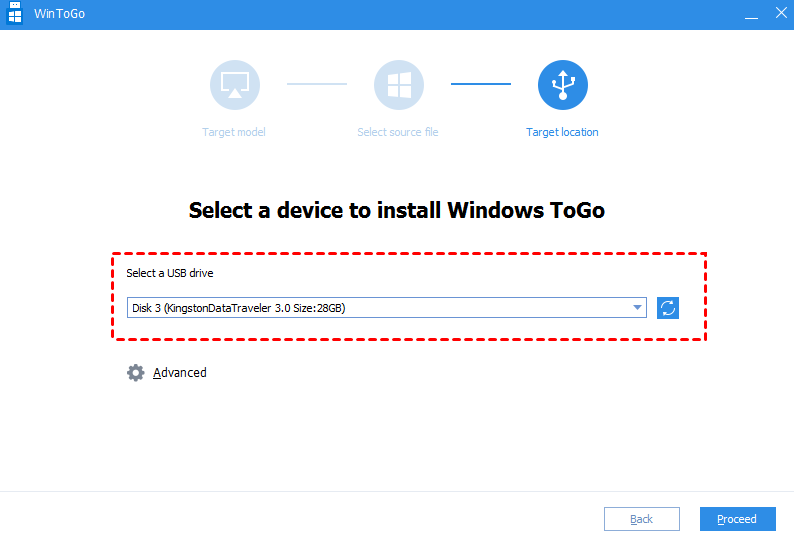
Step 6. There will be a notification that all data on the USB will be erased. Select “Yes” and unplug the US. Try to boot it on another computer.
▌Tips: Create Windows To Go with the current system
The feature of “Create Windows To Go for with current system” broads the channel to users whose devices cannot meet the Windows 11 upgrading system requirements. It makes it possible for them to experience the new operating OS even on an unqualified computer.
In addition, with this function, they can have a try with Windows 11 on the USB instead of doing a fresh installation on their devices. If they don’t like it, users can still keep using the original system.
The Best Windows Disk Partition Manager and PC Optimizer
Step 1 and Step 2 are the same as the above method. Open the software > “All tools” > “Windows To Go Creator” > “Create Windows To Go for personal computer” > “Next”.
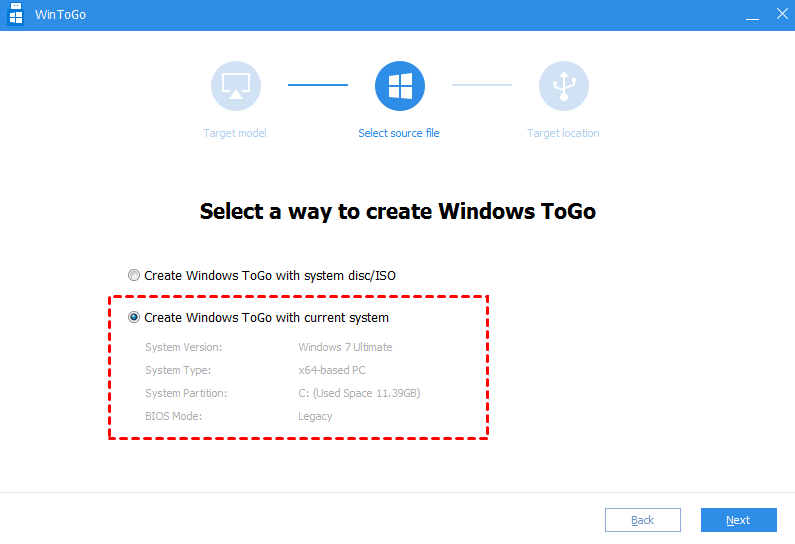
Step 3. Click the "Create Windows To Go with current system” option. You can see the current OS details. Then hit “Next”.
Step 4. Follow the instructions in the Advanced interface. Press the "Proceed” button to continue. When all the processes are finished, please plug the USB into the target computer to install Windows operating system.
Part 3. Boot from the bootable USB
Step 1. Insert the Windows To Go USB drive into your computer. Boot the device and hit a specific key to enter BIOS to change the boot order. If you don't know how to enter BIOS, here is a guide will help you.
Step 2. Choose USB Device and press the "Enter” key to boot from the Windows 11 bootable USB.

Final words
These are all about bruing ISO to USB bootable. In conclusion, creating a bootable USB with an ISO file is a simple and helpful way to install or test an operating system like Windows 11. AOMEI Partition Assistant makes the process easy, works with different Windows versions, and offers other useful features like moving your system to an SSD or recovering lost data. By following the steps, you can quickly burn an ISO file to a USB drive and enjoy the new system or fix issues with your computer.
The Best Windows Disk Partition Manager and PC Optimizer

