How to Partition a Dell Hard Drive without Formatting?
This post illustrates how to partition a Dell hard drive without formatting and losing data.
By Michael / Updated on August 23, 2023
Why partition Dell PC hard drive?
To partition a hard drive means to divide to entire hard drive into different parts (called partition). If the Dell laptop or desktop has only one partition, after you partition it, you can sort out your special information, such as important files for work, cherish photos of family, etc. In addition, once you saved the unique data in a unique partition, would it be easier to back up them only.
Two ways to partition hard drive in Dell computer
You can see two methods showing how to partition hard drive on Dell laptop or desktop, choose one based on your demands.
✔ Partition hard drive in Dell computer using Disk Management
Disk Management is a versatile tool built-in Windows and you can use it to manage partition easily. Now, have a look at how to use it to partition hard drive.
Step 1. Press “Windows” + “R”, input “diskmgmt.msc” and click “OK”.
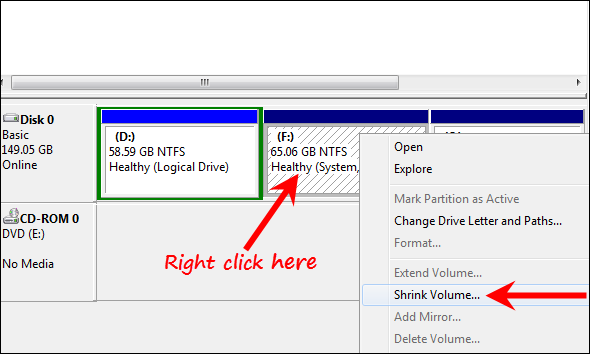
Step 2. Right-click the partition that you want to shrink it and choose “Shrink Volume”.
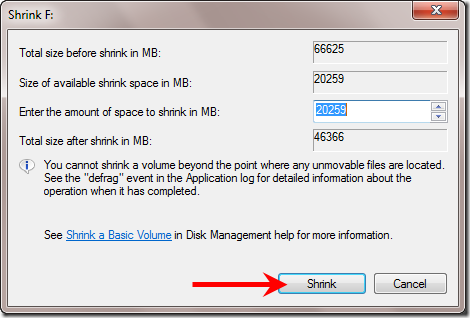
Step 3. Type the space in MB to shrink and click “Shrink” button.
Step 4. Then, you’ll get an unallocated space behind the shrunk partition. Right-click the unallocated space and choose “New Simple Volume”.
Step 5. Follow the wizard to set drive letter, partition size, volume label, and file system for the new partition.
Note: If your partitions are already mixed up and you want to partition your hard drive whole again, please make a backup of your important data and we recommend you AOMEI Backupper.
✔ Partition hard drive in Dell PC with a third-party partition manager
Or you can use a powerful& convenient partition software, AOMEI Partition Assistant Professional. It can help you create a new partition on existing partition directly and easily and without shrinking partition. It can work well under Windows 10/8.1/8/7, XP, and Vista. If you are using Windows Server 2019/2016/2012 (R2)/2008 (R2)/2003, you can use AOMEI Partition Assistant Server.
✍ You can download its demo version to have a try!
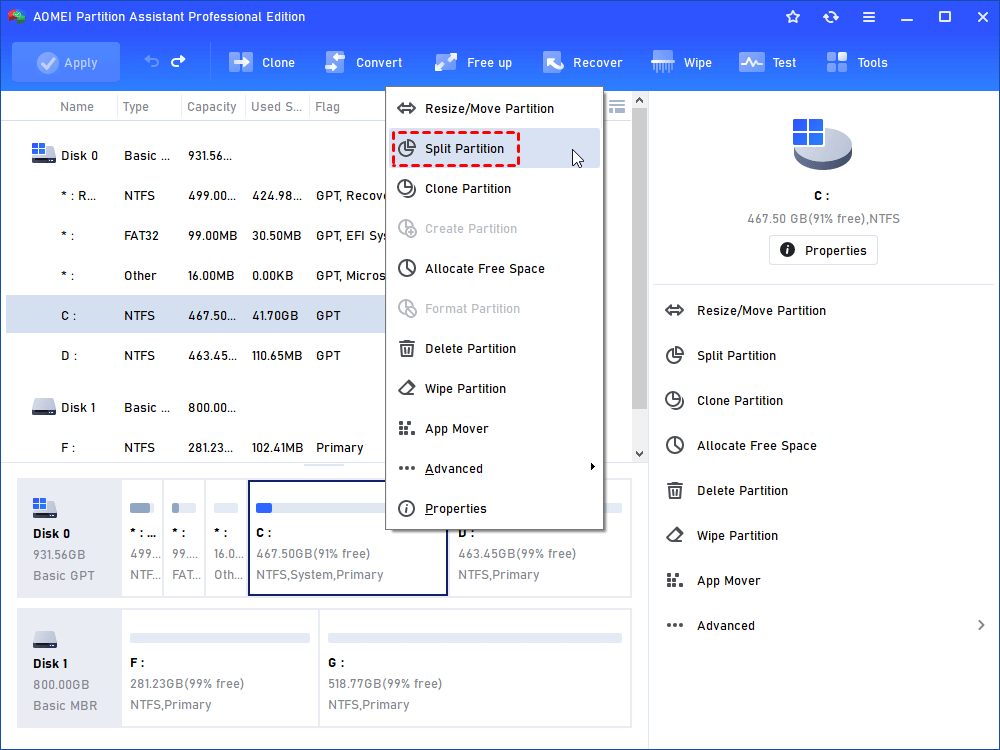
Step 1. Install and launch the software. Right-click the partition and choose “Split Partition”.
Step 2. Set partition size here, and “Partition Label” and “File System” are hid under the “Advanced”.
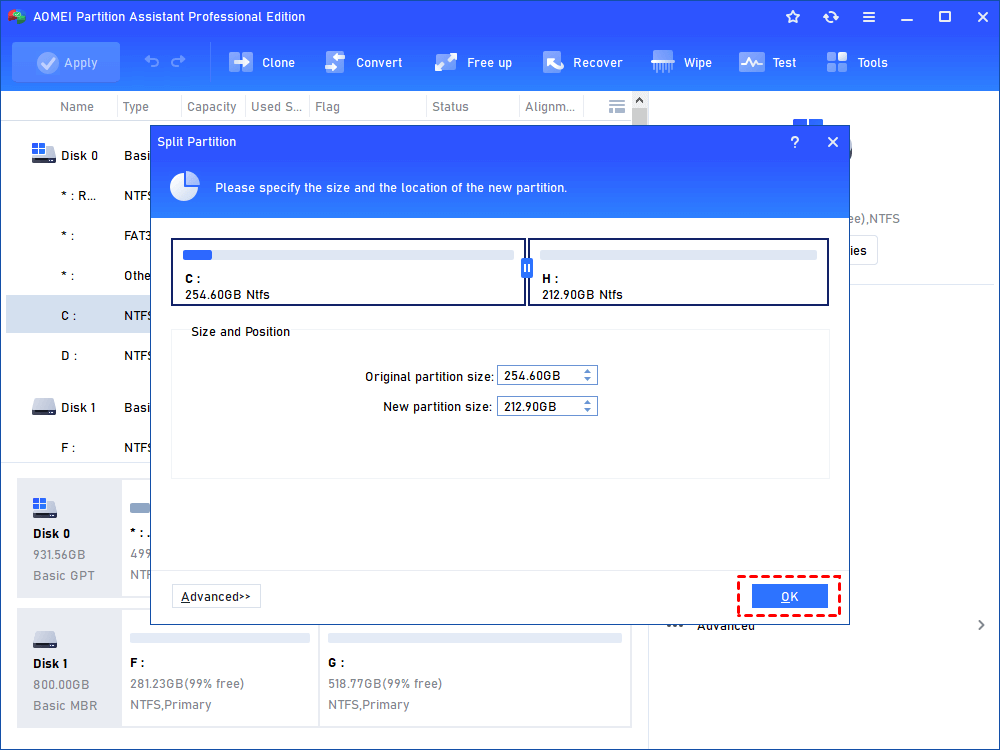
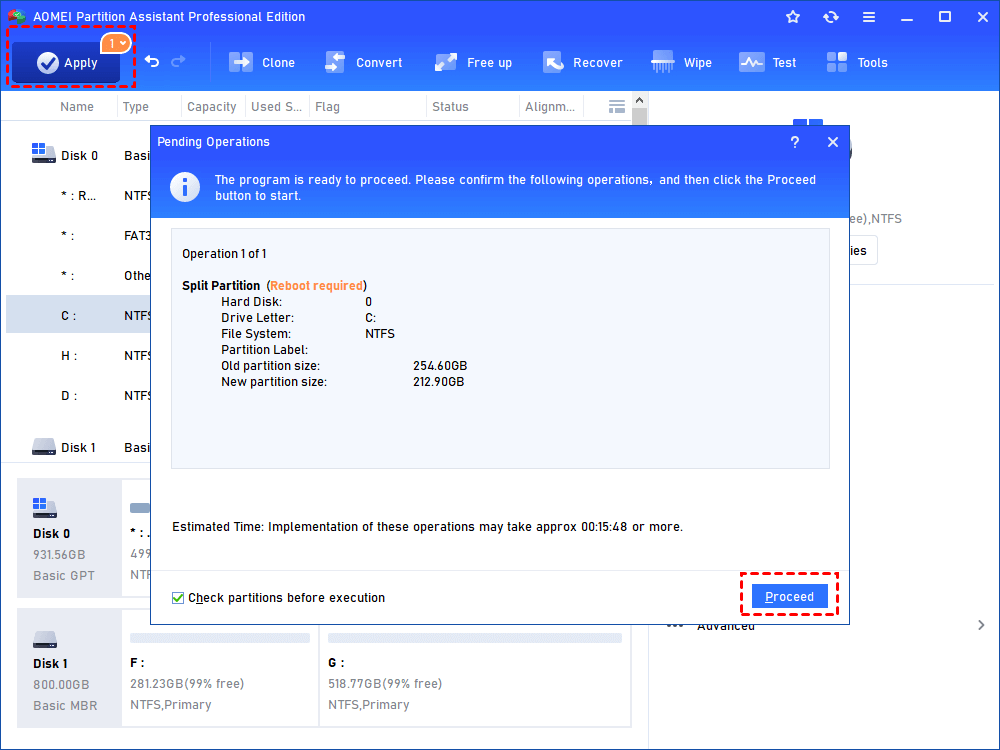
Step 3. You can view the result here, and don’t forget to click “Apply” to implement the operation.
Wrap things up
As you see, when you use AOEMI Partition Assistant Standard, you can achieve the partition job within just three steps which are so convenient and easy to operate. In addition, you can use it to copy disk, convert NTFS to FAT32, make bootable media, and so on.