How to Make Bootable Flash Drive for Windows 11
How to make bootable flash drive Windows 11 if you need a system bootable drive to install OS or repair system errors? Don’t worry, check this post, you can quickly finish this work.
By Lucas / Updated on February 11, 2025
A bootable USB drive is an external storage device that contains an operating system, allowing a computer or laptop to boot from it. Many users create a bootable USB drive in Windows for three main purposes. In this post, we’ll show how to make different bootable flash drive in Windows 11.
Preparation: Choose a suitable USB and format it
To make bootable flash drive Windows 11, you need a USB drive with at least 13 GB of storage. A USB 3.0 drive is recommended due to its faster read and write speeds, ensuring a smoother installation process. Since all data on the USB will be erased, it’s essential to back up any important files beforehand.
When formatting the USB, make sure it is set to FAT32 and uses the GPT partition style, as these settings are required for UEFI booting. However, Windows' built-in tools like Disk Management and Command Prompt cannot format USB drives larger than 32 GB to FAT32. In such cases, using a third-party tool like AOMEI Partition Assistant is a reliable solution. This utility allows formatting of USB drives up to 64 GB, 128 GB, or even 256 GB to FAT32 without compatibility issues.
The Best Windows Disk Partition Manager and PC Optimizer
Right-click on the target hard disk and select the "Format Partition" option, select FAT32 and click "Apply" to submit the pending operation. Formatting can be easily done in just three steps.

Guide 1. How to make a Windows 11 bootable flash drive for installation via CMD
Tips:
● The USB drive should be at least 4GB of storage (for a 32-bit operating system) or at least 8GB (for a 64-bit system).
● Back up files you have stored on the USB drive because the drive will be formatted during this process and all files on it will be erased.
Step 1. Open Command Prompt windows: click “Start” button, input “cmd” in the Search box and press “Enter”. Right-click the “Command Prompt” icon and select “Run as administrator”.
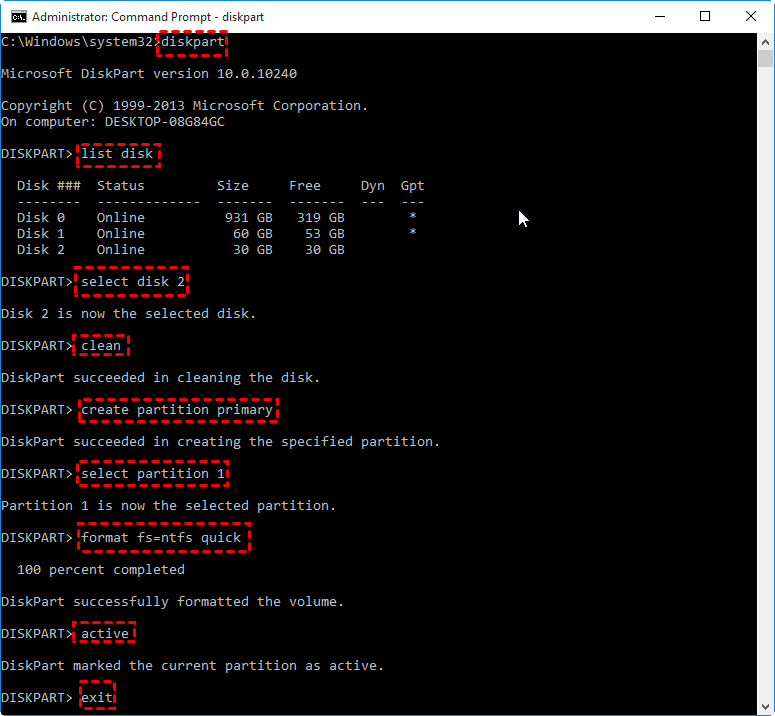
Step 2. In the pop-out Command Prompt window, type “diskpart” and press “Enter” to launch the Diskpart utility. Inside the Diskpart window, input the following commands and press “Enter” after each one.
list disk
select disk #
clean
create partition primary
select partition 1
format fs=FAT32 quick (if you plan to create UEFI bootable USB using Diskpart, type “format fs=ntfs quick”)
active
exit
Don’t close the Command Prompt. You can minimize it for a little bit since the process is not completed yet.Now, put the Windows DVD into your computer’s DVD drive. Open Windows File Explorer to check out the drive letter of the Windows DVD drive and the USB drive.
Then, go back to the CMD window and type in “D: CD BOOT” (replace D: with your DVD drive letter) and press Enter. Type “CD BOOT” again and press Enter. Lastly, type “BOOTSECT.EXE /NT60 H: “ (replace your USB flash drive letter for H:) and press Enter.
At last, copy all the files and folders of the Windows DVD to your USB flash drive in File Explorer. Now, you can plug the bootable USB flash drive into the target computer to start installing OS.
Guide 2. Create a bootable Windows 11 repair flash drive
If your Windows computer cannot boot due to hard drive failure, you can create a bootable USB drive as a Windows repair tool. In this case, you can use AOMEI Partition Assistant Professional.
Apart from creating a bootable USB stick on Windows computer for a PC emergency, it also offers related functions to repair boot issues such as rebuilding MBR, checking and fixing bad sectors on the system drive. Now you can download the demo version and learn how to create a bootable USB stick on Windows 11/10/8/7 for Windows repair.
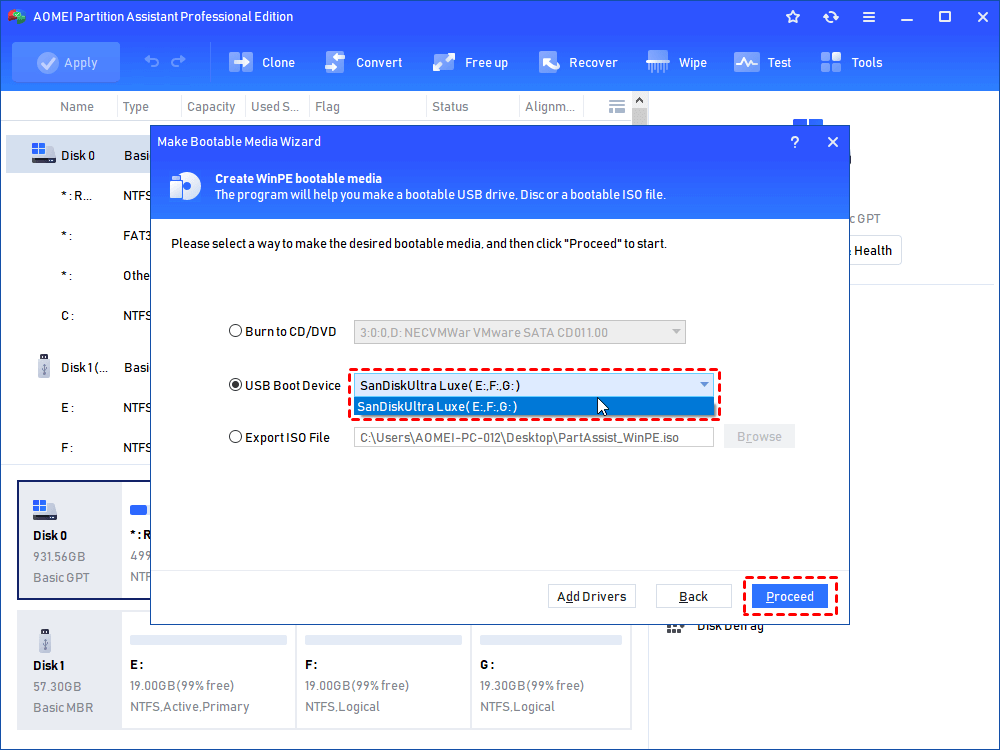
Step 1. Connect the USB drive to a working Windows computer, install and run AOMEI Partition Assistant Professional. Click “Make Bootable Media” and hit on “Next” to proceed.

Step 2. Choose the right USB drive under “USB Boot Device” and click “Proceed”.
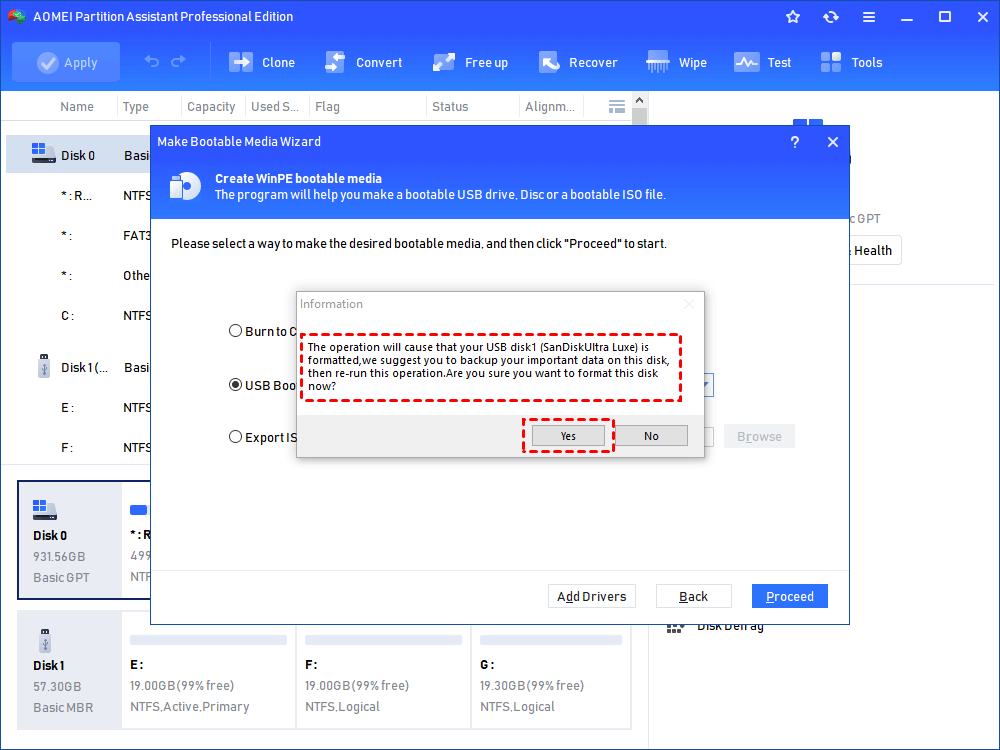
Step 3. Then you will be told the USB will be formatted, please back up important data. If you have done that, click “Yes”.
Step 4. Then wait for the process to be completed.
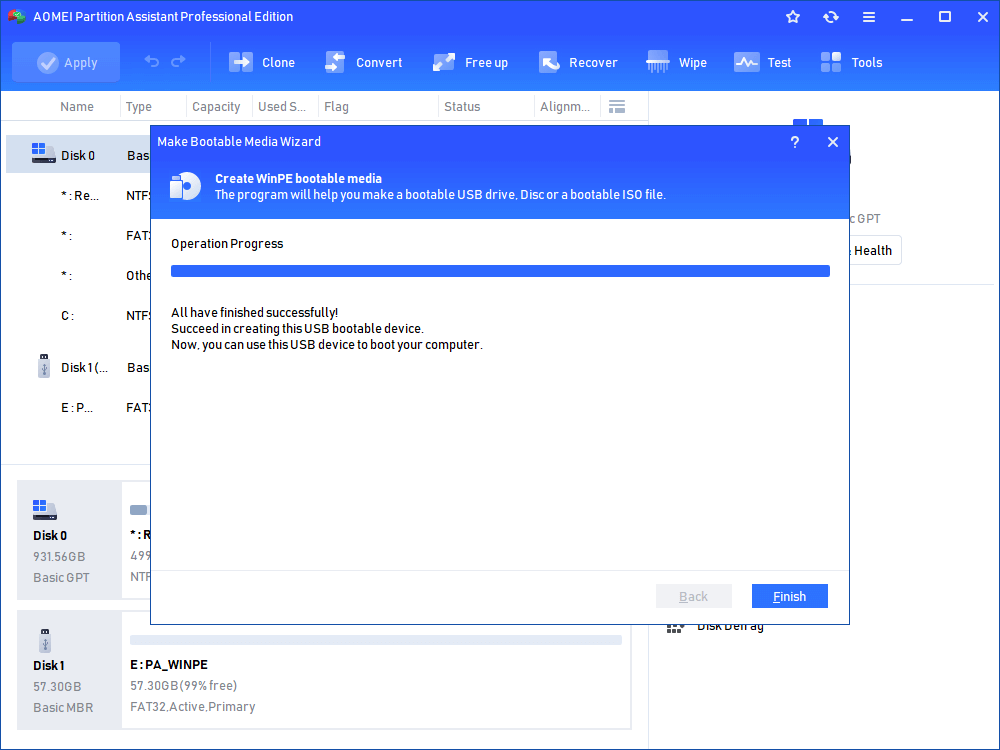
Note: the bootable USB drive contains the pre-installed AOMEI Partition Assistant Professional.
When the process is done, insert the bootable USB drive into the computer with boot issues, and change boot order in Boot menu to make it boot from the bootable USB stick. Then you can perform Boot Repair ot rebuild MBR on the system primary hard drive.

Or you can right-click the system partition to check whether there are some bad sectors on the partition and fix them if necessary. Those two functions are the most commonly used functions to repair Windows boot failures.
Guide 3. Create a bootable flash drive for portable Windows device
In addition to the aforementioned purposes, certain users seek to construct a bootable USB drive on the Windows operating system in order to obtain a portable Windows USB device. AOMEI software additionally provides the "Windows To Go Creator" functionality. Similar to Microsoft's "Windows To Go," it offers significantly greater capability and flexibility. It accommodates both certified and non-certified USB drives.
Step 1. Install and run AOMEI Partition Assistant Pro on your PC. Click “Tools” > “Windows To Go Creator”.

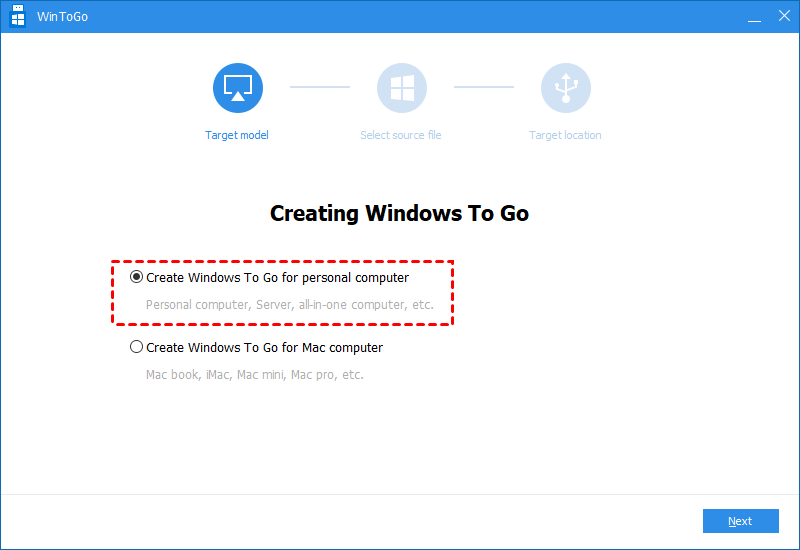
Step 2. Select "Create Windows ToGo for personal computer". PS.: if you want to make Windows 11 bootable USB for mac, you can use the seond option.
Step 3. Choose "Create Windows ToGo with system disc/ISO" and click on "Next".
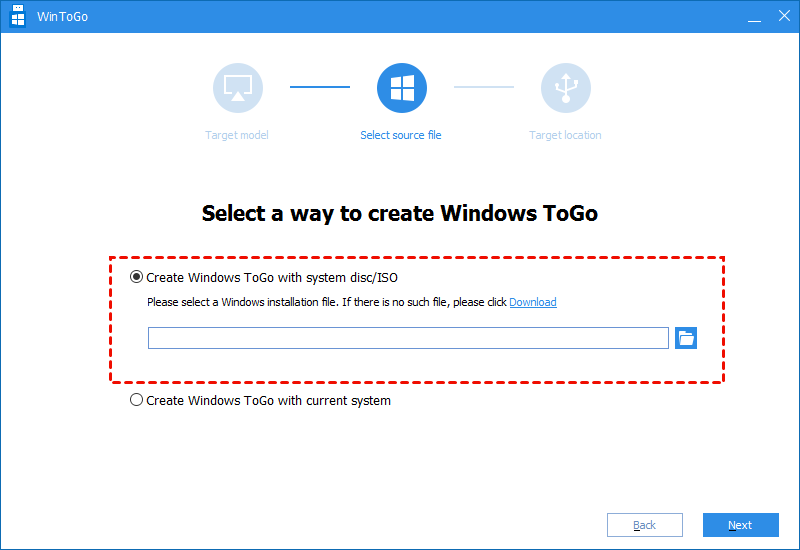
Step 4. Choose Windows ISO file in this window. Click “Next”.
Note: If you don’t have Windows ISO files, go for the second method to create Windows bootable USB with current system.

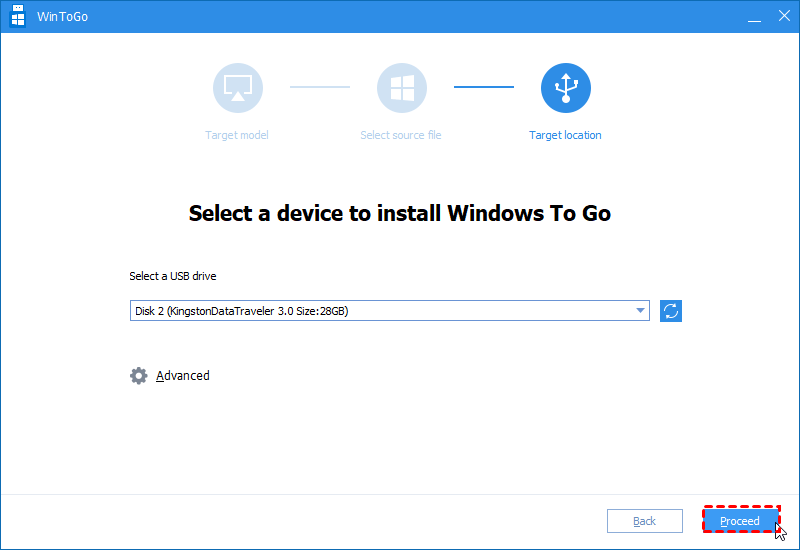
Step 5. Select USB drive and click on “Proceed” to start creating a bootable USB drive in Windows computer.
To sum up
Windows 11 features a modern and visually refined interface with rounded corners and a centered taskbar. Designed to be clean, fresh, and aesthetically appealing, Windows 11 also introduces new features and enhancements that elevate the user experience.
A bootable flash drive Windows 11 provides a practical solution. In this post, we show users how to make bootable flash drive Windows 11 for OS installation, system repair, and portable OS device. Each guide is detailed so you can carefully follow the steps to create bootable drive for you needs. AOMEI Partition Assistant is an all-in-one tool for Windows management, you can try other functions to improve your computer performance safely.

