How to Change FAT32 to NTFS USB (3 Ways Offered)?
A FAT32 USB flash drive does not support a file more than 4GB, and 2TB drive space. To solve this problem, this article will guide you on how to change FAT32 to NTFS with 3 methods.
By Michael / Updated on May 12, 2023
Why change USB drive from FAT32 to NTFS on Windows 11/10?
The main reason why change a USB drive from FAT32 to NTFS file system is to solve maximum file size of 4GB and 2TB limitation of partition capacity. As you know or may not know, the FAT32 was pubulished in 1996, used to describe how files can be stored or retrieved.
However, as a old file system, FAT32 does not support a file larger than 4GB, which means you probabaly can't store many movies, raw photos, high-quality musics. Besides, it can't read a partition more than 2TB. Fortunately, the new technogy file system (NTFS) have made improvement over FAT32. You can take a gimpse to kown the main features and benefits of NTFS.
● larger partition size. The maximum partition size of a NTFS USB flash drive can up to 16TB, which is much bigger than FAT32 file system
● Shadow copy. This will make a backup of poin-in-time version of a file, which doesn't take extra space. If any mistake added in the file, you can revert it back to a previous version.
● Higher security. It can encrype you files and folders to ensure a high data security
● Partition, folder and file compression. This feature allows you to make the best use of the USB space.
● Self-healing. In case of event of a system failure, NTFS file system can detect and repair itself without disrupting using.
Due to these feature that NTFS provided, and to break the size limit of FAT32. it is not surprising that so many people want to change USB flash drive from FAT32 file system to NTFS. Next, we going to demonstrate you how to perform this operation.
Three methods to change USB from FAT32 file system to NTFS
Generally, there are 3 different utilities helping you to do such operation. Windows 11/10 built-in tool-Disk Management, Diskpart. Choose a method according to your need.
Method 1: format USB from FAT32 to NTFS via Disk Management
✍ Tips: This method will format your USB pen drive which will delete all the data on it, please backup the data on the USB beforehand, or skip this method to method 3.
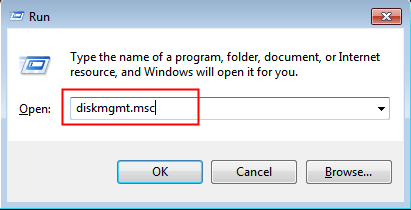
1. Press "Windows + R" to start Run, and type “diskmgmt.msc” hit Enter key to open up the Disk Management.
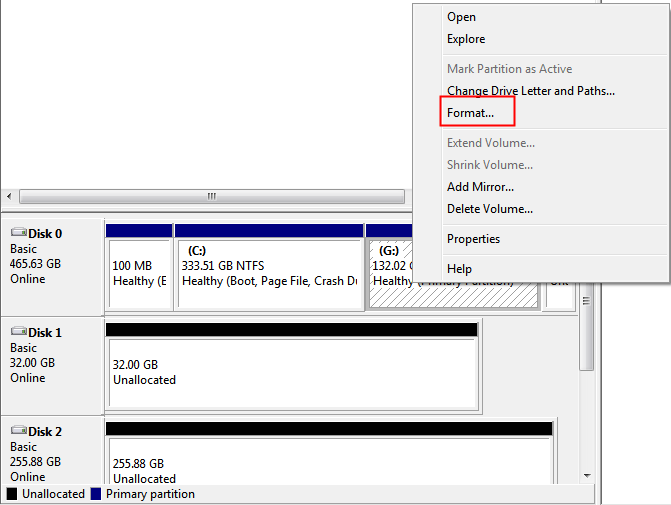
2. Just right-click the partition you want to change and select “Format”.
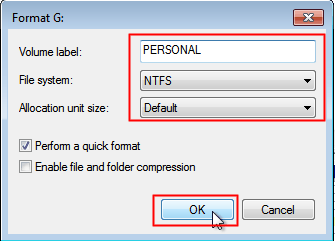
3. Specify the volume label and select NTFS file system, default the allocation unit size, and check Perform a quick format. Then click "OK".
Method 2: Convert FAT32 to NTFS for pen drive using cmd.
1. Open Run box. Type cmd and hit Enter to open the command prompt window.
2. In command prompt, type "convert drive: /fs:ntfs".
For example, if you want to change partition D to NTFS file system, you just type "convert d: /fs:ntfs".
3. When process is completed, type exit to close this window. Then you can open Disk Management to check if it is changed.
However, some factors like inadequate disk space can cause conversion failure, and in some PCs, the command is not available. Moreover, this method is not working to convert NTFS files system to FAT32 back. To convert USB drive from FAT32 to NTFS in a success, you have to find out the reason and take measure accordingly.
Method 3: Convert FAT32 to NTFS for USB drive without losing data
Actually, the two method above are not suitable for all conditions. Sometimes, your Disk Management may not support converting USB drive to NTFS file system, and you may lose all your important data after converision.
If you want to change FAT32 to NTFS without formatting easier, you can turn to this powerful tool – AOMEI Partition Assistant Professional. It is with a user-friendly graphic interface, allowing you to handle it effortlessly. Apart from converting FAT32 to NTFS without losing data, it permits you convert NTFS to FAT32 back without data loss.
You can click the button to down the demo version and follow the steps below to have a try.
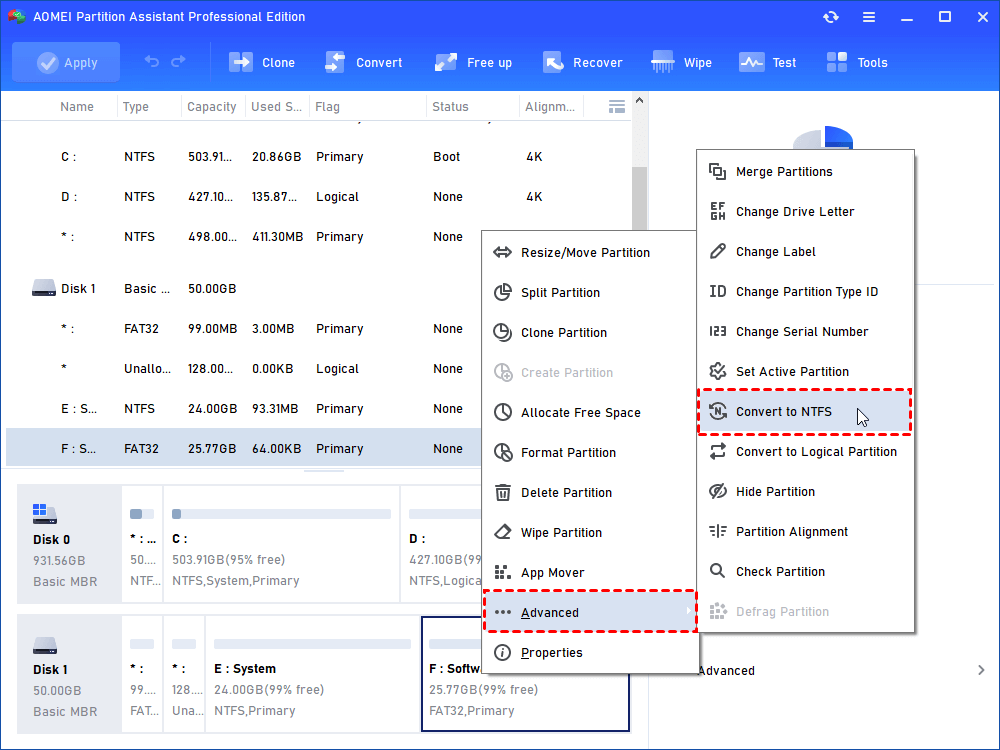
Step 1. Install and open it. Right-click the partition you want to change to NTFS and move mouse cursor to “Advanced” and click “Convert to NTFS”.
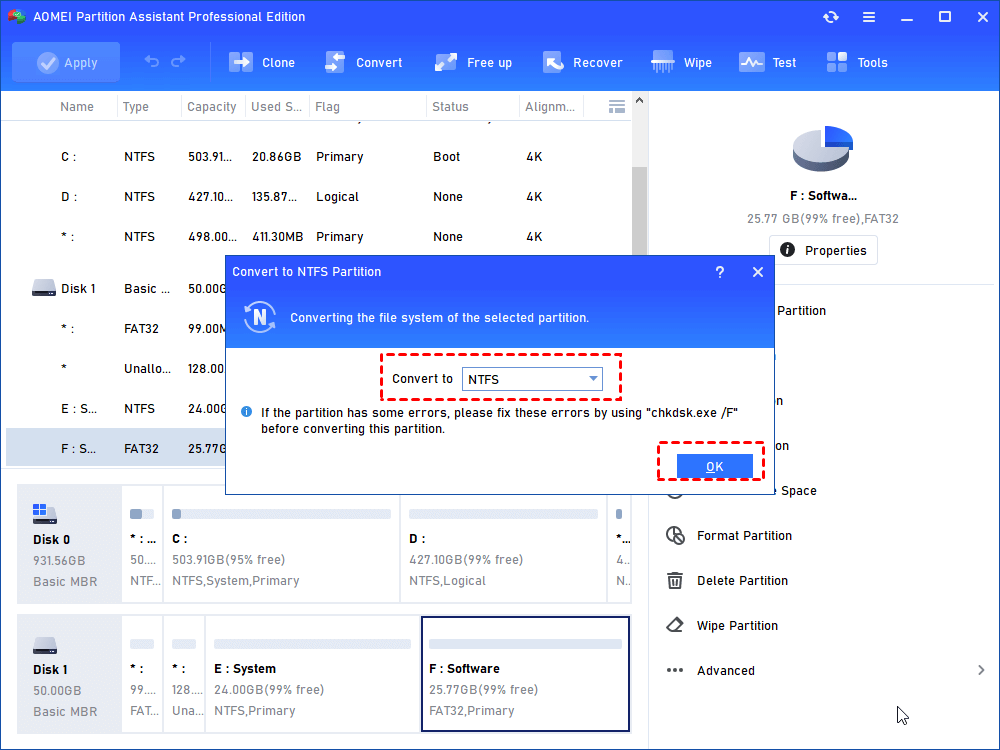
Step 2. In the pop-up window, choose “Convert to NTFS”, Then click “OK".
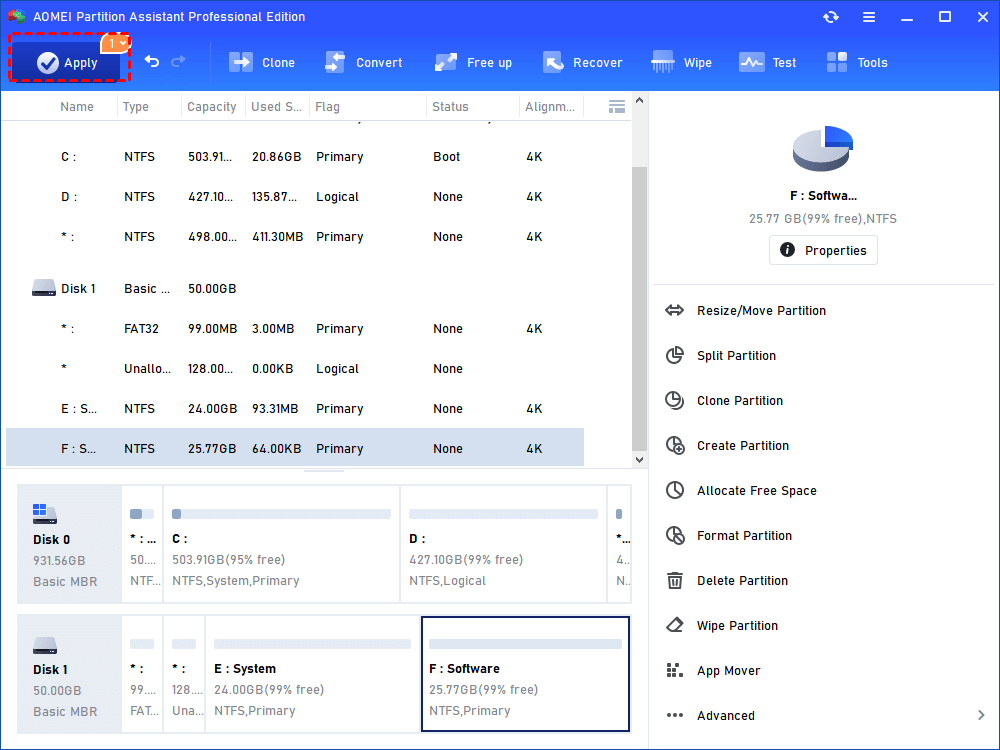
Step 3. Click “Apply”, now your USB drive is changed to NTFS file system.
Conclusion
This is all about how to change FAT32 to NTFS for USB. I hope these methods can help you. If your USB drive is empty or doesn’t have any necessary data, Method 1 is good; if you don’t want to lose data and are not a newbie, you can choose Method 2; if you want to complete FAT32 to NTFS conversion for USB drive without losing data fairly simple, method 3 is highly advised.
In fact, AOMEI Partition Assistant Professional is has many other functions can also help you, like convert a drive between MBR and GPT, and you can wipe a usb with it if one day you want to abandon or give it to other people.
And there is AOMEI Partition Assistant Server edition specially designed for Windows Server system. You can turn to this edition if you need to convert file system in Server.