7 Easy Ways to Fix Hard Drive Missing After Cloning
Some users experience the "hard drive missing after cloning" issue on Windows 10/11. What causes this problem, and how can it be fixed? This post will guide you on solving it easily.
By Hedy / Updated on April 3, 2025
Reasons for the hard drive missing after cloning
If you're facing a situation where your hard drive is missing after cloning, it could be due to a number of reasons. Let's break down some common causes:
1. Corrupted partition table: The partition table may not have been properly cloned, causing your new drive to not show up or appear empty. This could happen if the cloning software didn’t handle partition structures correctly.
2. Drive letter conflicts: After cloning, the cloned drive might have been assigned the same drive letter as the original drive, causing it to be hidden or not properly accessible.
3. Boot sequence conflicts: If the cloned drive is not set as the primary boot device in the BIOS/UEFI, the system might be trying to boot from another drive, causing the cloned drive to not appear in Windows.
4. Incompatible file systems: If the cloning software didn’t support the file system on the source drive or there was a mismatch between the source and destination drive types, this could cause the cloned drive to not show up properly.
5. Outdated drivers: If there are outdated or missing storage controller drivers, the system might fail to recognize the cloned drive. Ensure that you have the latest drivers for your motherboard's SATA or NVMe controller.
6. Bad sectors on the new drive: If the destination drive has bad sectors or is physically damaged, it may not be able to hold the cloned data properly, leading to errors or the drive not appearing in the system.
How to fix hard drive missing after cloning in Windows 11/10
Based on the potential causes mentioned earlier, we’ve compiled a series of practical solutions to address the "hard drive space disappeared after cloning" issue. Follow these methods one by one until you successfully resolve the problem.
Fix 1. Recover the disappeared hard drive
If you're dealing with missing data after cloning a drive, AOMEI Partition Assistant can help you recover the lost hard drive space. This professional tool is designed for data recovery and can effectively restore lost partitions due to issues like virus attacks or incorrect partitioning.
Follow the steps below to recover the missing hard drive space:
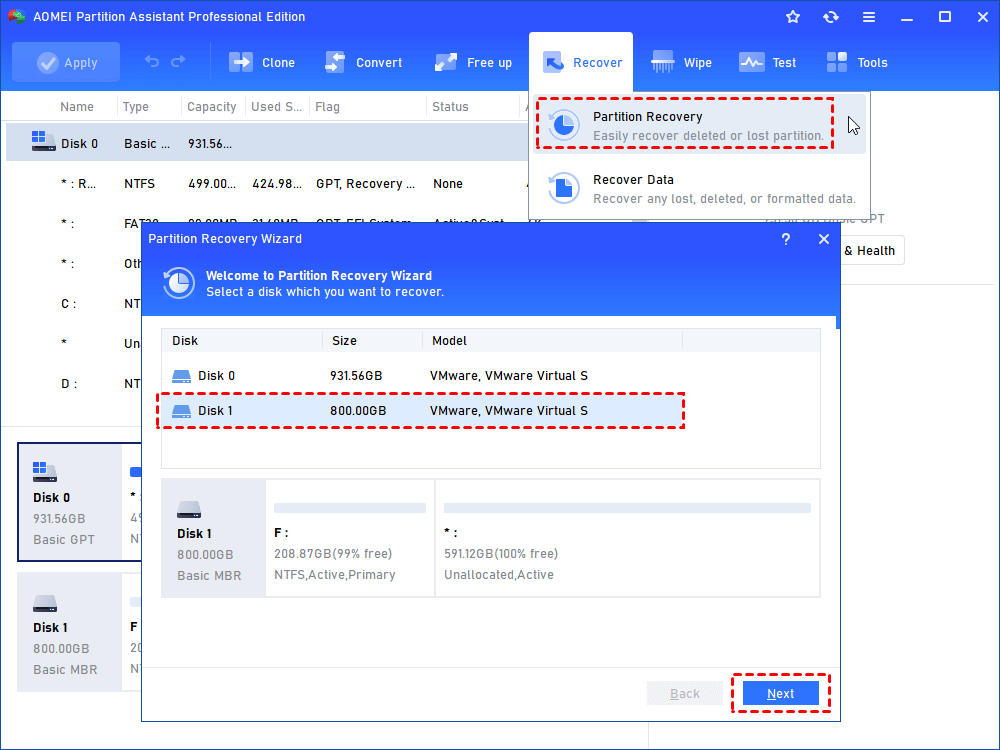
Step 1. Install and open AOMEI Partition Assistant. Go to Recover > Partition Recovery on the main interface. When you get into the partition recovery wizard, select a disk that you want to recover. Click Next.
Step 2. Select Fast Search. It is recommended that you select this option the first time as it is faster than Full Search. If you are unable to recover the lost partition using Fast Search then I recommend you try the Full Search option.

Step 3. Select the lost partition and click Proceed.

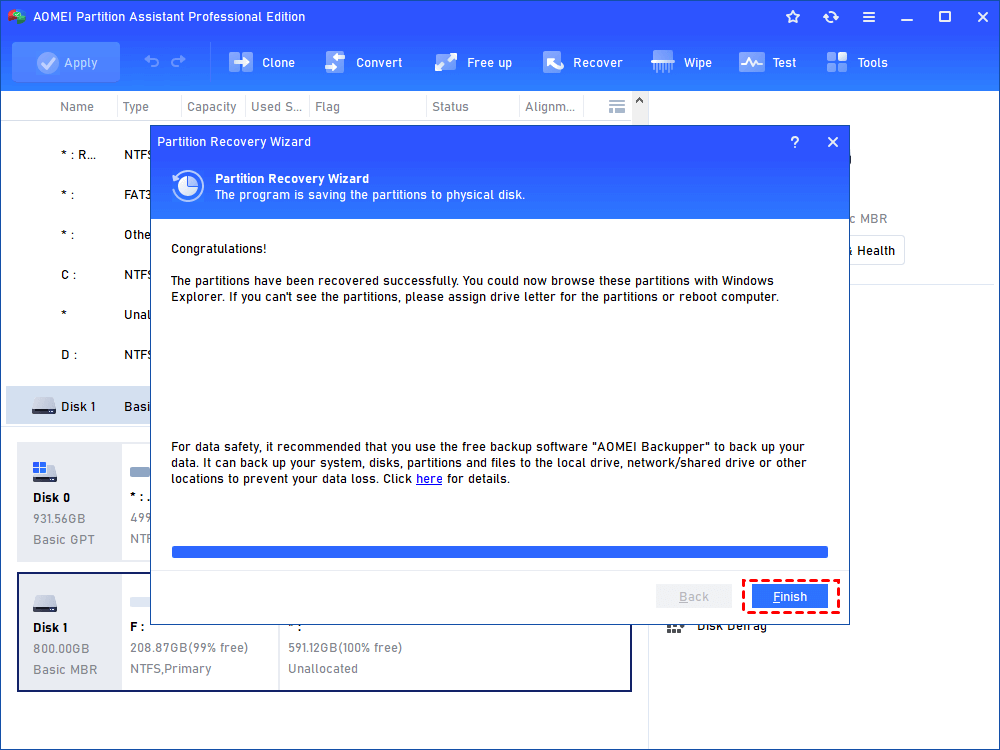
Step 4. Click Finish to exit this window after you see the congratulations message.
Fix 2. Detect the hard drive using Disk Management
If you're encountering the issue of a missing hard drive after cloning, the Disk Management tool can help you detect the drive. Here’s how to use it:
Step 1. Right-click the Windows icon and select Disk Management from the menu.
Step 2. In the Disk Management window, you'll see a list of all hard drives connected to your PC. If your hard drive is missing, it could indicate a hardware issue.
Step 3. Look at whether the disk is marked as Offline or Online. If it shows as Offline, right-click the disk and select Online to make it active again.
This should help you identify and resolve any issues with the missing hard drive.
Fix 3. Check cables and connections
To troubleshoot issues with a missing hard drive, first ensure that the drive is properly connected and powered. Here’s what you should check:
Step 1. Make sure both the data cable and power cable are securely connected to the hard drive, the motherboard, and the power supply.
Step 2. If the hard drive still doesn’t appear, try connecting it to another computer to see if the issue lies with the drive itself or the original system.
This simple check can help you determine whether the problem is related to the drive or a connection issue.
Fix 4. Reset the drive letter
If your cloned hard drive is not visible in File Explorer, it may be because the partition is missing a drive letter. Without a drive letter, the partition won't show up. To fix this issue, you can reset the drive letter by following these steps:
Step 1. Launch the Disk Management tool again.
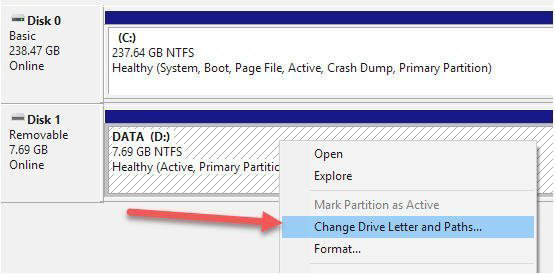
Step 2. Right-click the missing drive and select Change Drive Letter and Paths from the menu. In the pop-up dialog, click the Add button.
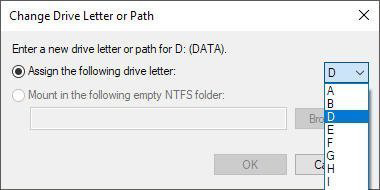
Step 3. Check the box for Assign the following drive letter, select a letter from the drop-down menu, and click OK to save the changes.
After this, the hard drive should become visible in File Explorer.
Fix 5. Check BIOS settings
If your hard drive is missing, it's a good idea to check the BIOS settings to ensure the drive hasn't been disabled. Here’s how you can do that:
Step 1. Restart your computer and press F2 (or the appropriate key for your system) to enter the BIOS setup.
Step 2. Once in BIOS, navigate to System Setup and refer to the system documentation to confirm whether the hard drive is disabled or turned off.
Step 3. If the hard drive is turned off or disabled, enable it in the BIOS settings.
Step 4. After saving the changes, restart your computer to see if the hard drive is now recognized.
This should help you ensure that the hard drive is properly enabled and accessible.
Fix 6. Update your disk driver
If your hard drive is missing after cloning, outdated or incompatible drivers may be the cause. Updating the disk driver can help resolve this issue. Follow these steps to update your disk driver in Device Manager:
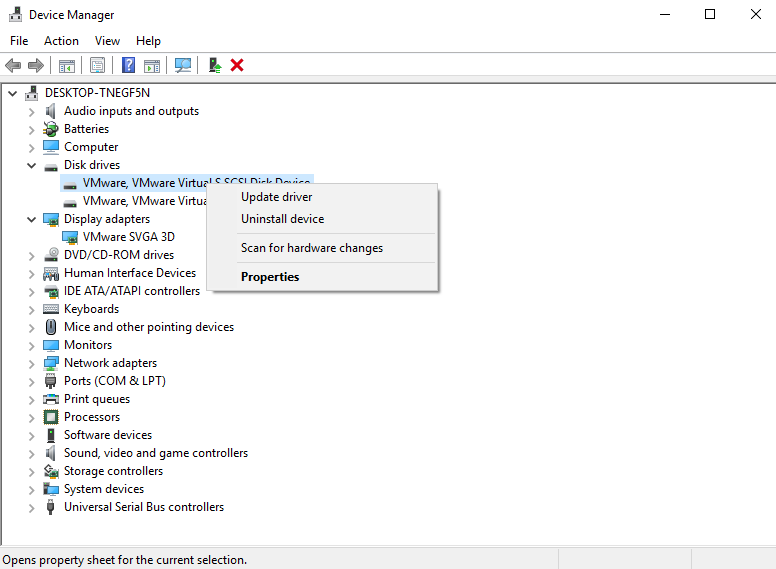
Step 1. Right-click the Windows Start button and select Device Manager from the menu.
Step 2.Double-click Disk Drives to view all connected storage devices.
Step 3. Right-click your disk drive and choose Update Driver.
Step 4. In the pop-up window, select Search automatically for updated driver software. Windows will then search your system and the internet for the latest drivers.
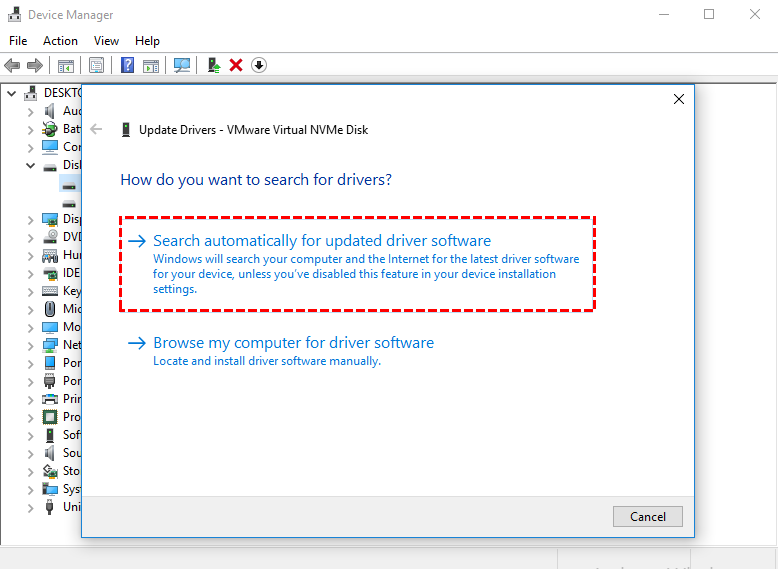
Step 5. Complete the update process by following any prompts.
Step 6. Once the update is finished, restart your computer and check if the hard drive is now detected.
Fix 7. Scan the disk for bad sectors
If your hard drive has bad sectors, it can cause issues like missing data after cloning. To resolve this, you should check for bad sectors on the drive. One effective way to do this is by using third-party software, and AOMEI Partition Assistant is a great option. This professional partition tool can help you scan and repair bad sectors, ensuring your hard drive functions properly.
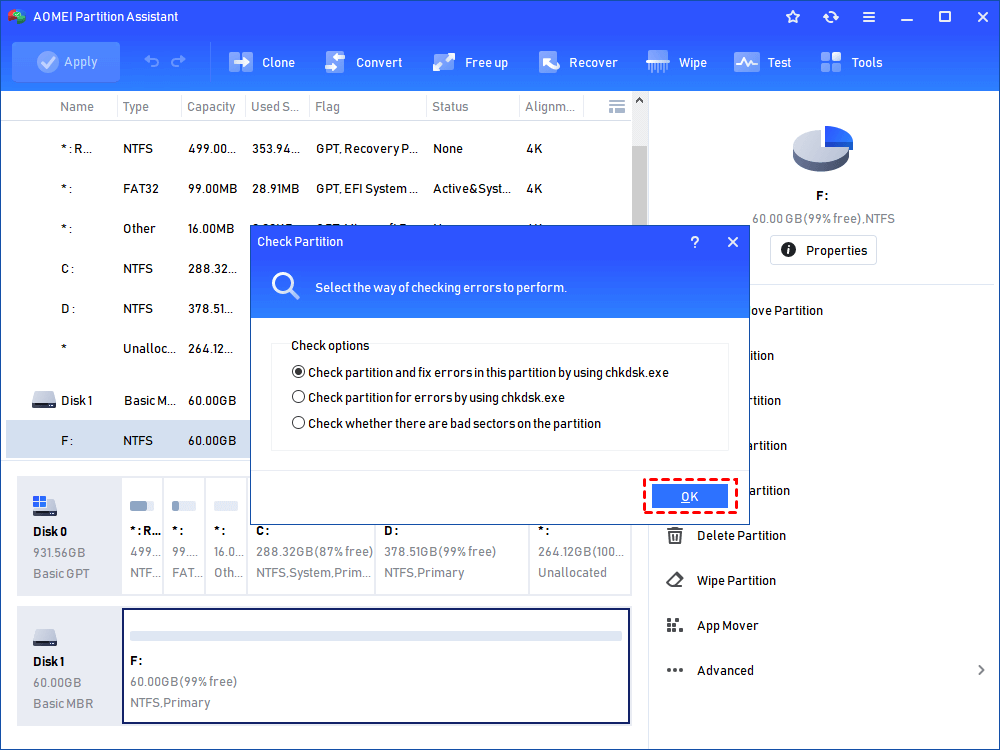
Step 1. In the main interface, right-click the target drive and then click "Check Partition".

Step 2. Choose the "Check partition and fix errors in this partition by using chkdsk.exe" option, then click "OK".
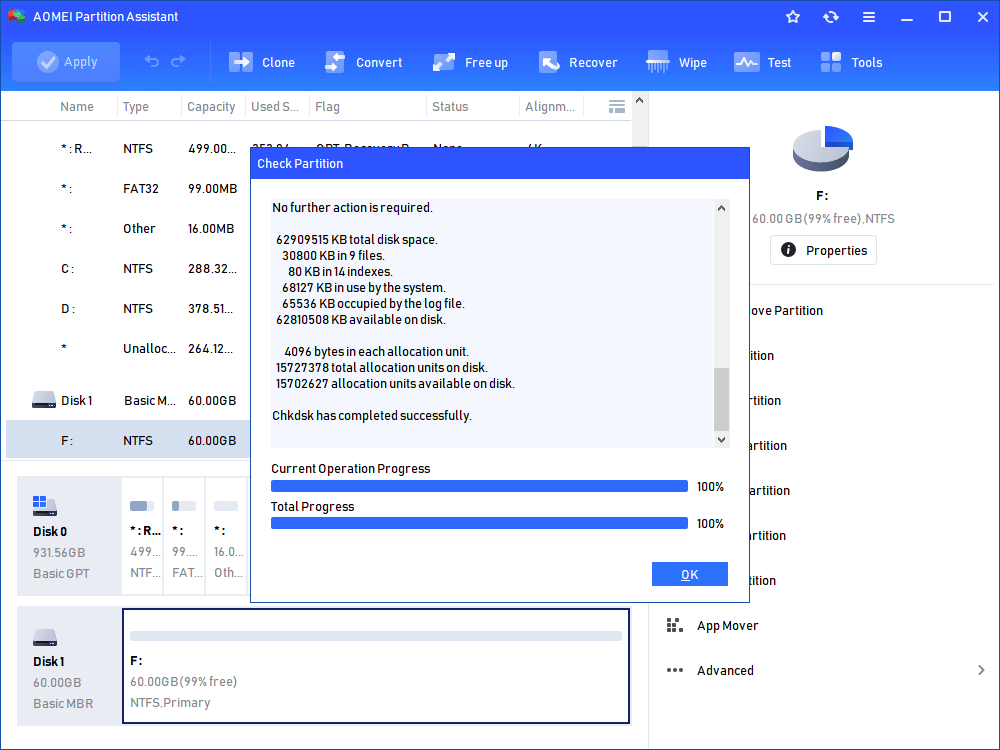
Step 3. Wait for a while and click "OK" when it's finished.
A safer way to clone a hard drive without disk missing after cloning
To safely clone a hard drive without running into issues like missing disks after cloning, AOMEI Partition Assistant is an excellent tool. AOMEI Partition Assistant is a trusted, feature-packed disk management tool that supports not only cloning but also partition management, disk formatting, and boot issues repair.
When you use this tool to clone a hard drive, it ensures that the target drive gets an exact replica of the source drive, avoiding common issues like missing partitions or inaccessible data. With its comprehensive set of tools, AOMEI Partition Assistant ensures that your hard drive cloning process goes smoothly.
-
Ensure all data is backed up: Before cloning, it's important to back up any important files. While cloning generally doesn’t cause data loss, accidents can happen.
-
Connect both the source and destination drives: Your source drive is the one you’re cloning, and the destination drive is where the clone will be created (either an internal or external disk).
Step 1. Install and launch AOMEI Partition Assistant, click the "Clone" main tab and select "Clone Disk". (You can also right-click the Disk you want to clone and select the "Clone Disk" tool to run disk clone.)

Step 2. Choose the hard disk that you need to clone as the source disk and click "Next".

Tips: To make a bootable disk clone, please select the system drive of the current computer with Partition Assistant installed as the source drive.
Step 3. Select the destination disk to put the data of the source disk on, and then click "Next".

Step 4. Then, you will enter the Confirm interface where you can check the source and destination disk. After all is set, you can click the "Confirm" button to continue.

In the lower left corner of the window, you can click the "Settings" button to adjust the partition size on the destination disk. There are three options for you:
- Clone without resizing partitions: all partitions will be cloned to the target disk as the original partition size. It is available when the target disk is larger than the source disk. If it is smaller, this option will be grayed out.
- Fit partitions to entire disk: all partitions will be cloned to the target disk and take up its full capacity according to the original partition size proportion.
- Edit partitions on this disk: you can change every partition size on the target disk as you need.
After finishing the adjustment, please click "Save".

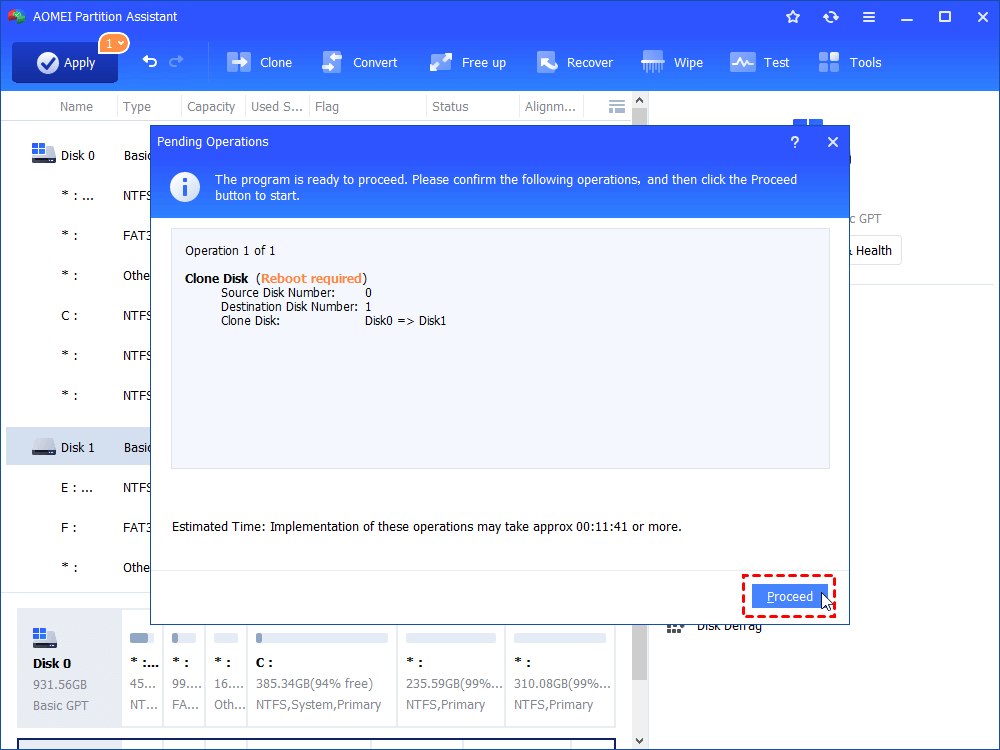
Step 5. You can preview the disk cloning operating by viewing the "Pending Operations". To commit the "Pending Operations", please click "Apply" and "Proceed".

Step 6. The cloning process will start and you can check the cloning process.
Conclusion
In conclusion, a missing hard drive after cloning can be caused by various issues such as corrupted partition tables, drive letter conflicts, or boot sequence problems. To resolve this, try these fixes introduced on this page. By addressing these common issues and using reliable cloning tools, you can ensure a smooth and error-free hard drive cloning process. Always remember to back up important data and carefully follow the troubleshooting steps for optimal results.