3 Methods to Format Write-protected Disk in Windows 11/10/8/7
When your disk is write protected and cannot be formatted, you can try the following 3 methods to successfully format write protected disk in Windows 11,10, 8, and 7.
By Emily / Updated on February 25, 2025
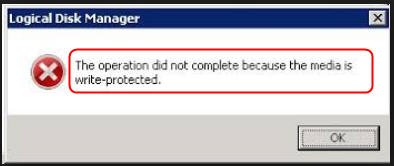
Failed to format the write-protected disk!
“When I format my USB any time, an error message "The disk is write protected" will pop out. I have already tried to insert the pendrive, go to the Disk Management, right click the removable disk, select Format option. But my USB is not Format. When Formatting is complete 100% again, message "The operation did not complete because the media is write protected" appears again. How can I format my write protect USB? Please help me!”
How do you format a drive that is write-protected?
When your disk is write-protected, you will not be able to modify files, add files to your drive or delete files from it because of the restrictions associated with permissions and sharing. What’s worse, the disk cannot be formatted with "The disk is write-protected" error. Here we will present how to format write-protect disk in Windows using the Registry Editor, Command Prompt, as well as a professional disk formatting tool. 3 methods are available for your choice.
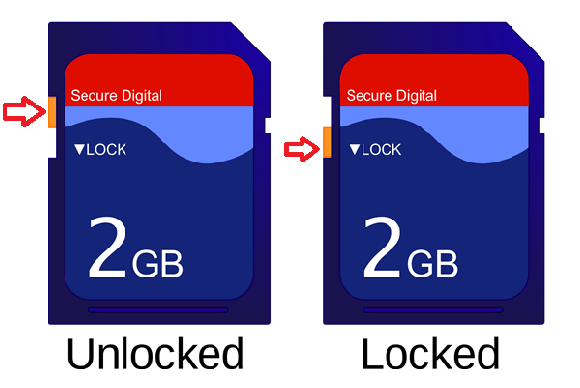
★★★Before proceeding to the following methods, you can check out whether your disk (especially the USB drive) has a physical write-protection switch on its exterior, it might be in the wrong locked position. If this is the case, try toggling the switch to see if you can successfully format the drive then.
★★★Please note that following operations would case data loss, so recover data from the write-protected disk and back them up to another safe location.
-
Method 1. Format write-protected disk using the Registry Editor
-
Method 3. Format write-protected hard drive via a multifunctional partition manager
Method 1. Format write-protected disk using the Registry Editor
If your hard drive becomes write-protected because of the wrong registry value, you can try this method.
Step 1. Press "Wind + R" to open the "Run" dialogue. Type "regedit" and click “OK” to open the Registry Editor.
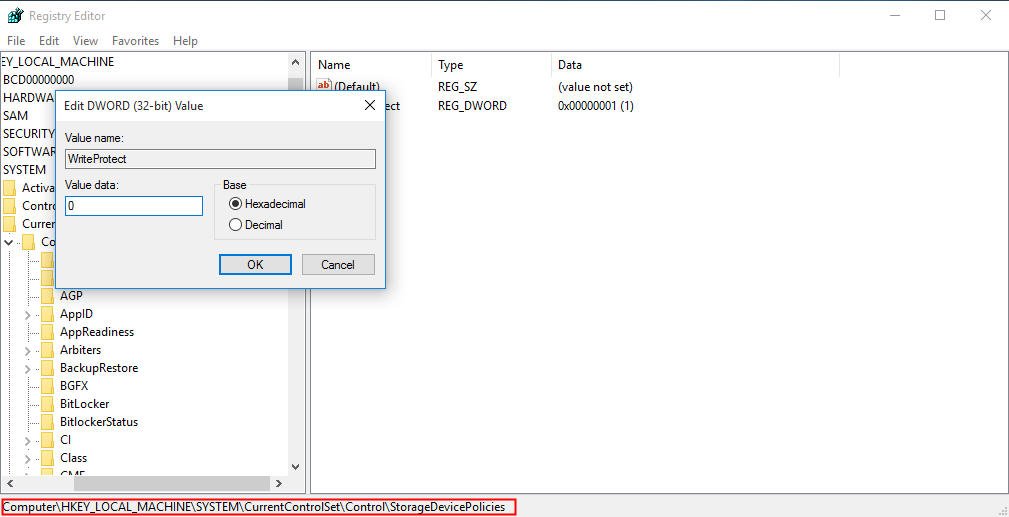
Step 2. Expand the entries on the left-hand pane to navigate to the following path:
"Computer\HKEY_LOCAL_MACHINE\SYSTEM\CurrentControlSet\Control\StorageDevicePolicies"
Step 3. Double-click WriteProtect and Change the value data from 1 to 0. Then, click OK.
Attention:
★ If there is no ”StorageDevicePolicies” under Control, you can right-click "Control" and go to “New”->”Key”. Then name it”StorageDevicePolicies”.
★ Then, at the right-hand pane, right-click white space and go to ”New”->”DWORD (32-bit) value” (If your computer is 64-bit version, choose QWORD (64-bit) Value). Name it with ”Write Protect”.
★ Finally, double-click the newly created DWORD and change its value from 1 to 0. Click ”OK" to apply the change.
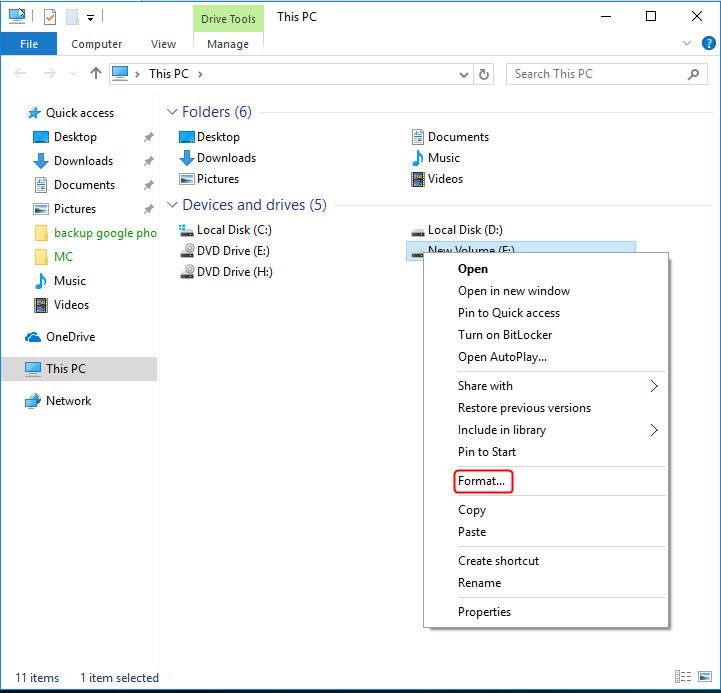
★ Till now, the write protection attribute is removed from the disk, and then you can open File Explorer, right-click the disk, select “Format…”, and follow the hints to format it successfully.
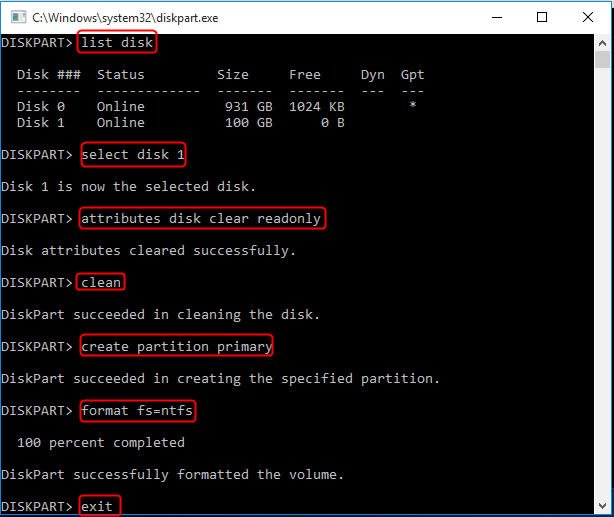
Method 2. Format write-protected hard drive using CMD
When the hard drive is set into write protection mode manually in Command Prompt, you can use CMD to remove this attribution as well.
Step 1. Click on “Start” and type “cmd.exe” into the search field. Double-click on Command Prompt to launch the program.
Step 2. Type the following commands and press “enter” after each one.
- diskpart
- list disk
- select disk # (ex: Disk 1): to select the disk which is write protected.
- attributes disk clear readonly: to change the disk’s properties so that it is no longer read-only.
Step 3. Till now, the write protection attribution is removed from the disk. Next you need to input some other commands like below to format the disk.
- clean
- create partition primary
- format fs=ntfs
- exit
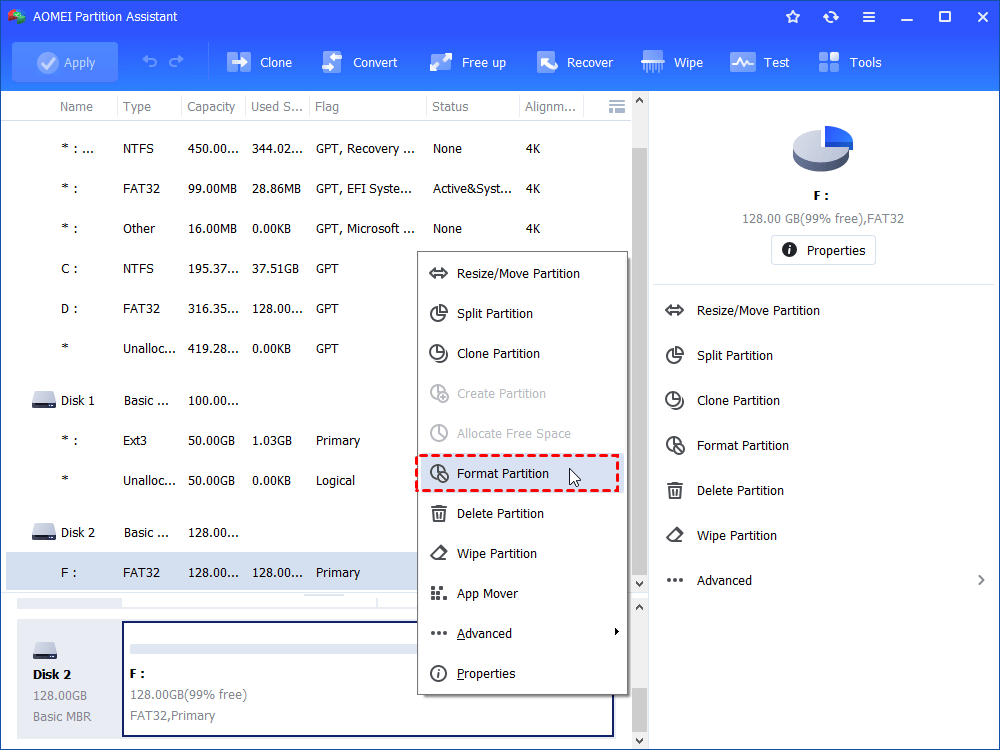
Method 3. Format write-protected disk via a multifunctional partition manager
This method is proper for the situation where your hard drive is write-protected due to file system corruption. The multifunctional partition manager-AOMEI Partition Assistant is a powerful hard drive formatting tool. It can perform many formatting tasks that Windows native tools cannot finish. For example, it can format 2TB hard drive to FAT32, format RAW or corrupted hard drive, as well as convert NTFS to FAT32 without losing data/formatting and vice versa.
Now you can free download the software and take the below steps to format write-protected hard drive in Windows 11/10/8/7.
Step 1. Right-click the disk that is write-protected and select “Format Partition”.
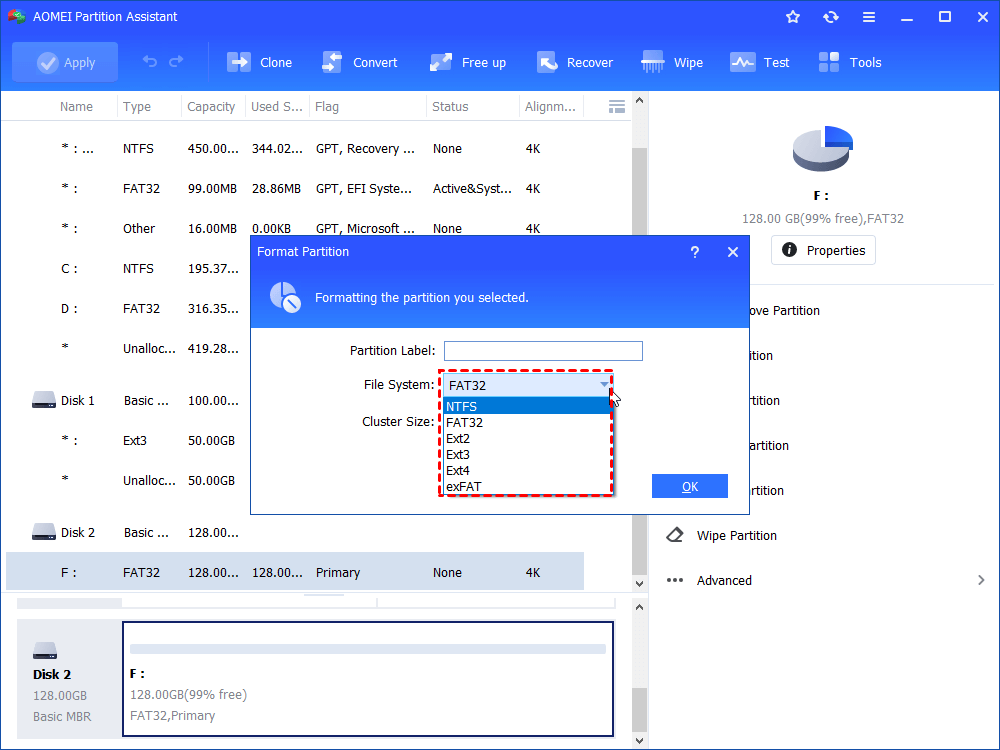
Step 2. Choose your desired file system (ex: NTFS), and you can also set your other disk format preferences, such as partition label and cluster size.
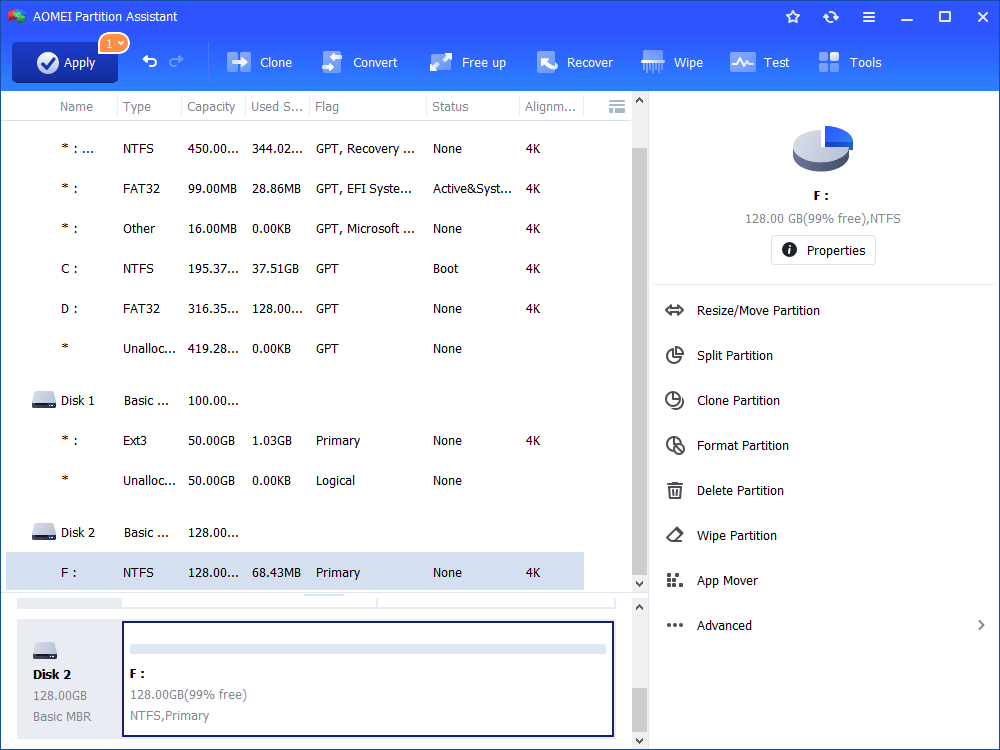
Step 3. Back to the main interface, click “Apply”->”Proceed” to start formatting the disk.
Conclusion
With those 3 different methods for various situations, next time you will be sure to format write-protected disk successfully. In addition to formatting the hard drive, AOMEI Partition Assistant also comes with other great functions such as merging partitions, copying partition to another hard drive, migrating OS from MBR to MBR disk, merging partitions, converting file system between FAT32 and NTFS without formatting.
For more advanced functions, like allocating free space from one partition to another, splitting partition, recovering deleted partitions, and so on, you can feel free to try them.

