How to Format USB for Windows Media Creation Tool
How to format USB for Windows Media Creation Tool? In this post, explain why formatting your USB correctly matters, recommend top USB drives for the task, and walk you through multiple methods to format your USB.
By Lucas / Updated on February 8, 2025
Creating a bootable USB drive for installing Windows 10 or 11 using the Windows Media Creation Tool is a critical step for system upgrades, clean installations, or computer troubleshooting. However, many users stumble at the very first hurdle: formatting their USB drive correctly. An improperly formatted USB can lead to errors, failed installations, or compatibility issues.
In this guide, we’ll explain why formatting your USB correctly matters, recommend top USB drives for the task, and walk you through multiple methods to format your USB for the Windows Media Creation Tool. By the end, you’ll also learn how to create installation media and install Windows seamlessly.

Why do you need to format USB for Windows Media Creation Tool?
The Windows Media Creation Tool requires a USB drive formatted to a compatible file system (typically NTFS or FAT32) with sufficient storage (8GB minimum for Windows 10/11). Formatting ensures:
Clean Slate: Remove hidden partitions or residual files.
Optimal Performance: Faster read/write speeds for smooth installations.
✨ Top 5 USB Drives for Windows Media Creation Tool
SanDisk Ultra Fit 128GB: Compact, durable, and USB 3.1-compatible for rapid transfers.
Samsung BAR Plus 64GB: Waterproof, shock-resistant, and optimized for large files.
Kingston DataTraveler Max 256GB: High-speed USB 3.2 Gen 2 for lightning-fast installations.
PNY Turbo 32GB: Budget-friendly yet reliable for basic Windows installations.
Lexar JumpDrive S75 128GB: Sleek metal design with AES 256-bit encryption for security.
Tip: Choose a USB with 16GB+ capacity for future-proofing, especially if installing Windows 11.
4 Proven methods to format USB for Windows Media Creation Tool
Now, let’s see how to format and make a Windows 10/11 media creation tool USB for your computer.
Method 1: Using Windows File Explorer to format USB
Step 1. Insert your USB drive.
Step 2. Open File Explorer, right-click the USB, and select Format.
Step 3. Choose NTFS or FAT32 as the file system.
Step 4. Check Quick Format and click Start.
Note: FAT32 is ideal for older systems, while NTFS supports larger files.
Method 2: Using DiskPart command lines to format USB drive
You can also use Diskpart tool to format the target USB drive. But, please double-check the disk number to avoid accidental data loss.
Step 1. Type cmd in the Windows search bar, then right-click Command Prompt and select Run as administrator.
Step 2. Enter the following commands:
diskpart
list disk
select disk X (replace X with your USB disk number)
clean
create partition primary
format fs=ntfs quick
exit
Tip: Sometimes, Windows tools may fail to format USB, and you may receive pop errors such as: "This disk is write-protected", "Windows was unable to complete the format" or "The format did not complete successfully".
Method 3: Using third-party tool--AOMEI Partition Assistant
If you don’t want to use complex command lines, AOMEI Partition Assistant is a versatile disk management tool (supports Windows 11, 10, 8.1, 8, 7, ) trusted by millions for its intuitive interface and advanced features. This USB format utility can assist you in formatting USB drives to NTFS, FAT32, exFAT, Ext2, Ext3, and Ext4 for different uses.
Moreover, it simplifies partitioning disk, cloning disk & partitions, and formatting tasks—ideal for preparing USB drives for the Windows Media Creation Tool.
💪🏼 Flexible File Systems: Supports NTFS, FAT32, exFAT, Ext2, Ext3, and Ext4 and more.
⚡ Speed: Quick format without compromising reliability.
Step 1. Plug in the bootable USB drive when you running Windows. Install and launch AOMEI Partition Assistant.
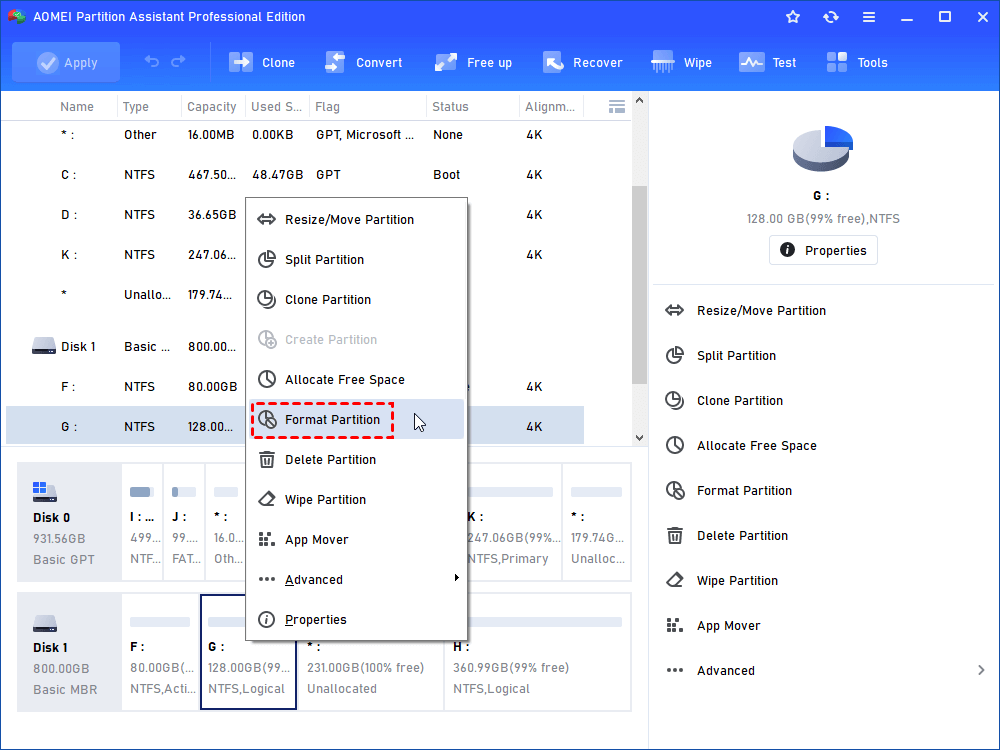
Step 2. Right-click the bootable flash drive and select “Format Partition”.
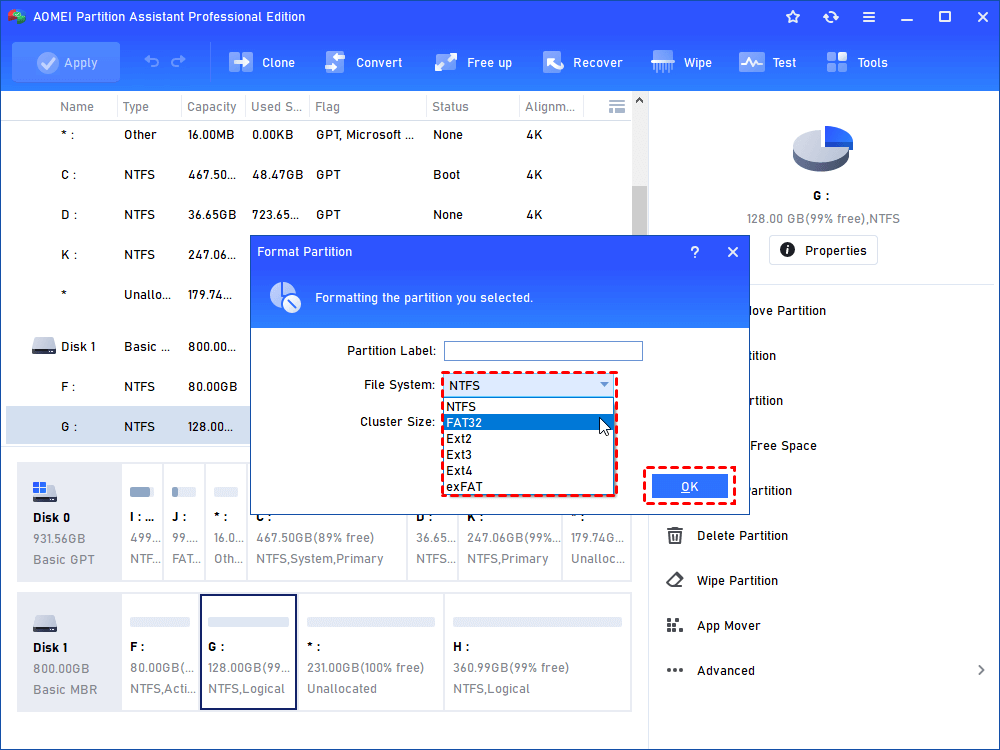
Step 3. Set file system and cluster size and then click “OK”.
Step 4. This is the virtual result. Click “Apply” to make it real.
Tips: If you want the USB drive to bootable again, try “Make Bootable Media” in this software to create a bootable device with Windows PE, and you can use this bootable USB to format hard drive in WinPE mode without booting Windows.
Bonus tips: How to Create Windows Media Creation Tool & how to install Windows 11 from media creation tool
After formatting your USB, you can make a Windows Media Creation Tool for your computer.
Step 1. Download the Windows Media Creation Tool from Microsoft’s official site.
Step 2. Run the tool, accept the license terms, and select Create installation media for another PC.
Step 3. Choose language, edition, and architecture (64-bit recommended).
Step 4. Select USB flash drive and pick your formatted USB.
Wait for the process to complete (20–60 minutes).
To Install Windows:
- Insert the bootable USB drive into the computer where you want to install Windows 10.
- Restart the computer and access the BIOS or UEFI settings by pressing the designated key (usually F2 or Del) during startup.
- In the BIOS or UEFI settings, set the USB drive as the primary boot device.
- Save the changes and exit the BIOS or UEFI settings to restart the computer.
- Follow the on-screen instructions to complete the Windows 10 installation process.
To sum up
Formatting a USB for the Windows Media Creation Tool doesn’t have to be daunting. Whether you use built-in tools, command lines, or specialized software like AOMEI Partition Assistant, the key is ensuring compatibility and efficiency. Pair your formatted USB with a high-quality drive from our recommended list, and you’ll breeze through Windows installations.

