Tutorial: Fix MBR From Command Prompt in Windows 11, 10, 8, 7
If MBR is damaged and OS cannot boot, here you can learn how to fix MBR from Command Prompt in Windows 11, 10, 8, 7 step by step.
By Emily / Updated on November 19, 2024
Overview of MBR (Master Boot Record)
The Master Boot Record (MBR) is a boot sector of any hard disk that identifies how and where the operating system is located. It is created on the very first partition when you install Windows on your computer. It is the first 512 bytes of your hard disk. MBR holds significant information that enables your PC to find and identify the OS location and allows Windows to boot up successfully.
What happens if MBR is corrupted?
Now that you might have known the importance of MBR, but what will happen if the MBR is damaged because of a virus infection, drive failure, or an MBR overwrite? Generally, as a result, your computer may fail to boot and prompt one of the following error messages during OS initial:
- Error loading operating system;
- Operating System not found;
- Invalid partition table;
- No bootable device found;
- Reboot and select proper boot device.
Thus, how to repair MBR so that you can boot the OS successfully? Windows provides Diskpart to fix MBR. Many users will first choose this solution to perform advanced operations. But this tool is more suitable for advanced users with computer knowledge. I will strongly recommend a free CMD alternative tool - AOMEI Partition Assistant, which can easily repair MBR without CD and data loss.
This tool provides one-stop repair services and supports all Windows versions. While CMD has different usage methods on different Windows 8/7/10, which can easily cause data loss. If you are familiar with Windows operations, you can choose the appropriate method according to your needs.
Fix MBR from Command Prompt in Windows 10/8/7
This part will illustrate how to fix MBR through Command Line step by step in Windows 10/8/7. Since Windows 7 and Windows 8/8.1/10 slightly differ in accessing Command Prompt, we make two respective tutorials for your reference.
Tutorial 1. Fix MBR via CMD in Windows 7
To fix damaged MBR using Command Prompt, you have to use the Windows installation CD/DVD to boot your computer since it is unable to boot from the OS. If you don’t have one, you can download Windows ISO files from the official Microsoft website and create a bootable USB drive.
1. Boot computer from the Windows 7 installation CD/DVD.
2. At the “Press any key to boot from CD or DVD…”, press any key to boot PC from the inserted DVD.
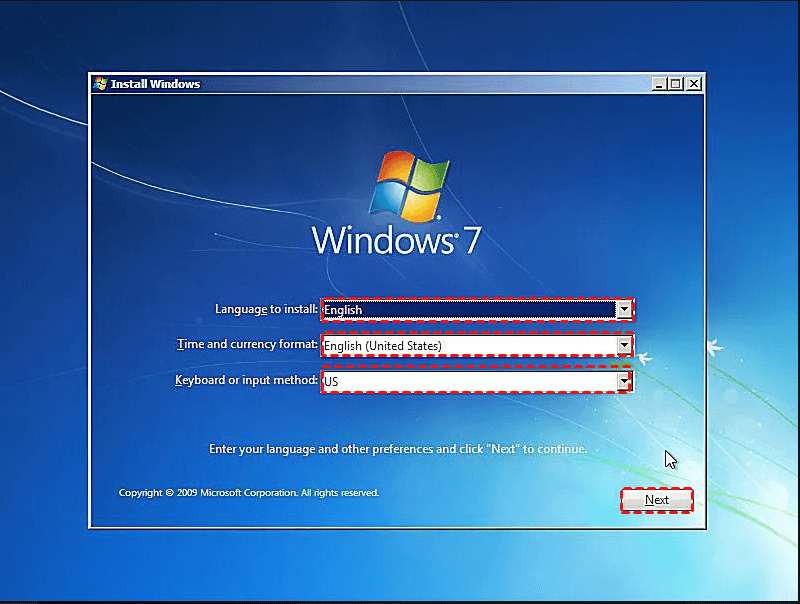
3. Select a language, keyboard layout and click “Next”.
4. Select the operating system and click “Next” and tick “Use recovery tools that can help fix problems starting Windows”.
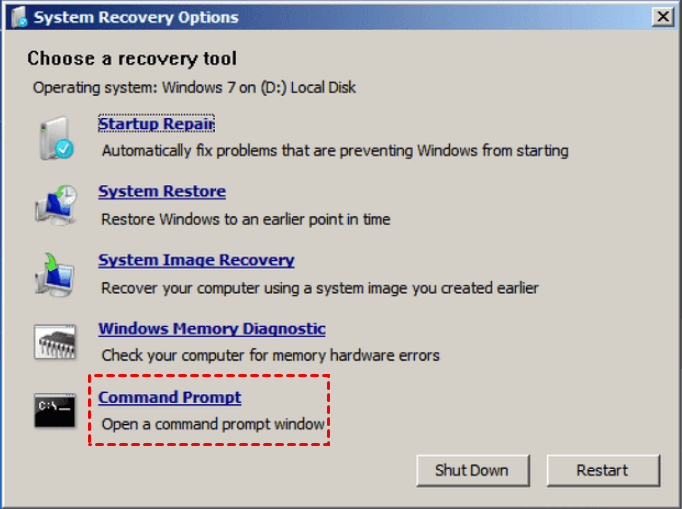
5. At the “System Recovery Options” screen, click on “Command Prompt”.
6. When Command Prompt launches successfully, type the following command in the given order and hit on “Enter” after each one.
-
bootrec /fixmbr
-
bootrec /fixboot
-
bootrec /rebuildbcd
Then, you can remove the installation DVD from the disk tray and restart your computer to check if the boot MBR is fixed.
▸If the above commands do not work, do as below to restore the boot sector code in Windows 7:
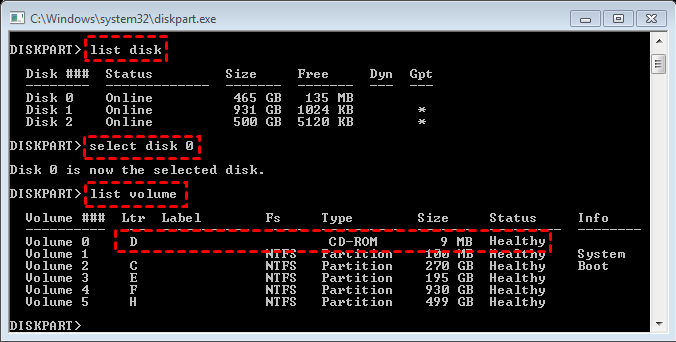
1. Check out the drive letter of your Windows 7 installation CD/DVD by running commands: “diskpart-> list disk->select disk 0 -> list volume”.
2. Find out the “CD-ROM” word in the “Type” column.Then check your CD/DVD installation drive letter. If the drive letter is d:\, type the command: “exit d: cd boot dir”.
3. Then type command: “bootsect /nt60 SYS /mbr” and hit on “Enter”.
4. Remove the CD/DVD from the disk tray, type“Exit” and press “Enter” to restart your PC.
Please be sure to enter the correct parameters during this process to avoid data loss. If you find rebuilding MBR via the command prompt complicated, try AOMEI Partition Assistant to easily fix computer problems and create WinPE bootable disks.
Tutorial 2. Fix MBR via Command Prompt Windows 8/8.1/10
Likewise, you have to boot computer from Windows 8/8.1/10 original installation CD, or created bootable media.
1. Boot from Windows installation DVD or CD. At the Welcome screen, click “Repair your computer”.
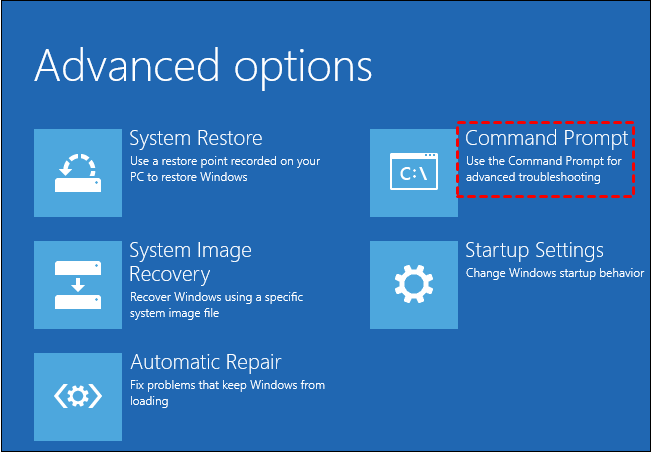
2. Choose “Troubleshoot”> “Advanced options” and then “Command Prompt”.
3. When the Command Prompt loads, execute the following commands in order:
-
bootrec /FixMbr
-
bootrec /FixBoot
-
bootrec /ScanOs
-
bootrec /RebuildBcd
4. Remove the DVD and restart your computer to check if it can boot up successfully.
▸If the above commands do not work, do as below to restore the boot sector code in Windows 10/8:
1. Type “diskpart-> list disk->select disk 0 -> list volume” to check for the EFI partition that was formatted to be FAT32 file system.
2. Check out the volume number of EFI partition. Supposing it is “2”, you need to type the command: “select volume 2”.
3. Type “assign letter= g” or other unused drive letters.
4. When Diskpart successfully assigned the drive letter, you need to type “exit” to close the Diskpart window.
5. Then run the below commands in the Command Prompt window:
-
cd /d g:\EFI\Microsoft\Boot\: replace “g” with the letter you assigned to the EFI partition.
-
bootrec /fixboot: repair the volume.
-
ren BCD BCD.backup: back up the old BCD and recreate a new one.
-
bcdboot c:\Windows /l en-us /s g: /f ALL: recreate the BCD.
At last, remove the DVD and reboot your PC.
If your Windows OS is not installed in C drive, please replace c:\ with your drive letter in above commands.
Free alternative to CMD: fix MBR without Windows CD/DVD
Above is all about how to fix MBR through Command Line using Windows installation CD or DVD. However, if you don’t have one, how can you make it done? Thus, you can switch to the free partition manager-AOMEI Partition Assistant Standard, which helps you to repair damaged MBR without using DVD or CD Instead, you can use this freeware to create a bootable media (USB flash drive) first, boot computer from it and then rebuild MBR in Windows PE environment.
1. Download, install and run AOMEI Partition Standard on a working Windows computer. And plug an empty USB flash drive (over 8GB) to this PC as well.
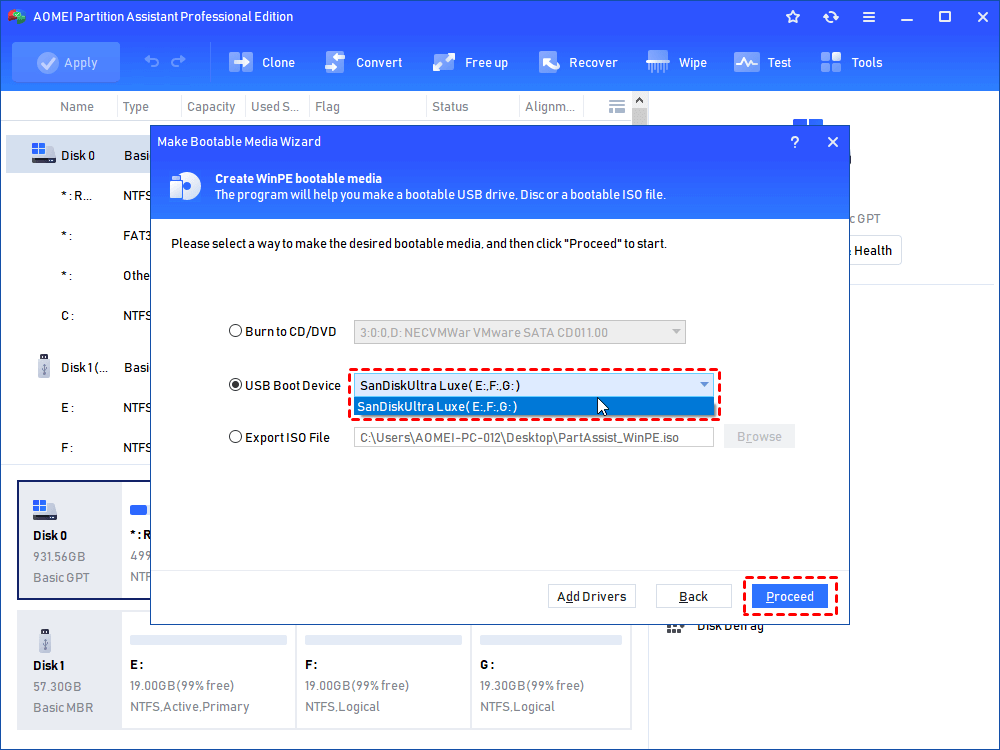
2. In the main interface, click “Tools” in the top toolbar, and choose “Make Bootable Media”.

3. Choose your USB flash drive and click “Proceed”.
4. Wait for the process to be done. After that, connect the bootable USB flash drive into the computer which cannot boot due to damaged MBR. Reboot it and enter BIOS to change boot order to boot computer from the USB flash drive.
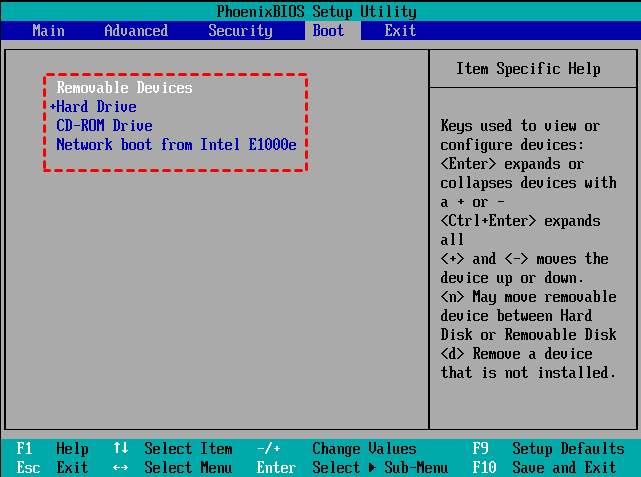
▸To give a USB device boot sequence priority over the hard drive, do the following:
1. Move the hard drive device to the top of the boot sequence list.
2. Expand the hard drive device to display all hard drives.
3. Move the USB device to the top of the list of hard drives.
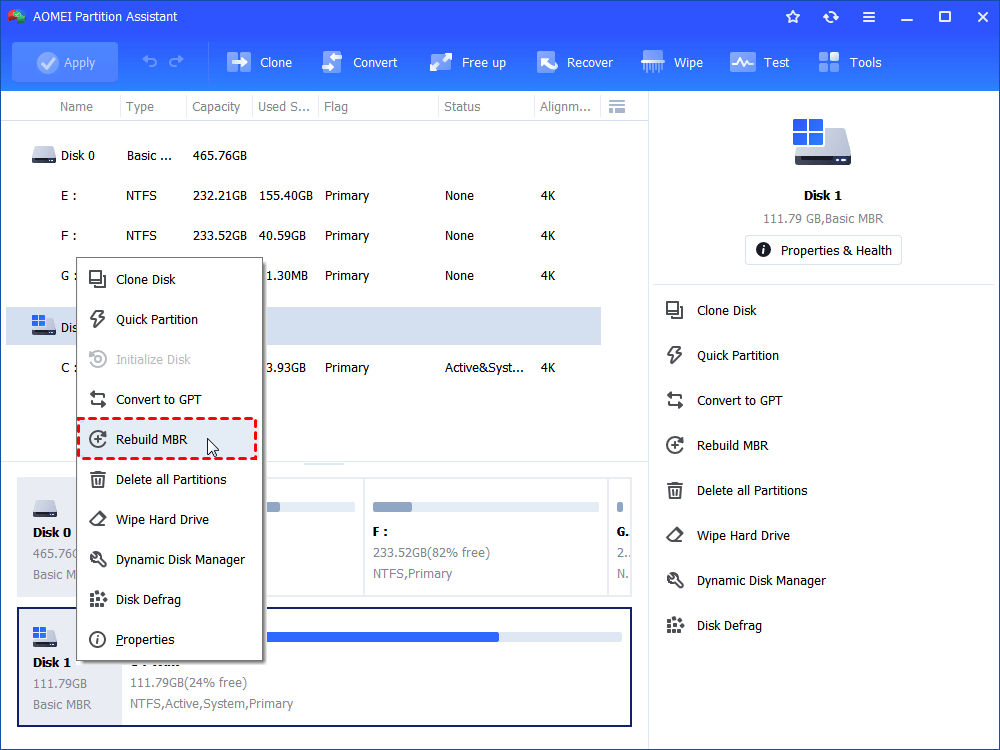
5. Once login, you will see AOMEI Partition Assistant Standard is running. Right click the system disk and select “Rebuild MBR”.
6. Choose a proper MBR type for your current operating system.
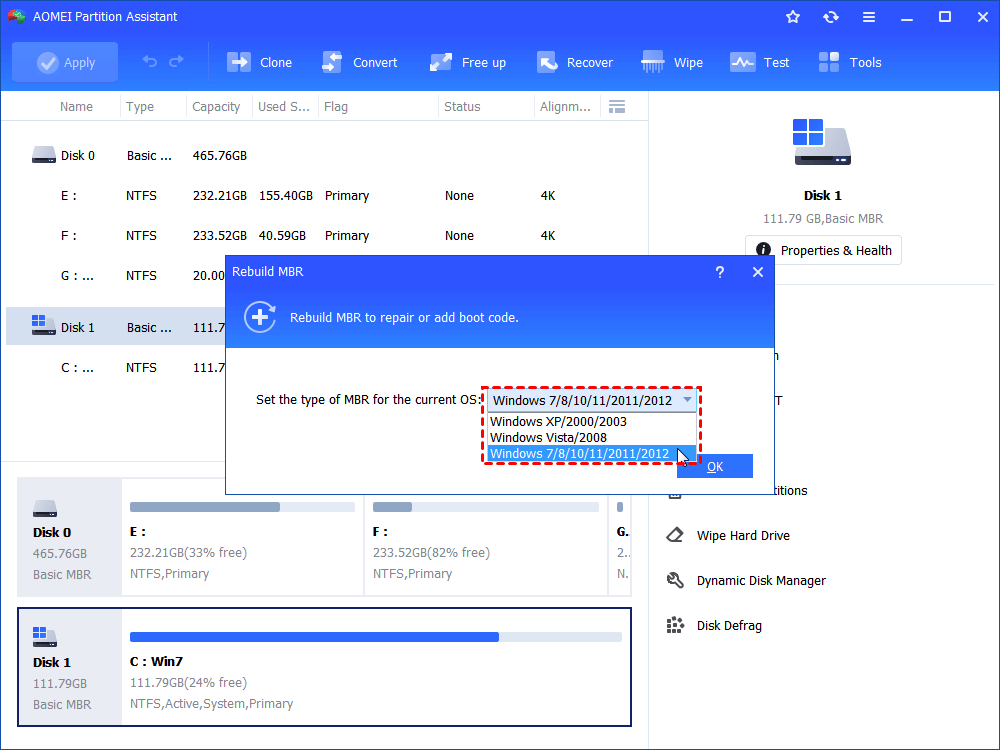
7. Click “Apply” and “Proceed” in the main interface to start rebuilding MBR.
After you have finished all steps, you can restart your computer to check whether your computer can boot normally.
Summary
As you can see, compared with fixing MBR via Command Prompt/DiskPart, AOMEI Partition Assistant Standard is much easier. Moreover, it can fix MBR without using Windows installation CD or DVD, a big bonus for users without enough computer knowledge. Besides, it also has other functions to better manage your disk and partitions such as merging partitions, copying partition to another drive, moving partition, cloning large HDD to smaller HDD/SSD etc.
If you upgrade to AOMEI Partition Assistant Professional, you can enjoy more amazing features including recovering lost data, splitting partition, extending NTFS system partition without reboot, allocating free space from one partition to another.

