How to Solve File Is Too Large to Copy to External Hard Drive Problem?
If the file is too large to copy to external hard drive, you need to know why that happens and find out effective ways to settle that issue.
By Bryce / Updated on May 12, 2023
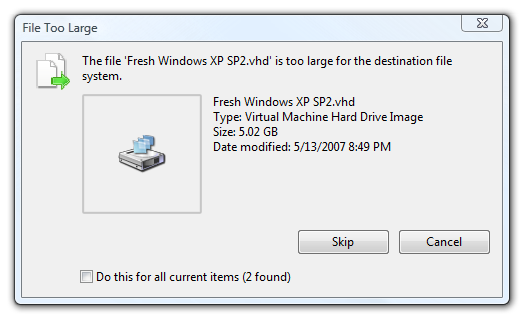
The error: File Too Large
“The capacity of my SanDisk HDD is 256 GB and the disk space is not enough. Therefore, I decided to transfer some files to my external hard drive to get more free space on my SanDisk HDD. At first, the file copy process went smoothly.
But I was prompted by the message that the file is too large for the destination file system when I try to copy the 4.32 GB film to the external hard drive. My external hard drive is formatted as FAT32 and what’s wrong with the file system? If have, what did you do to handle this issue? Is there any suggestion?”
Why can't copy large file to external hard drive?
In fact, the reason that you are unable copy large file to the external hard drive is right the file system of the external disk. Although FAT32 system takes advantages in the aspects of compatibility, it is with limitation in file size. It is not available to store a large file whose size is beyond 4 GB on FAT32 disk.
Thus, it is normal that you are not allowed to copy the 4.32 GB file to your external hard drive. To break this file size limitation and deal with the issue file too large to copy to the external hard drive issue, you can format your external hard drive to NTFS/exFAT file system or convert FAT32 to NTFS file system without losing data.
Three ways to solve file too large to copy to external hard drive
✔ Reformat external hard drive to NTFS
If there is no important data on the external disk, reformatting the disk to NTFS is the simplest way. You can press “Windows + R” Keys at the same time, input “diskmgmg.msc” in the Run Dialog and hit “Enter” to open Disk Management. Then, have a look at the example that formatting external hard drive to NTFS in Windows 10.
1. Right click in the external hard drive and choose “Format”.
2. Choose “NTFS” in the drop-down menu behind file system.
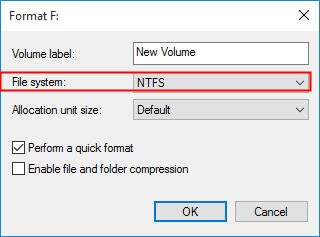
3. You can add volume label to the hard drive partition if you want.
PS.: Formatting will erase all data on the external hard drive, you should back up the data that you are care about before formatting.
If you want to fix the error the file is too large for the destination file system without formatting, you can choose converting external hard drive FAT32 to NTFS without losing data. Here offers you two ways to convert FAT32 to NTFS.
✔ Convert FAT32 to NTFS using Command Prompt [withotu data loss]
Firstly, you can run Command Prompt by opening Run box and input “cmd”. After that, In Command Prompt, you should type “convert n: /fs:ntfs”, where “n” is the external hard drive partition number. Then, press “Enter” to start the converting process.
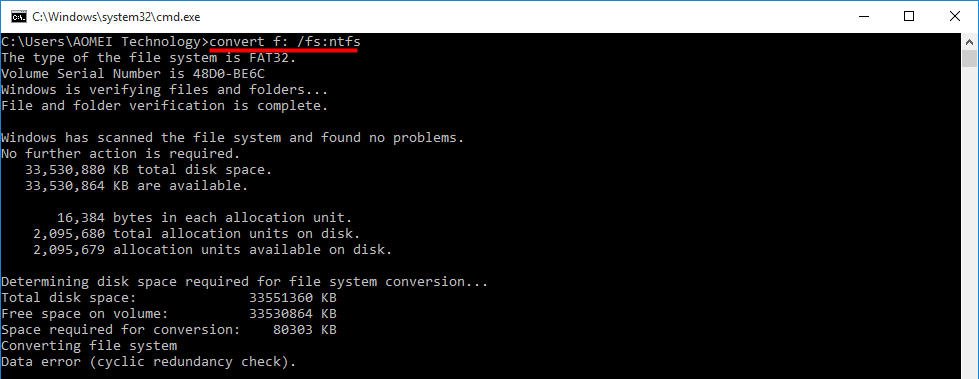
Within a few minutes, FAT32 formatted external hard drive will be converted to NTFS successfully. At this time, you can type “exit” to close Command Prompt.
It seems simply easy to convert FAT32 to NTFS without data loss using Command Prompt in Windows. However, there are chances that you will meet errors like “Conversion failed” or “Volume is not available” during the process of using Command Prompt.
In fact, the failure of conversion from FAT32 to NTFS could be caused by any one of the following problems: low disk space, page file, non-standard cluster, non-continuous volume. It’s not a bad choice to fix the problems and then try to make conversion once more. But it’s more convenient and effective to seek out the help of third party software to convert FAT32 to NTFS.
✔ Convert FAT32 to NTFS via third party GUI tool [withotu data loss]
Here I advise you to try AOMEI Partition Assistant Standard, which is able to change external hard drive, internal hard drive, USB flash drive, SD Card system file from FAT32 to NTFS without data loss. And this powerful software also allows you to convert NTFS to FAT32 back without formatting as you need.
If you ugrade it to Professional version, you can get more functions like allocating free space, converting dynamic disk to basic and so on.
✍ Free download the tool and have a look at how it works:
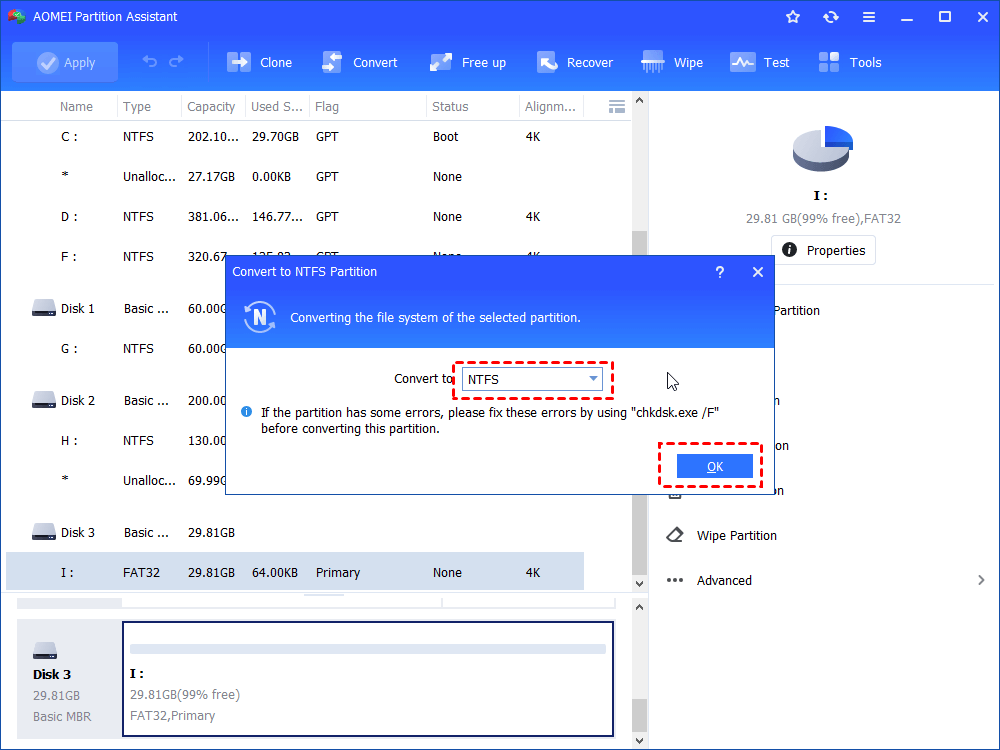
Step 1. Install and run AOMEI Partition Assistant Standard. Right click the external hard drive partition that you want to convert and navigate to “Advanced”>“Convert to NTFS”.
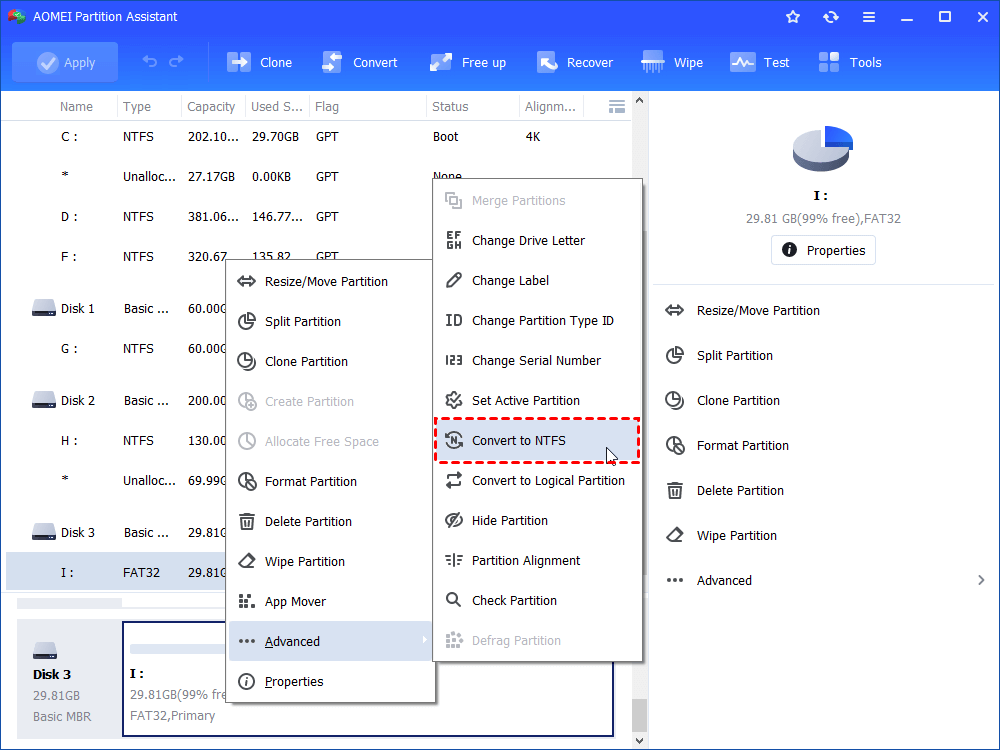
Step 2. The selected partition will be converted to NTFS. Then click on “OK” icon.
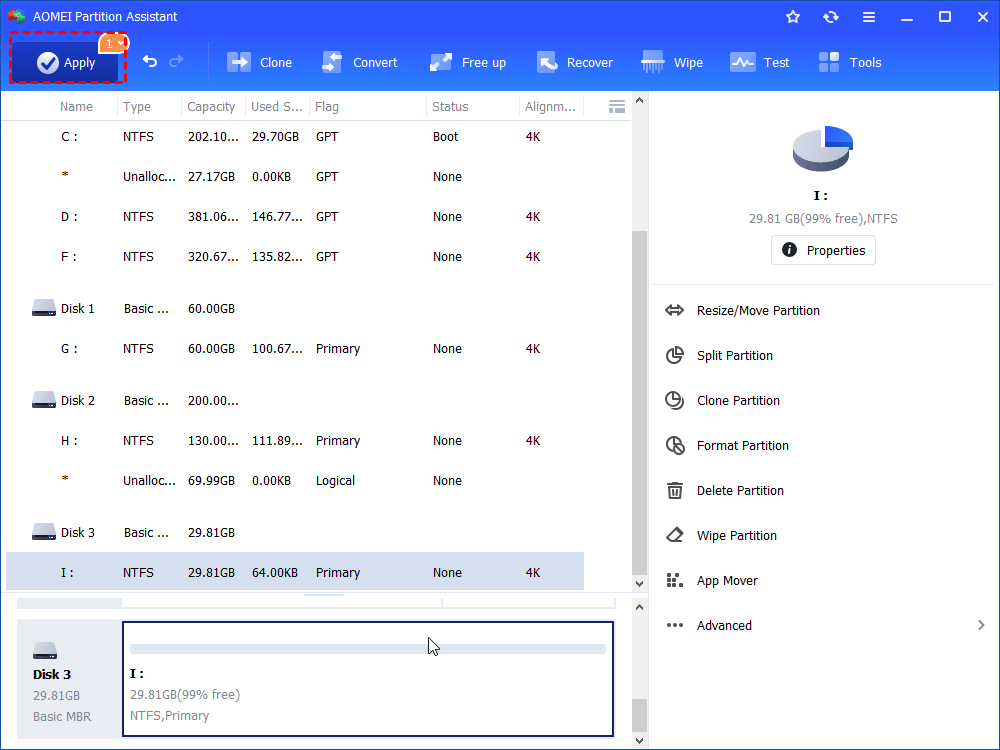
Step 3. Confirm the pending operation and click “Apply”>“Proceed” to perform it.
Notes:
◆ If you need to use the external hard drive for Windows and Mac OS X at the same time, it is available to format FAT32 to exFAT using AOMEI Partition Assistant.
◆ AOMEI Partition Assistant is with high compatibility. It can be applied on Window 7/8/10/11, XP and Vista. If you are using Windows Server OS, you can switch to AOMEI Partition Assistant Server.
In general, all of the ways above to settle file too large to copy to the external drive issue are simple and you can make your own decision according to your need.