How to: Use Diskpart to Clean Partition Only
Want to clean one partition only using Diskpart and keep other partitions intact on the disk? This post illustrates different solutions to clean single partition only.
By Bryce / Updated on January 6, 2025
Can I use Diskpart to clean a partition only?
“I have an external hard drive and it has two partitions (E and F). I know that I can use “clean or “clean all” command in Diskpart to erase all data on the external hard drive. But what I want to do is clean partition E only and keep partition F intact. How can I achieve this goal using Diskpart?
Diskpart clean partition only via “delete partition” command
It’s necessary to realize the difference between “clean” and “clean all” commands. Both of them will delete all partitions on the selected disk and leave it unallocated. However, “clean” command only marks the data as deleted and the data can be retrieved easily via data recovery software; “clean all” command write zeros to the disk, which makes it’s more difficult to recover erased data.
If you want to clean a partition without writing zeros, you can delete the partition only via Diskpart by following those steps:
Step 1. Press Windows + R, input “diskpart” and press Enter.
Step 2. In Diskpart interface, run the following commands in order:
▪ list disk(all the disks on your PC will be listed)
▪ select disk n(“n” is the disk number of the disk that contains the partition you need to clean)
▪ list partition(all partitions on the selected disk will be displayed)
▪ select partition m(“m” is the partition number that you want to delete.)
▪ delete partition
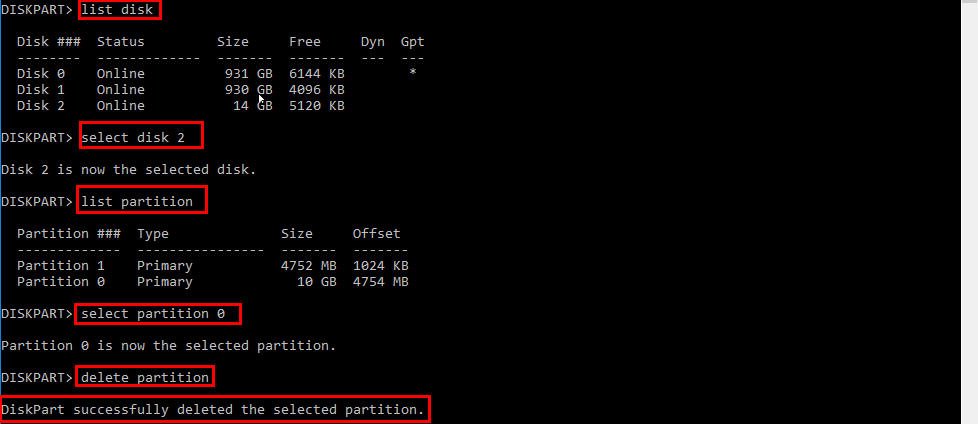
Step 3. After you see Diskpart successfully deleted the selected partition, type "exit", and hit Enter to close this program.
Clean a partition only via a GUI tool [with zero fill]
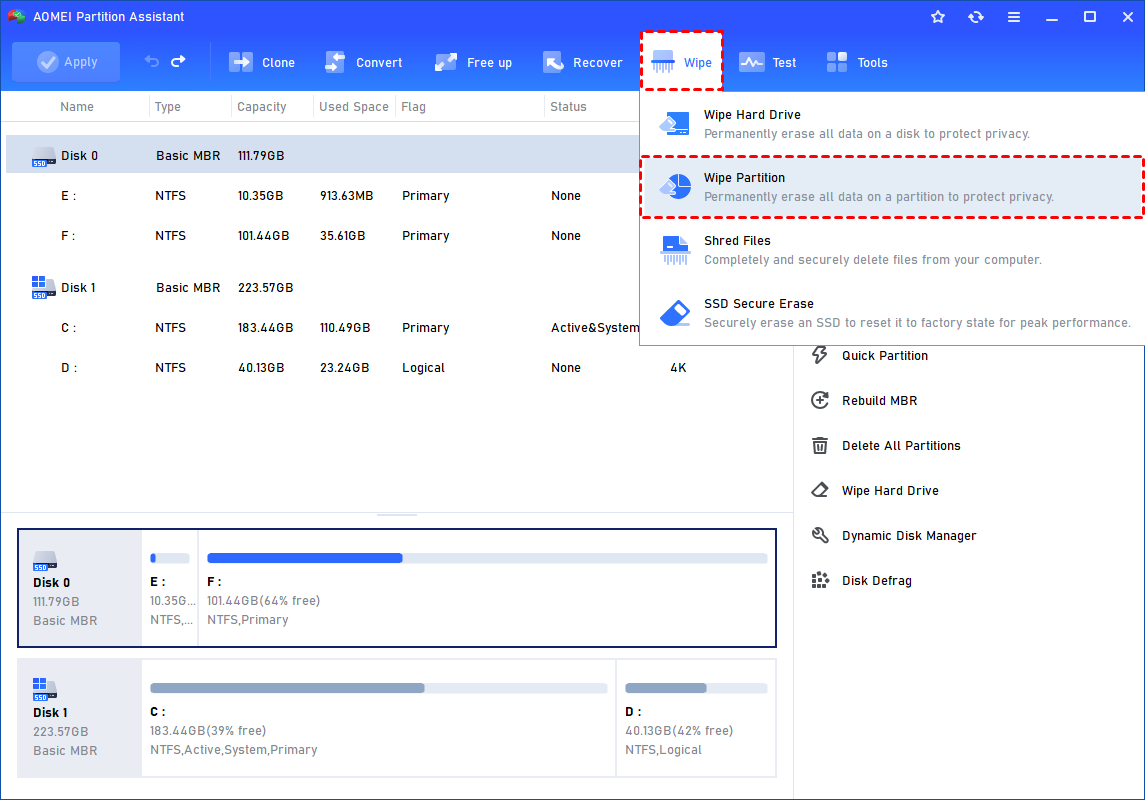
If you need to clean a single partition with zero fill, you can use a third-party free partition tool, AOMEI Partition Assistant Standard. It can complete lots of operations related to partition, including formatting partition, deleting partition, cloning partition, wiping partition, defragging partitions, etc. With an intuitive interface, it’s easy to use. And you can use it to create a bootable USB drive to manage partition when the system is unbootable.
✍ Now, free download the tool and have a look at how to use it to clean a partition only.
Step 1. Install and run the tool. Click the "Wipe" main tab and select "Wipe Partition" option.
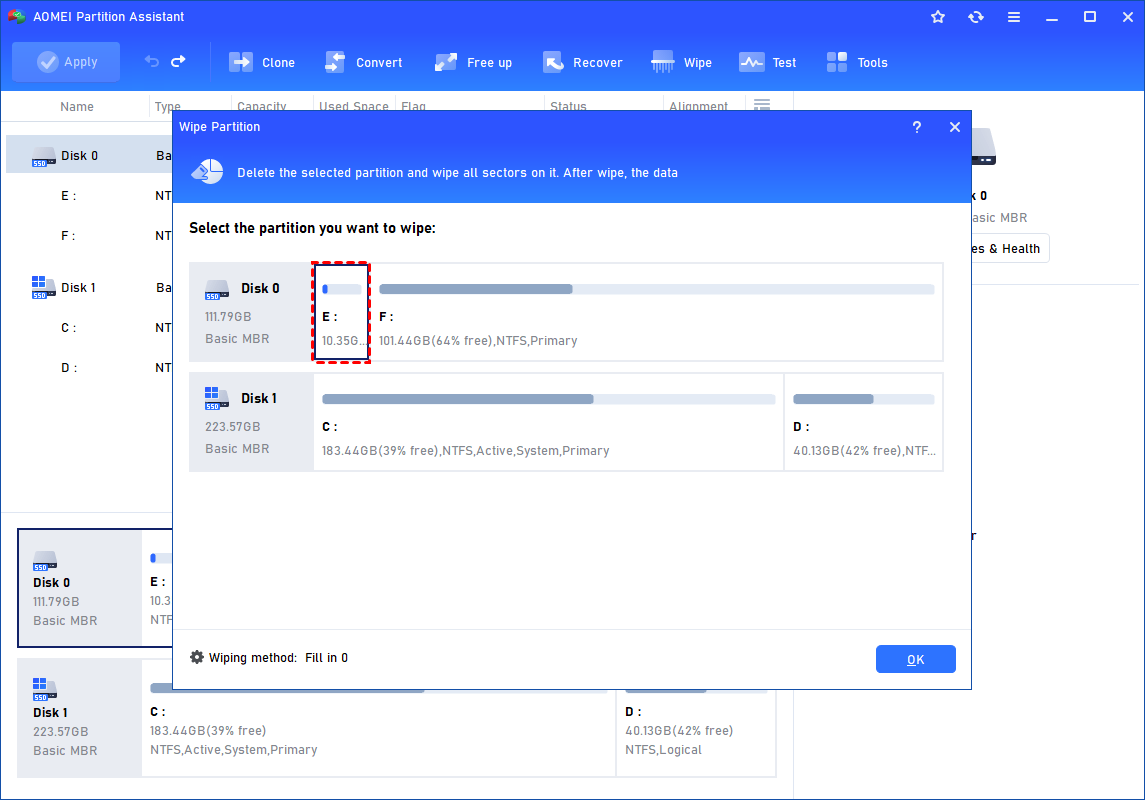
Step 2. Select the partition you want to wipe and click "OK" to continue.
Step 3. In the pop-up window, choose “Fill in 0” and click “OK” to continue.
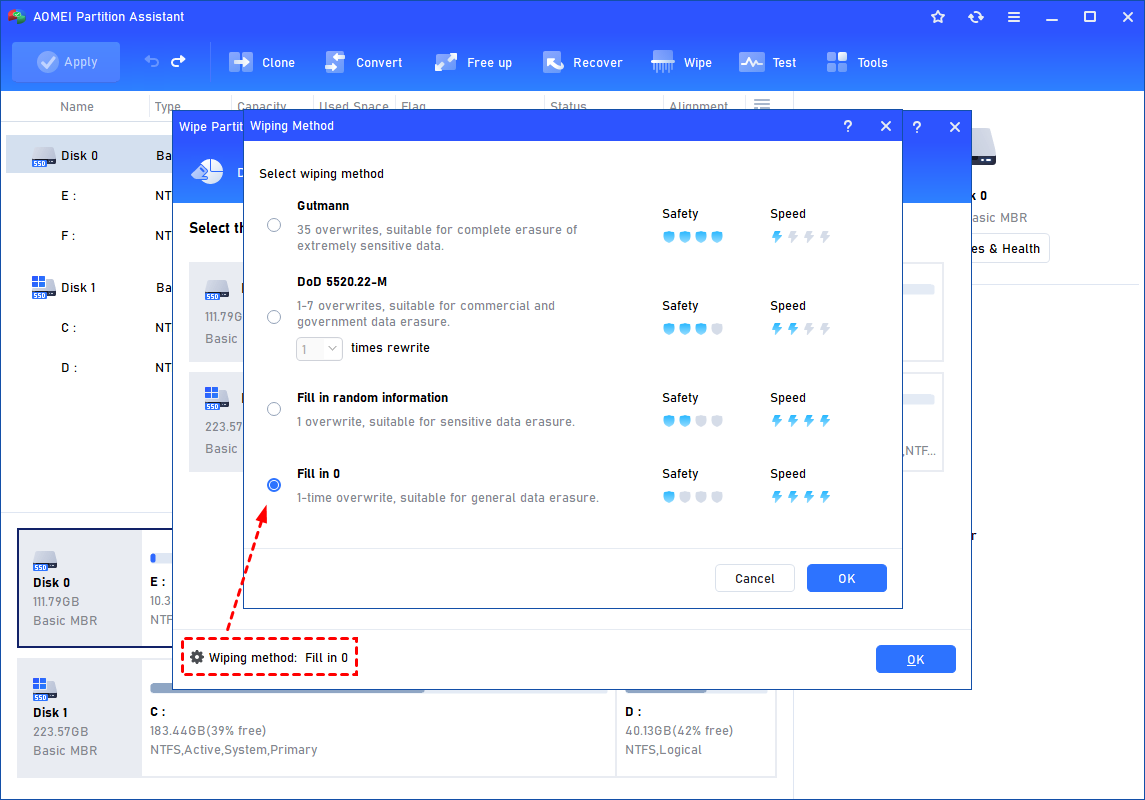
☞ You need to upgrade to the Professional version if you want to use the other three wiping methods:
◆ Fill in random information: Erase the partition and overwrite existing contents with random data.
◆ DoD 5220.22-M: Overwrite with a set of zeros, ones, and random data through 3 passes.
◆ Gutmann: Overwrite the partition with a random character for the first 4 and the last 4 passes and overwrite from pass 5 through pass 31.
Step 4. Click “Apply” and “Proceed” to commit the operation.

Note: To wipe a specific file or some files only, you can use Shred Files function in AOMEI Partition Assistant.
Further reading: perform partition recovery after Diskpart clean command
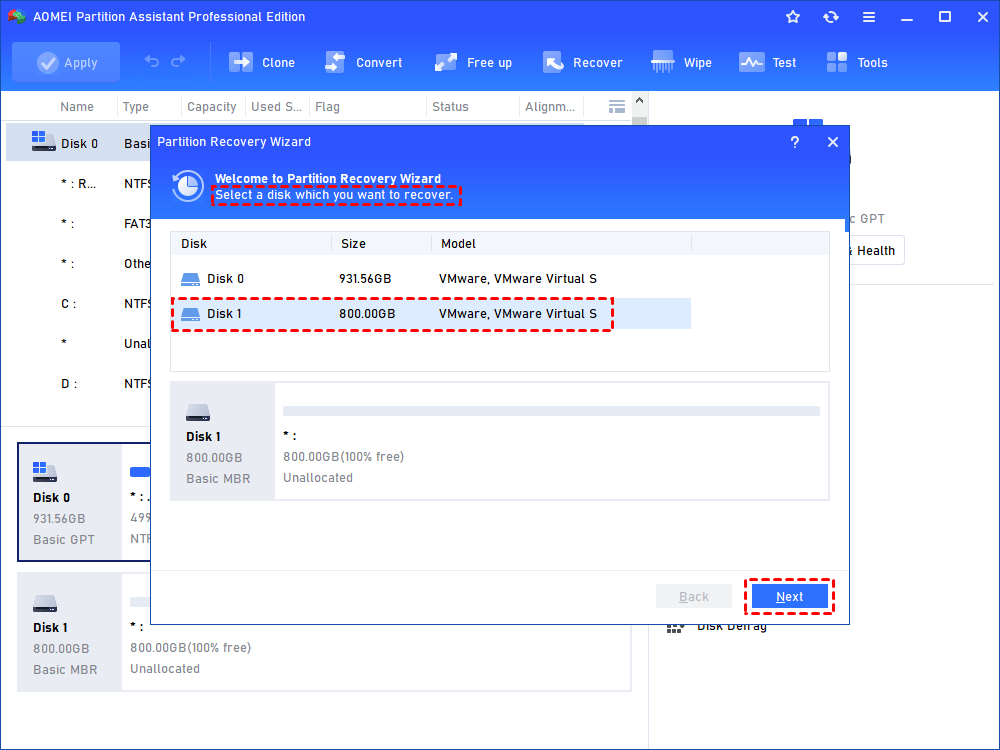
If you have run “clean” command and deleted all partitions on the chosen disk mistakenly and you want to retrieve a certain partition and its data on the disk, you can use AOMEI Partition Assistant Professional to recover deleted partition. Install and run the software. Then, see how it works:
Step 1. On the home interface, click "Recover"> "Partition Recovery".
Step 2. In this window, locate the disk that has been deleted all partition by Diskpart clean command, choose it, and click “Next”.
Step 3. Choose one between “Fast Search” and “Full Search”. Then, click “Next”.
Step 4. Partitions deleted after Diskpart clean command will be listed, choose the partition (s) that you need to restore, and click “Proceed”.
Step 5. When you see Congratulations message saying that the partitions have been recovered successfully. Click “Finish”.
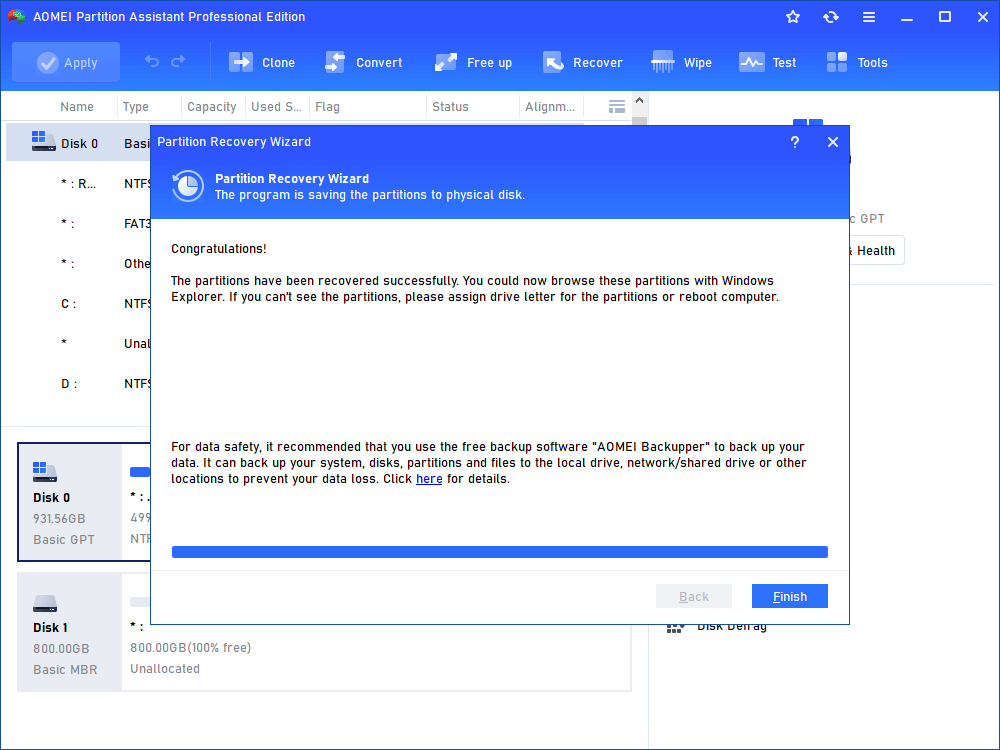
Then, you can see the selected partition (s) recovered and the data saved on the partition (s) come back as well.