3 Methods to Create New Partition in Windows Server
Learn how to create a new partition in Windows Server systems with built-in Disk Management and Windows Server partition manager software.
By Dervish / Updated on December 5, 2024
Content
-
Method 1. Create a new partition in Server with Disk Management
-
Method 2. Create new volume in Server 2025/2022/2019/2016/2012 using Command Prompt
-
Method 3. Create new partition with AOMEI Partition Assistant(recommend)
Why create new partition in Windows Server?
When you have a new Server laptop/computer, usually, you would find there is only C partition in your computer from the File Explorer. But only one partition is always not enough to keep system and data files and applications, then you need to create a new partition in Windows Server 2025/2022/2019/2016/2012/2025 for the following purposes:
● Systematic management: Generally, we put system files in the c partition, and put data files in other partitions. You can create several partitions to save different types of files and data, in case your system, applications and personal files become a mess.
● Backing up files: Well-organized partitions contribute to backing up important files and data. For example, you can create a partition for all of your important files, and clone the partition to another location for backing up those files.
● Retrieving data: It is probable that some important files and folders are deleted by accident one day. A smaller size of a partition ensures faster speed and a higher possibility of recovering data.
● Date safety: That is highly risky if you put all files and data in one partition because once your computer crashes or system files are affected by virus, you might lose them all. On the contrary, if you store them separately, you can format and reinstall the OS, and your personal documents are still there.
● Multiple operating systems: Creating a new partition in Windows Server makes it possible to install other operating systems in your computer because 2 versions of operating system cannot be installed in the same partition.
Thus, to create more partitions is very important to better manage the hard disk in Windows Server. Here, we are going to introduce to you 3 methods of creating new partition in Windows server 2008 (r2)/2012/2016/2019/2022/2025.
How to create new partition in Windows Server
An MBR disk only supports 4 primary partitions, or 3 primary partitions and an extended partition which can contain an infinite number of logical partitions, while a GPT supports 128 primary partitions.
Tip: You can click: MBR vs GPT to know more about their major difference.
Method 1. Create new partition in Server with Disk Management
Disk Management is a Windows built-in tool that enables you to manage hard disks and partitions or volumes. Complete steps to create a new partition in Server Disk Management are listed:
Step 1. Right-click on “This PC” and choose “Management”. And go to “Disk Management”.
Step 2. Right-click on “Unallocated space” and choose “New Simple Volume”.

✍ Notes:
-
If your disk is MBR disk, and there are already 4 primary partitions, the “New Simple Volume” option would be grayed out. To create a new partition, you can convert one primary partition to logical firstly.
-
If there isn’t any unallocated space, right-click on an existing partition, and choose “Shrink Partition” to get an unallocated space.
Step 3. It pops up “New Simple Volume Wizard”, just click “Next”.

Step 4. Input the desired size of the partition, and click “Next”.

Step 5. Assign a drive letter and click “Next”.

Step 6. You can format the new partition to different file system: exFAT, NTFS, FAT, FAT32, and custom the allocation unite size, or set it to default. Then click “Next”.

Method 2. Create new volume in Server 2025/2022/2019/2016/2012 using Command Prompt
Command Prompt is a command-line interpreter application in most Windows systems. You can execute several commands to automatically perform lots of functions, and troubleshoot certain issues. And Command Prompt is also a great tool to create a new partition in Windows Server. Here are the detailed steps:
✍Attention: Using Command Prompt to create a new partition will clean the disk. If there are some important data on the disk, please back up the disk beforehand.
Step 1. Press “Win + R” and type “cmd” on the Run box, and press Enter to open Command Prompt.
Step 2. Type “diskpart” in Command Prompt and hit Enter to open Disk part window.
Step 3. Type and execute the following commands in the Command Prompt.
● list disk
● select disk n (replace the n with the disk which you want to create partitions in)
● clean
● Create partition primary size=10000 (If you want to create an extended partition, change the primary to extended. And the 10000 is the size of the new partition, you can also input other numbers)
● assign letter=F (choose a drive letter for the partition)

This is how to create a new partition in Windows Server with Command Prompt. This method can work, but it is not widely used by Server users, because the commands are complicated to remember for them. It is easy to type the wrong disk or partition number. As a result, they might lose important data. So, is there any easier way to create a new partition?
Method 3. Create new partition via AOMEI Partition Assistant Server
The easiest way to create a new volume in Server 2008 (r2)/2012/2016/2019/2022/2025 is to use a third-party Server Disk Manager such as AOMEI Partition Assistant Server Edition. It is a versatile utility to manage disks and partitions for Windows Server as well as Windows 11/10/8/7/XP users.
This tool can create partition not only from unallocated space but also directly using another existing partition in Windows Server. Moreover, it also offers lots of other functions, like split partition, resize partition, shrink partition, and move partition.
Download AOMEI Partition Assistant Server Demo and see how to create new partition in Server via AOMEI Partition Assistant Server step by step.
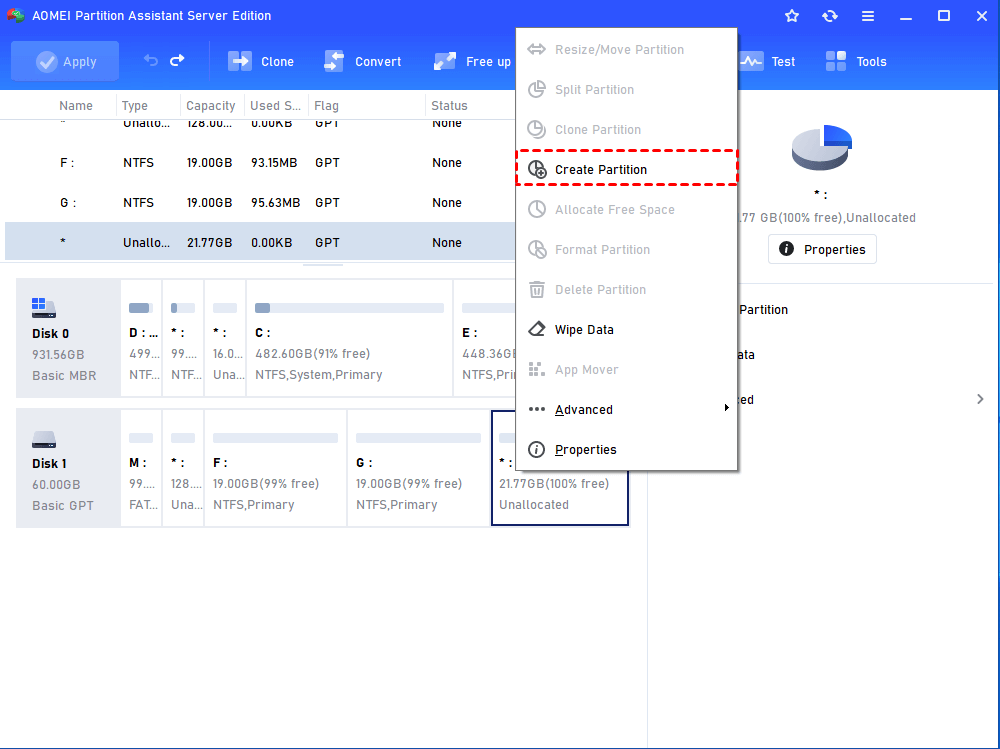
Step 1. Install and launch AOMEI Partition Assistant Server, and right-click the unallocated space or a partition with enough free space.
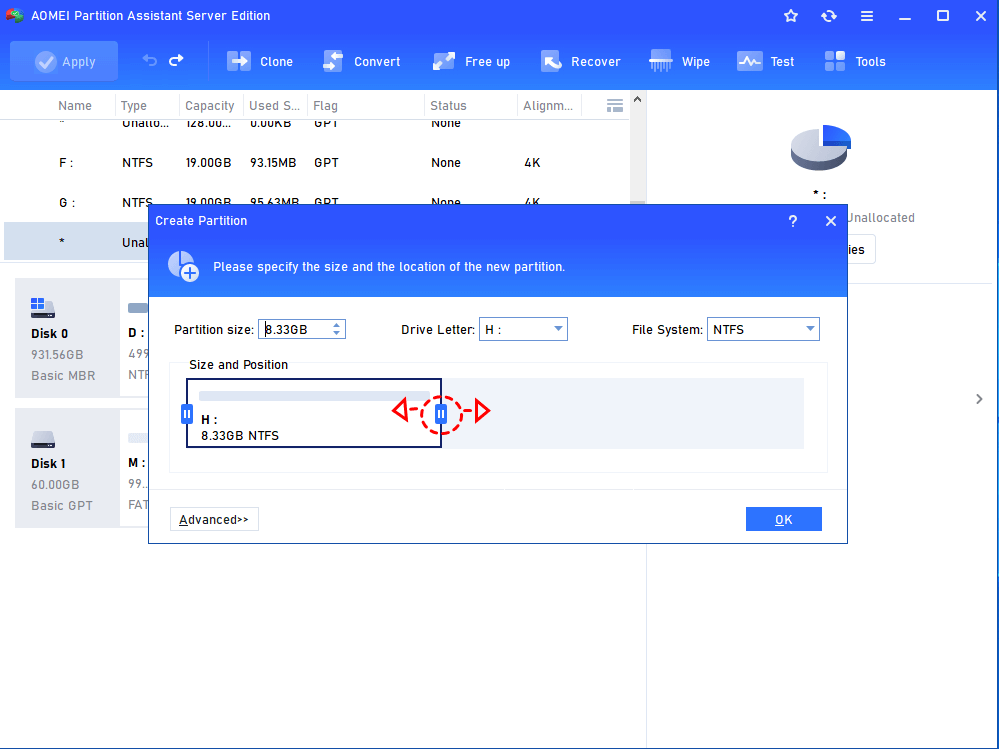
Step 2. Specify the size, file system and drive letter of the new partition. And click “OK”
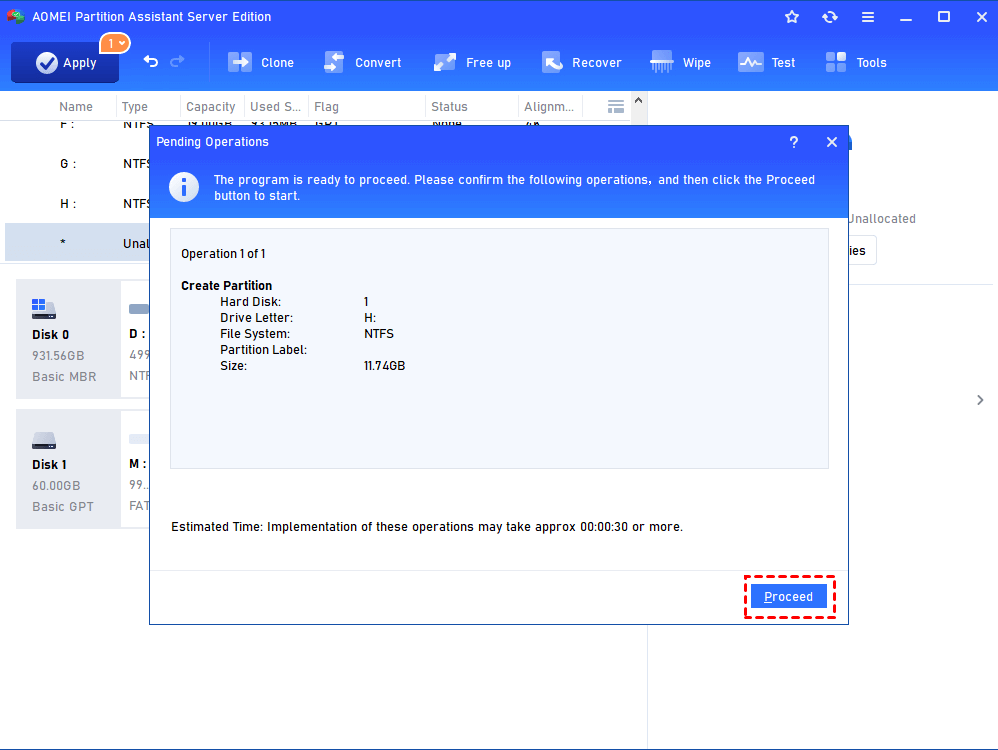
Step 3. In the main interface, click “Apply” and view the operation and click “Proceed” to start create a new partition.
- ★Tip:
- There is an AOMEI Partition Assistant Unlimited Edition for you if you want unlimited usage within one company. And a great function, "Create Portable Version" is available in AOMEI Partition Assistant Unlimited. The function enables users to create AOMEI Partition Assistant to a removable device so that users can directly run it on target computers without installing.
Conclusion
So many methods of creating new partition in Windows Server are introduced in this page. By contrast, AOMEI Partition Assistant Server is a much easier way to create a new partition, at the same time you don’t need to format your disk and take the risk of data loss. All you need to do is just a few clicks.
Besides, AOMEI Partition Assistant also provides other functions, like allocating free space from one volume to another and merging partition. If your disk is an SSD, you can perform 4K align partition that can improve the read/write speed of SSD.