[Full Guide] How to Change the Default Folder in File Explorer
You can learn to change the default folder in File Explorer with our guide. This tutorial also provides an easy alternative if you find the methods are too complicated.
By Irene / Updated on March 28, 2025
Would you like File Explorer to open to a specific folder instead of the default Quick Access? By default, File Explorer launches to Quick Access, where you can easily access frequently used folders and recent files. While this is convenient for many users, some prefer to set a different default folder.
If you want to change the default folder in File Explorer, you’re in the right place. Windows allows you to switch to "This PC" through the built-in settings, but if you’d like to choose a custom folder, you’ll need to use other methods. This guide will introduce some effective ways to modify File Explorer’s default folder.
How to change the default folder in File Explorer?
Need to change your default folder location in Windows? You can choose from 3 simple methods: adjust paths via File Explorer settings, modify the Registry for advanced users, or simplify the process with tools like AOMEI Partition Assistant. Pick the method that suits you best!
The Best Windows Disk Partition Manager and PC Optimizer
Way 1. Run File Explorer
Changing the default folder path in Windows File Explorer is simple. This guide will show you how to move default folders like Documents, Downloads, or Pictures using built-in Windows tools. By following these steps, you can smoothly transfer your files while keeping everything intact—just make sure to create the target folder beforehand to avoid any issues.
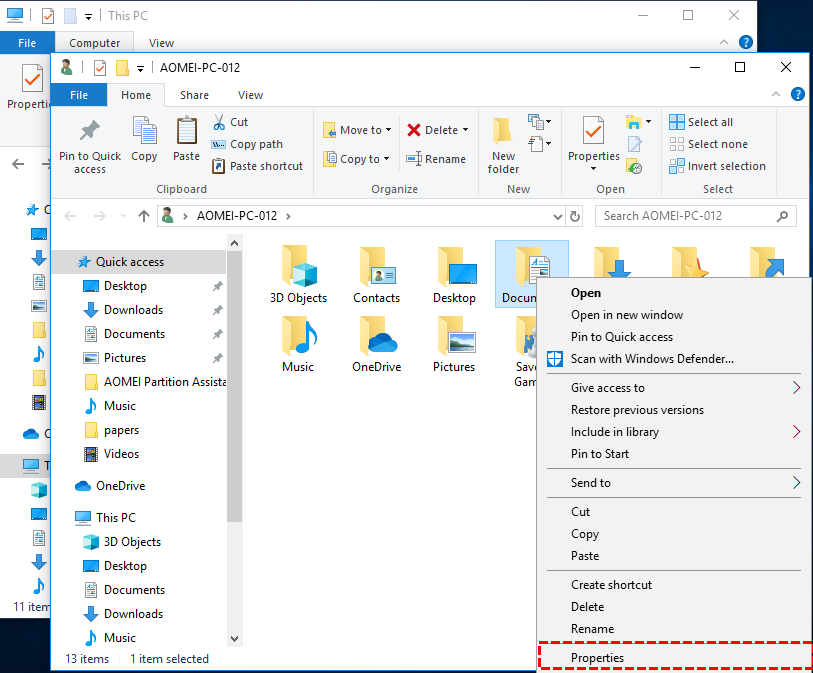
Step 1. Press"Windows + E" together to open "File Explorer".
Step 2. Right-click files or folders and choose "Properties".
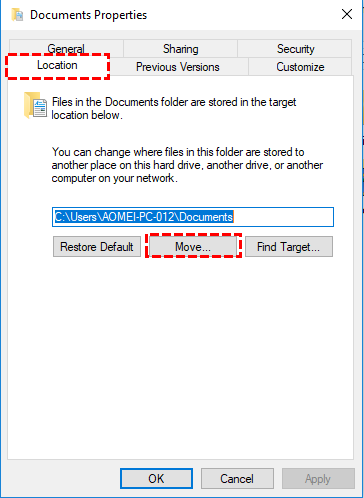
Step 3. In the "Document Properties" window, click "Location" tab and then choose "Move".
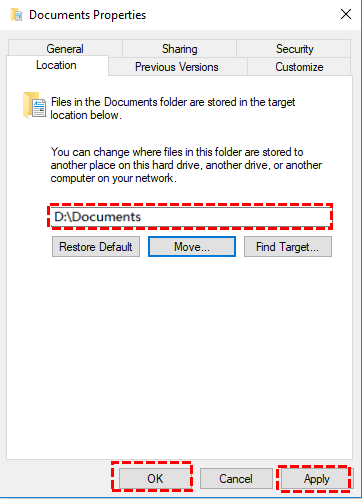
Step 4. Now, choose another drive as a destination location, and click "Apply" to finish the process. (You need to create folders with the same name in the target location beforehand, otherwise, the movement may fail or the data may be lost.)
Way 2. Use the Windows Registry
Besides running the File Explorer, you can also edit the Windows Registry. It is a database that stores low-level settings for Windows and installed applications. It contains keys and values that control various system behaviors, including File Explorer’s default folder. However, this utility will be problematic at times. If you encounter broken registry items, you can click to read how to fix it. Now, if you want to change the default folder in File Explorer, you can follow these steps:
Step 1. Press "Windows + R" at the same time to open the Run box.
Step 2. Input "regedit" or "regedit.exe" and click "OK" to run Registry Editor window.

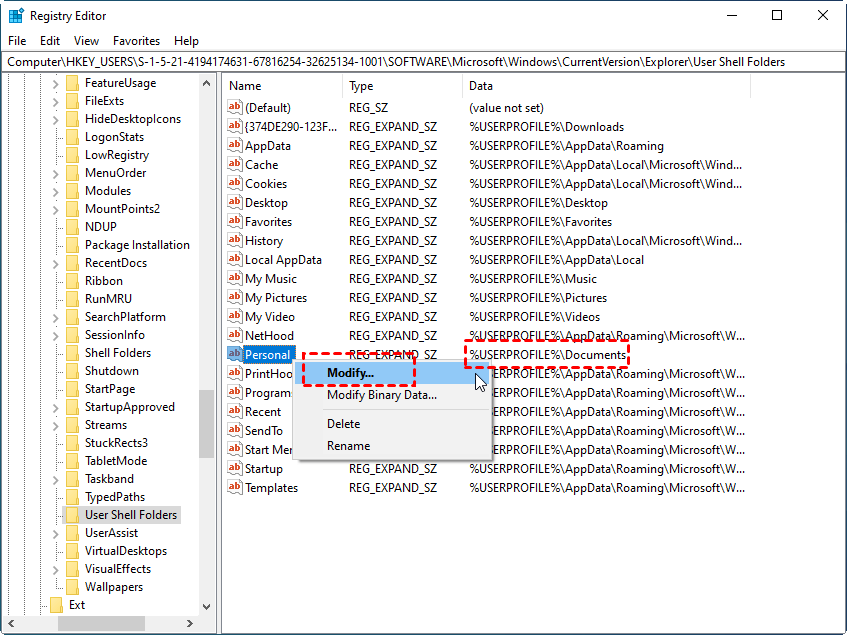
Step 3. Follow the path "HKEY_LOCAL_MACHINE \ SOFTWARE \ Wow6432Node \ Microsoft \ Windows \ CurrentVersion" and you will see all the User folders are listed.
For Windows 7/8/8.1: "HKEY_LOCAL_MACHINE \ SOFTWARE \ Microsoft \ Windows \ CurrentVersion"
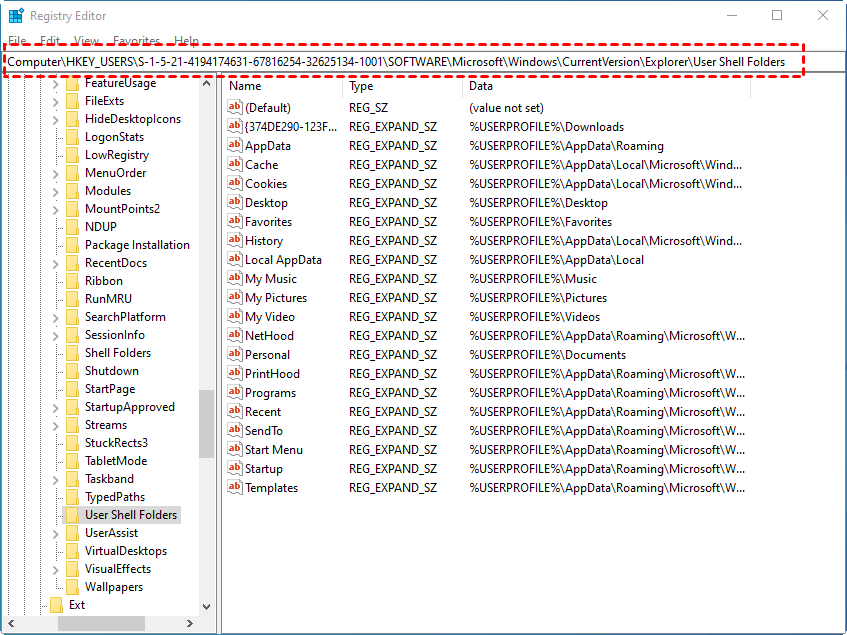
Step 4. Find the data or string named "%USERPROFILE%\Documents" (here we take Documents as example), right-click it and then choose "Modify".
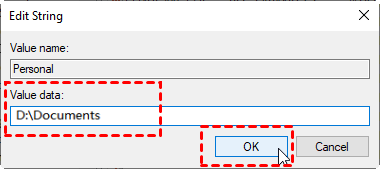
Step 5. Now, under "Value data", type the new location or path as you like (e.g. "D:\Documents") and click "OK". (You need to set the new folders in advance.)
Step 6. Close Registry Editor and restart your computer to see if it's done.
Way 2. Use a handy tool
While the method above is effective, it involves multiple steps, which can be a bit complex for some users. For a more convenient solution, you might consider using AOMEI Partition Assistant, a user-friendly tool designed for Windows 11, 10, 8, and 7. Its "App Mover" feature allows you to easily transfer folders between partitions or even to an external drive. Best of all, it automatically updates the file path, so you won’t need to make any manual changes. By the way, if you want to free up space, this feature also supports moving installed programs to another drive without any data loss.
If you'd like to give it a try, you can download it and follow the steps to move default folders in Windows to another drive with ease.
The Best Windows Disk Partition Manager and PC Optimizer
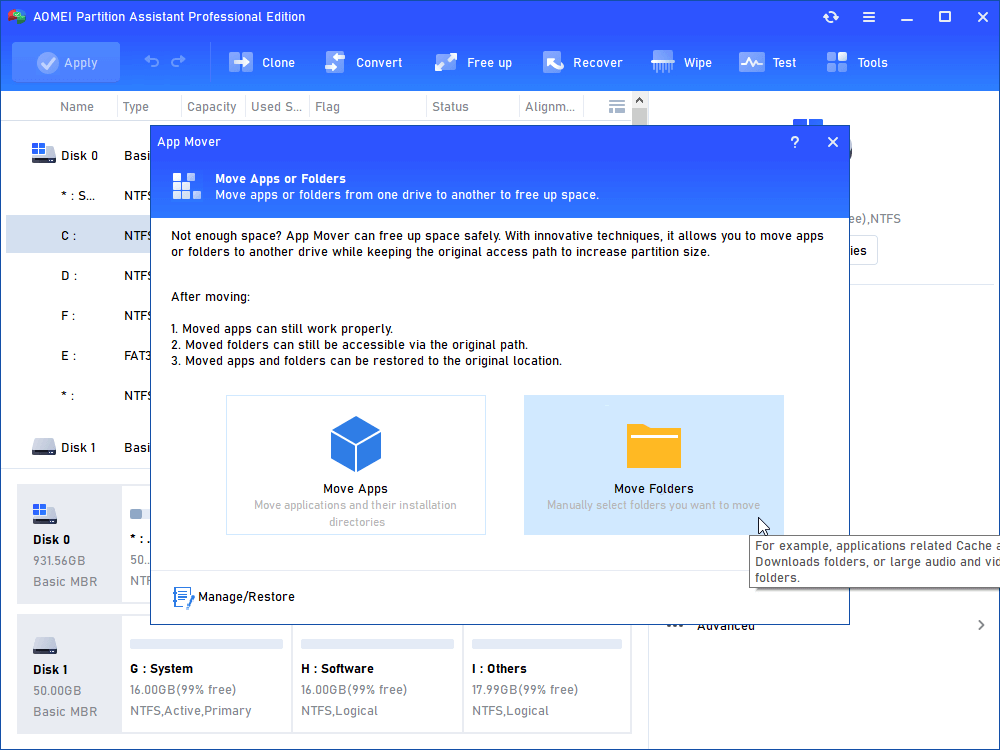
Step 1. Install and run AOMEI Partition Assistant, click "Free up" on the top panel and then choose "App Mover".

Step 2. In the new window, click "Move Folders".
Step 3. Select the folders you want to move and choose the location drive under the window, and click "Move". Please make sure the target drive has sufficient free space to store your folders, if not, extend the partition can help a lot.

Step 4. You will see a pop-up message to confirm forcibly closing running applications when moving starts. Click "OK" to begin Windows 10 move default folders to another drive.

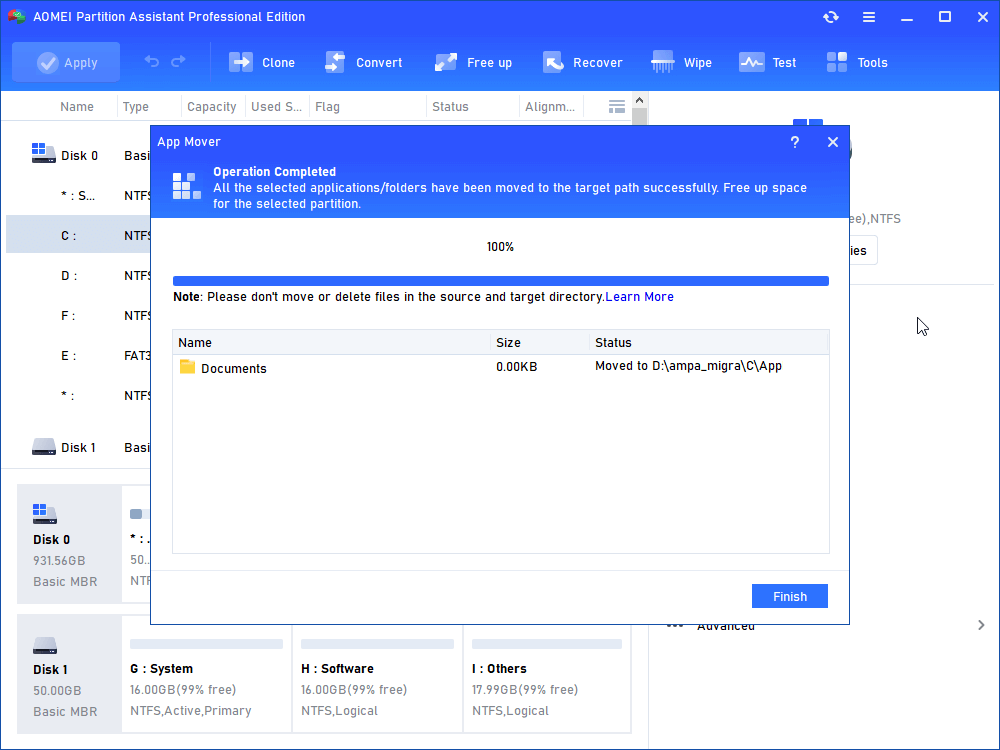
Step 5. Wait for a while, and click "Finish" .
Further reading: What to do if lost important data when editing Windows Registry?
Incorrect Windows Registry edits risk data loss by destabilizing the system or blocking data access. The Registry controls key system and app settings. If you edit or delete the wrong parts, your computer might crash, apps could stop working, or user profiles might break. Your files aren’t stored in the Registry, but these errors can block access to your data. Fixing the problem might require reinstalling Windows or formatting the drive, which could accidentally erase files.
How can you recover lost data in this situation? AOMEI Partition Assistant is also a professional and user-friendly data recovery tool. It supports recovering documents, emails, photos, videos, audio files, and more from external hard drives, USB flash drives, CDs/DVDs, and other storage devices.
For data recovery on an unbootable computer, a bootable media is required. This version includes the PC Crashed Recovery feature, which allows you to start your PC and retrieve lost files. However, if your computer is functioning normally but you’ve lost some files, you can directly run it. It enables you to scan your drives, view recoverable files, and restore them with ease.
The Best Windows Disk Partition Manager and PC Optimizer
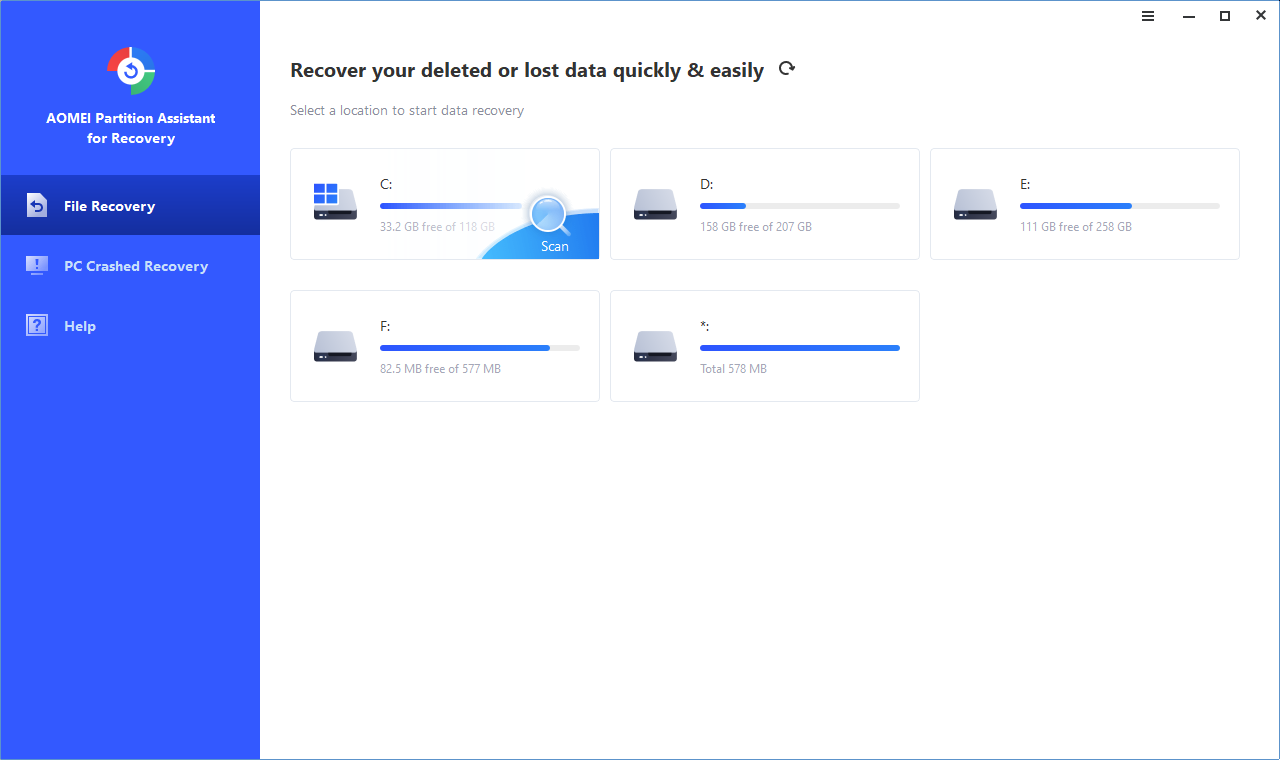
Step 1. Locate and click on the options labeled "Recover" and "Recover Data".

Step 2. Identify the partition where the lost files were originally stored. Initiate the scanning process by clicking on "Start Scan".
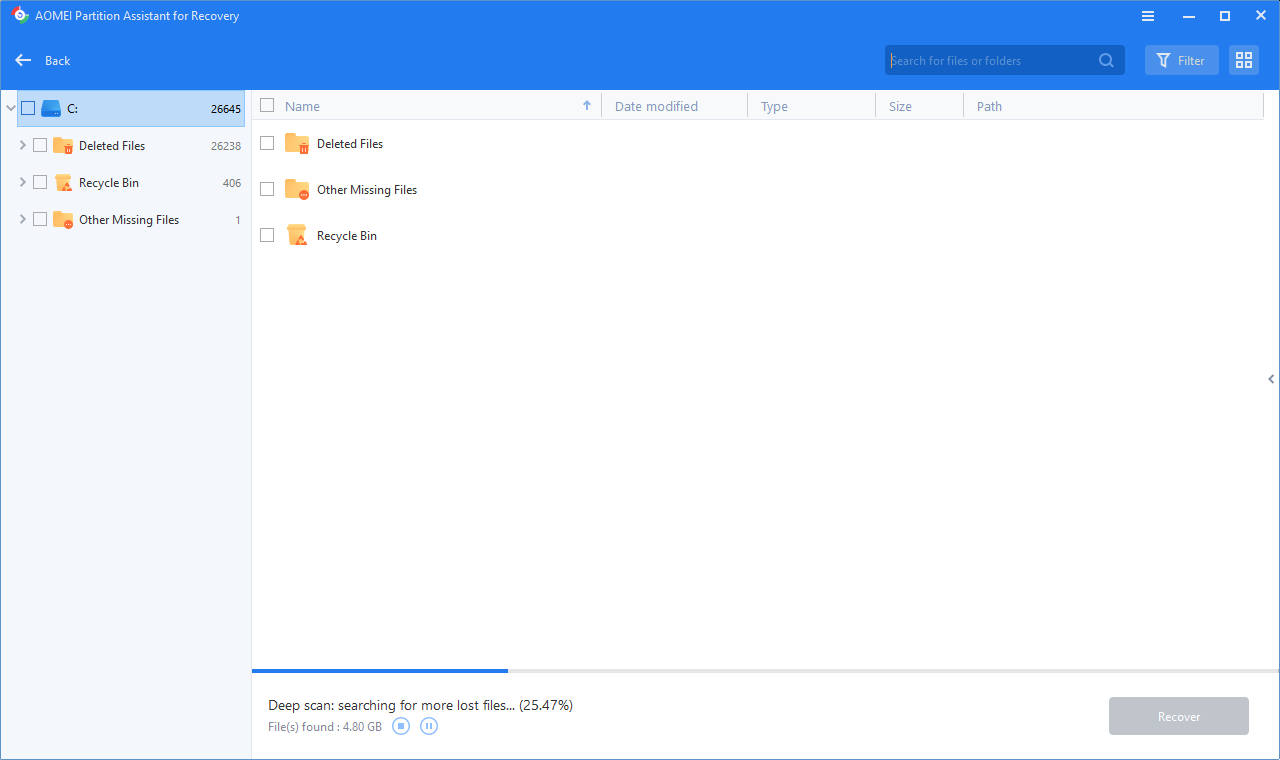
Step 3. A comprehensive list of deleted files will appear. Select the specific files you want to recover and click on the "Recover" button.
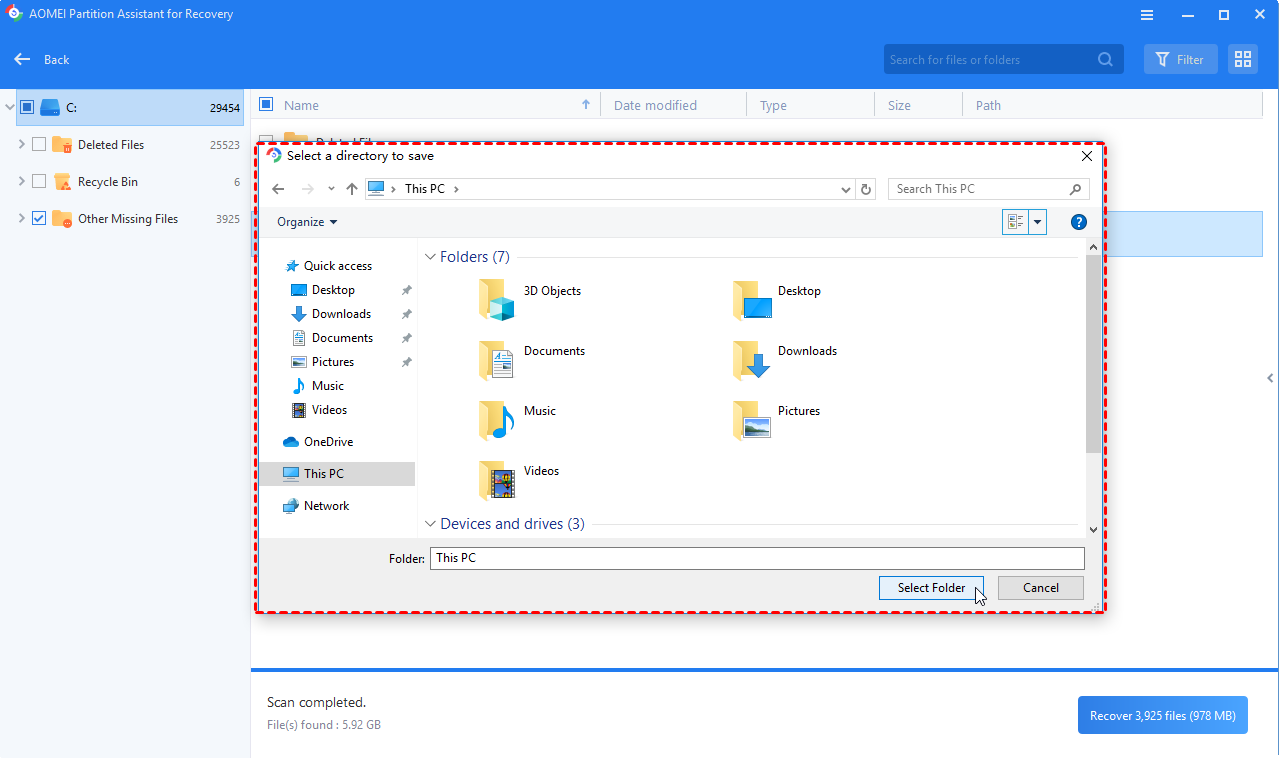
Step 4. Choose a destination folder path to save the recovered files. Proceed by clicking on "Select Folder".
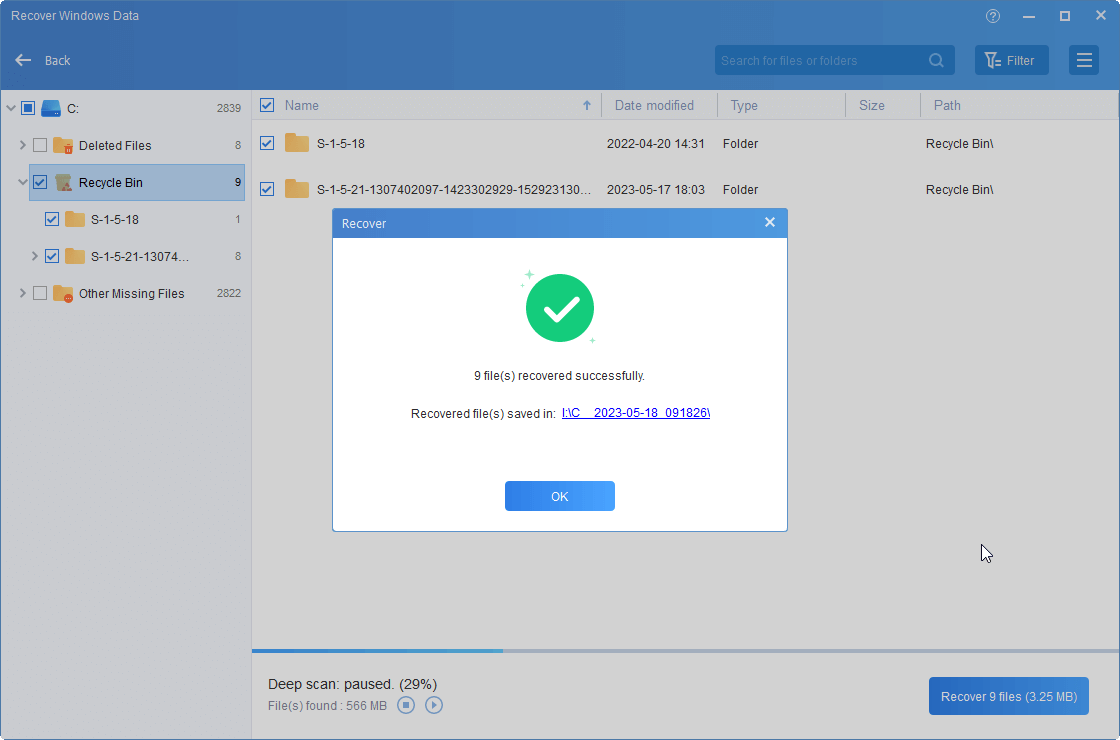
Step 5. Once you see the window below, it indicates that the lost files have been successfully recovered. Simply click "OK" to finish the task.
Conclusion
Changing the default folder for File Explorer can help you access your preferred files more quickly. Whether you use the Windows Registry method or a tool like AOMEI Partition Assistant, both options provide effective solutions. Just be cautious when modifying the Registry to avoid potential data loss. If needed, data recovery tools can help restore lost files.

