Bootable USB Maker - Create Windows 10/8/7 Bootable USB Easily
Here will introduce you a great bootable USB maker - AOMEI Partition Assistant, which allows you to create Windows 10/8/7 bootable USB easily.
By Cherry / Updated on May 12, 2023
What a bootable USB can do for you?
Many Windows users would like to create a bootable USB. Well, what a bootable USB can do for you? Here we list some advantages of bootable USB drive, with a bootable USB stick, you can do the following things:
1. Install or upgrade Windows;
2. Test out the desktop experience without touching your PC configuration;
3. Boot into Windows on a borrowed machine or from an internet cafe;
4. Use tools installed by default on the USB stick to repair or fix a broken configuration.
Thus, it is necessary to create a bootable USB drive in a certain way. Here is the question, how to create a bootable USB drive? Is there any bootable USB maker?
How to create bootable USB drive?
As a Windows user, you may know that you can create bootable USB drive via the command-line utility - Diskpart. Do as the following steps:
1. Insert a USB flash drive into a running computer. Press Windows key + R key to open Run dialog, and type cmd and press Enter to run the Command Prompt window as an administrator.
2. In the command prompt window, type diskpart and press Enter to open diskpart window.
3. Type list disk and press Enter. It will list all disks on the computer. Note the drive number or drive letter of the USB flash drive.
4. Type select disk N and press Enter. N is the drive number or drive letter of the USB drive.
5. Type clean and press Enter. It will delete all data on the USB drive.
6. Type create part pri and press Enter to create a new primary partition on the USB drive.
7. Type select part 1 and press Enter to select the partition you just created.
8. Type format fs=ntfs quick and press Enter to format the partition as NTFS file system.
Note:
If your platform supports UEFI, you should format the USB flash drive as FAT32 rather than as NTFS. To format the partition as FAT32, type format fs=fat32 quick, and then press Enter.
9. Type active and press Enter.
10. Type exit and press Enter.
11. When you finish preparing your custom image, save it to the root of the USB flash drive.
As so far, you have already created a bootable USB drive.
Choose bootable USB maker
It is clearly to see that using Diskpart to create bootable USB drive is complex and you may face the problem that cannot boot from the USB drive. Thus, here we highly recommend you to choose a bootable USB maker, for creating bootable USB drive easier than Diskpart.
AOMEI Partition Assistant Professional should be the best bootable USB maker:
1>. It is suitable for Windows 11/10/8/7/Vista/XP users.
2>. It allows you to create bootable USB drive with only mouse-clicking rather than typing so many commands.
3>. Its concise interface make things easier that anyone can use it light-hearted.
4>. The bootable USB created by AOMEI Partition Assistant has embedded all features of AOMEI Partition Assistant, when you boot from the USB drive, you can use AOMEI Partition Assistant to repair or fix a broken configuration.
Well, how to create bootable USB flash drive with this bootable USB software?
Note:
If you are Windows Server users, you should try AOMEI Partition Assistant Server Edition, which is specially designed for Server 2003, 2008, 2012, 2016, 2019, etc.
Steps of creating bootable USB drive with the bootable USB maker - AOMEI Partition Assistant
Using AOMEI Partition Assistant to create bootable USB drive is very simple. Do as the following steps:
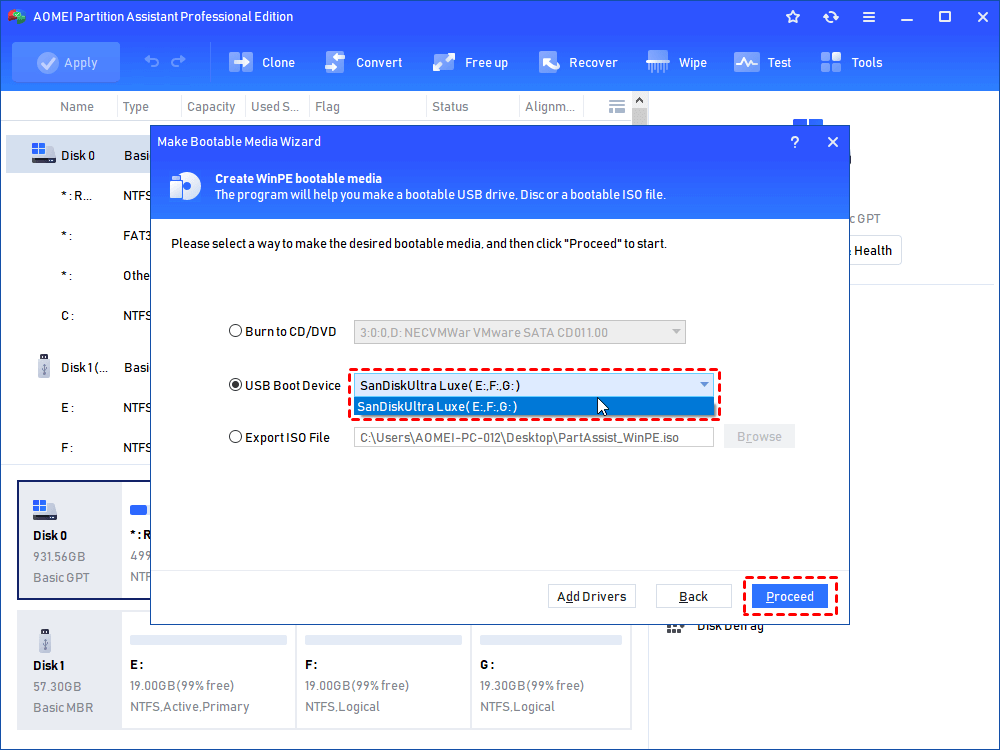
Step 1. Connect the USB drive to a computer based-on Windows. Install and launch AOMEI Partition Assistant. In the main interface, click Tools> Make Bootable Media in the top pane. You will get into the Make Bootable Media wizard, click Next.

Step 2. Here you can choose to make the desired bootable media, here we choose USB Boot Device, click Proceed.
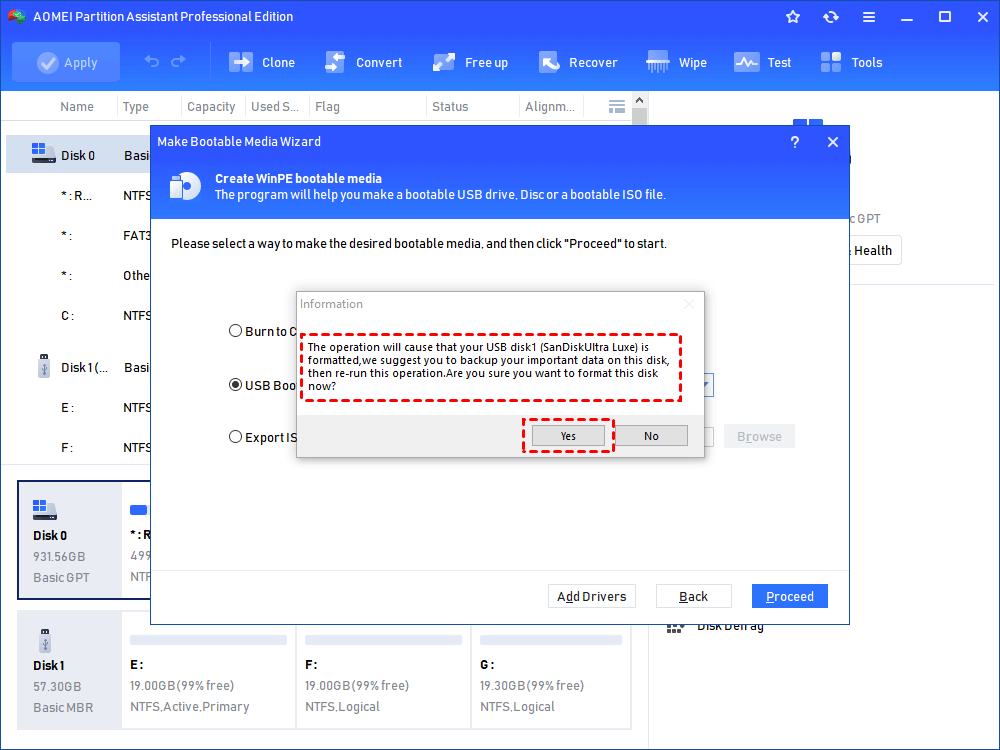
Step 3. You may get the warning that the operation will format the USB drive and all data on the USB drive will be erased. Thus, if you have any important data on the USB drive, backup files on USB drive in advanced. If no, click Yes to continue.
Step 4. Then, you can wait till the progress finished.
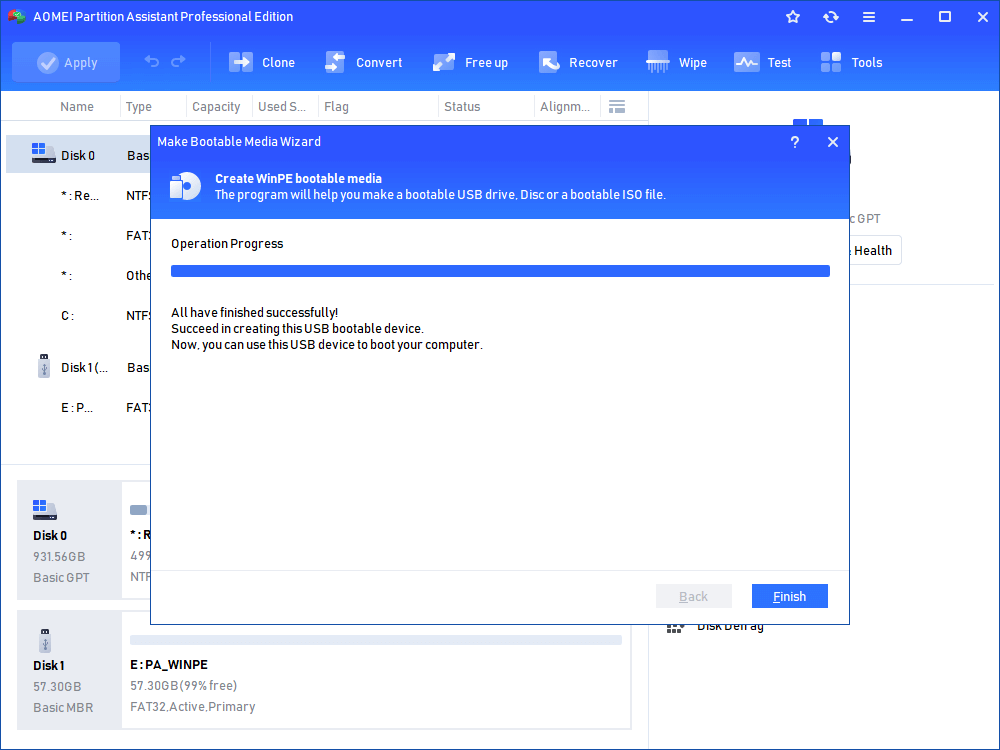
After that, you have already created a bootable USB drive, and you can boot any computer from this bootable USB drive.
Final words
Compared with Diskpart, AOMEI Partition Assistant should be a better bootable USB maker for creating bootable USB flash drive. Besides, AOMEI Partition Assistant is also a good Windows 10/8/7 USB creator that allows you to create Windows 10/8/7 to go USB drive with an ISO file. You can even create Windows to go USB drive with current OS. Thus, you can boot any computer in everywhere with this USB drive to use your own Windows system. Fabulous!

