How to Boot Windows on Your Mac from External Hard Drive
Windows To Go Creator provided by AOMEI Partition Assistant enables you to boot Windows 11/10/8/7 on your Mac. Refer to this page, lean how to create a bootable Windows external hard drive and boot Windows on Mac from it
By Dervish / Updated on March 12, 2024
Why boot Windows on Mac from external hard drive?
Because of easy-to-use applications, unique design, great hardware, stable system, and other services provided by Apple, Mac computer has a great appeal to lots of users when people choose a computer or laptop.
But the Windows system still has its edges, like compatibility. Nowadays, some Windows applications that may play a very important role in your work don't work with macOS. Besides, lots of games are only compatible Windows environment.
To solve this situation, you can boot Windows on Mac from an external hard drive. So you can run Windows software and games on your Macbook.

Best tool to make Windows bootable drive for Mac
You may know Boot Camp is a way of using Windows on macOS, but this way will take a large space and MacBooks don't support it. Here we recommend a third-party tool-AOMEI Partition Assistant Professional, which brings a feature called “Windows To Go Creator” to help you create a portable Windows 11, 10, 8, and 7 on an external hard drive. With such a tool, you can load Windows OS on your MacBook without Boot Camp.
Compared with other solutions, creating a Windows external hard drive using AOMEI Partition Assistant has the following advantages that Boot Camp doesn't provide:
✦ It doesn’t occupy any space of your MacBook. Some tools, like the built-in Boot Camp will install Windows on your Mac to run Windows OS, while this method stores Windows OS on the external storage devices, so your Mac computer doesn’t share any space with Windows system.
✦ It supports a Mac computer and a Windows computer. With AOMEI Partition Assistant, you can create a Windows drive for Mac or other computers that running with Windows.
✦ It keeps your external hard drive and computers separately. The “Windows To Go” hard drive or USB flash drive doesn’t affect the computer it connects. So don’t need to worry about information leakage or data security.
✦ It supports multiple external storage device. You can employ an external HDD, SSD, USB flash drive, SD card and other storage devices to complete such operation.
You can download Demo edition and plug in an external hard drive, SSD, USB drive and follow the steps to see how it works and boot Windows on your Mac from your external drive.
How to create bootable Windows external hard drive
✍Before starting, you need to know:
-
Although AOMEI Partition Assistant supports all Windows 10 Editions, the Mac can only boot from UEFI that only works with 64-bit, so 32-bit ISO file is not recommended
-
It supports USB 2.0/3.0/3.1/SSD/HDD, and other storage devices, but take speed and performance into consideration, it is better to use USB 3.1 device produced by famous brands such as Samsung, SanDisk, Kingston.
-
All the data on your external hard drive will be formatted, you can back up the hard drive beforehand.
1. Install and open AOMEI Partition Assistant on Windows computer, click “Tools” in the top toolbar, and choose “Windows To Go Creator”.

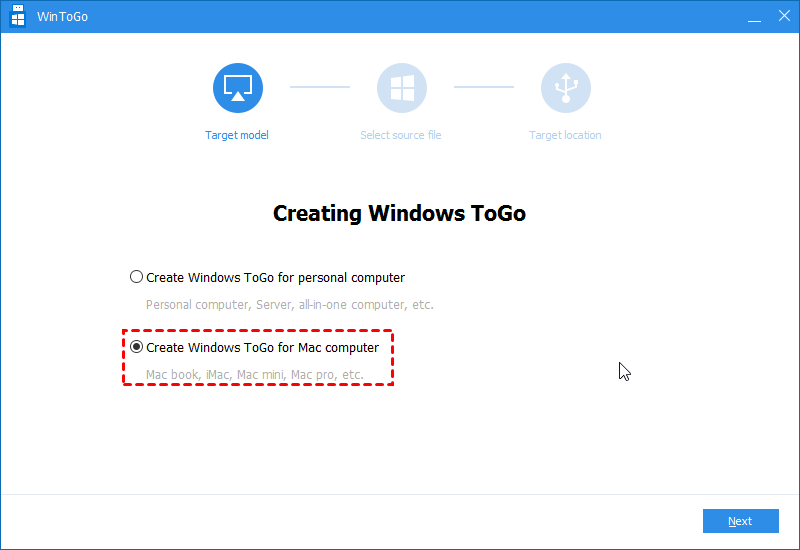
2. In the Windows To Go window, choose “Create Windows ToGo for Mac computer” and click “next”.
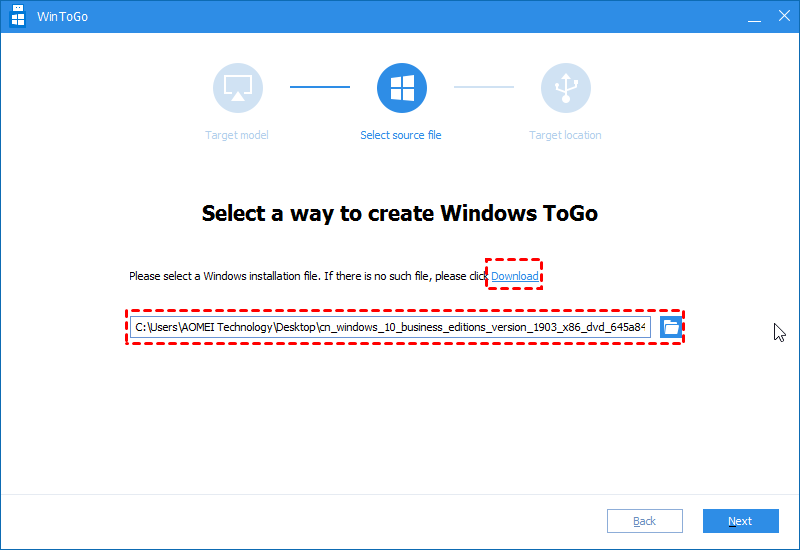
3. Choose Windows 10 as the source file, and click “Next”.
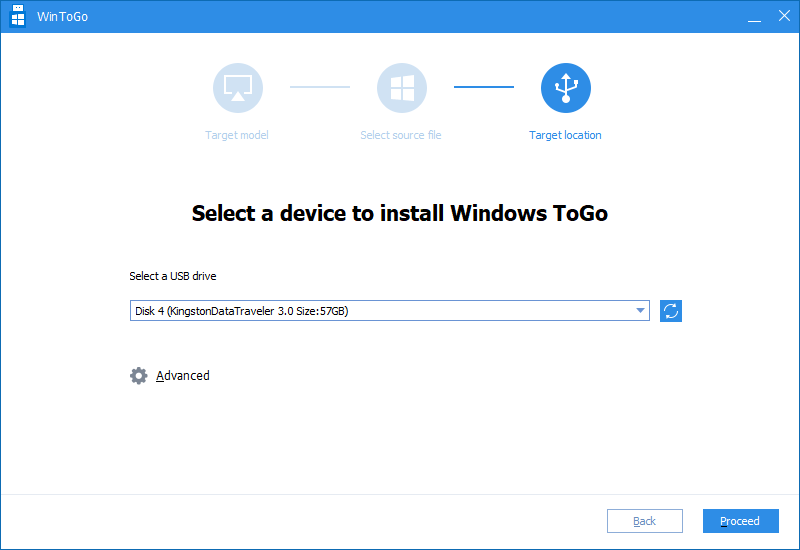
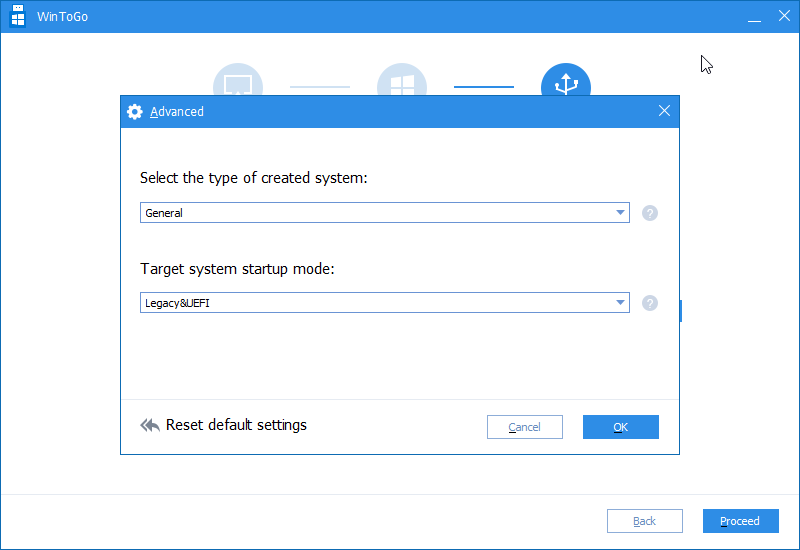
4. Then select the external hard drive as the target location of Windows To Go, and you can click “Advanced” to specify startup and system information, then click “Proceed”.
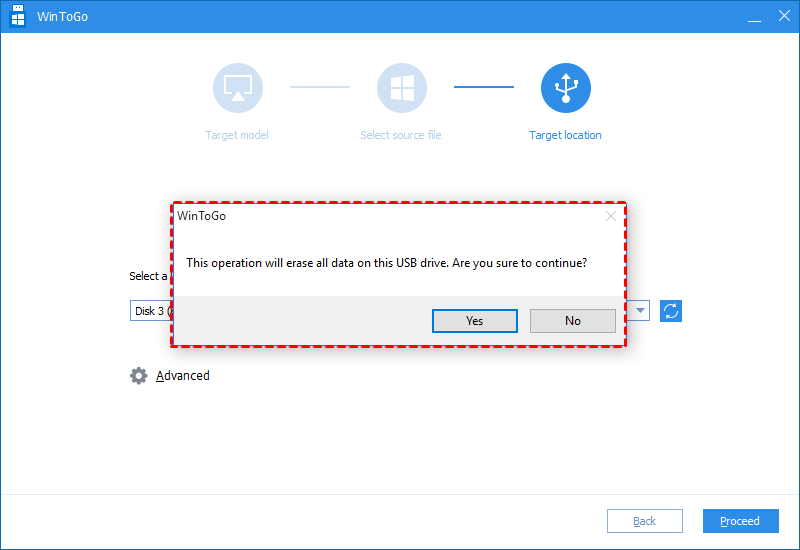
5. Then it will pop up a warning message about data loss. Ensure you have backed up important data, and click “Yes”.
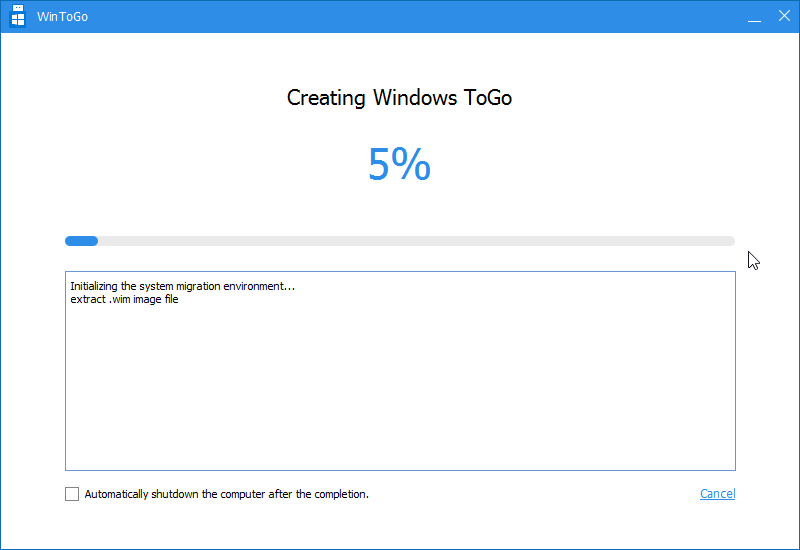
Then the program takes half an hour on average to complete. When it is finished, you can connect the external hard drive to load Windows on your MacBook, MacBook Pro, and MacBook Air.
Boot Windows on your Mac from external hard drive
After creating a bootable external hard drive, follow the steps below to set it as boot device.
1. Connect the external hard drive to the Mac computer. Click the Apple icon and open “System Preferences”.
2. In the “System Preferences”, click “Startup Disk”.

3. Choose the external drive from the listed of available disk. Next time you start up Mac, it will load Windows from the drive.
▲ Temporarily boot Windows on your Mac
You can also select the bootable Windows hard drive to boot during startup. And it is a temporary setting.
1. Turn on your Mac.
2. Press and hold the “Option” key, you will see the bootable device listed on the screen.

3. Use mouse or arrow keys to choose the Windows external hard drive, and you can boot Windows on Mac from it.
- ★Tips: If you don’t see the Windows bootable drive on the Startup Disk.
- Make sure the drive is connected and detected by computer.
- You can wait a while or repeat the operation because the Startup Disk needs time to scan the connected device.
- Make sure you have created a bootable drive. A drive that doesn’t contain a valid system will not show on the Startup Disk.
Conclusion
Now you can boot Windows on Mac from external hard drive, I hope you can enjoy it. The same method can be applied to booting Windows 10/8/7 from SD card, HDD, SSD, and other storage devices.