To turn off automatic driver updated in Windows 11, you can try Settings or Registry Editor. By following the tips, you can disable automatic driver updates in Windows 11 without data loss.

Have you ever had your Windows PC restart suddenly, with a notification stating that the device drivers were automatically updated? Although automatic driver updates in Windows 11 are beneficial: it generally meant to enhance system performance and stability by providing the latest drivers for hardware components, they can sometimes interrupt your workflow.
To avoid issues caused by automatic driver updates in Windows 11, you can take steps to exert more control over your device drivers and prevent unexpected disruptions and potential risks in your work.
How to turn off automatic driver updates in Windows 11? You can run Settings or Registry Editor to do that. But don’t forget to follow the tips as precautionary measures to ensure data safety.
The Settings app is like the control center for your Windows PC, where you can do a lot of things, from simple tasks like personalizing your system to more advanced ones like managing user accounts. To turn off automatic driver updates in Windows 11, just make sure your Windows account has admin privileges and follow these steps:
Step 1: Initiate the Settings app by pressing the Windows + I keyboard shortcut.
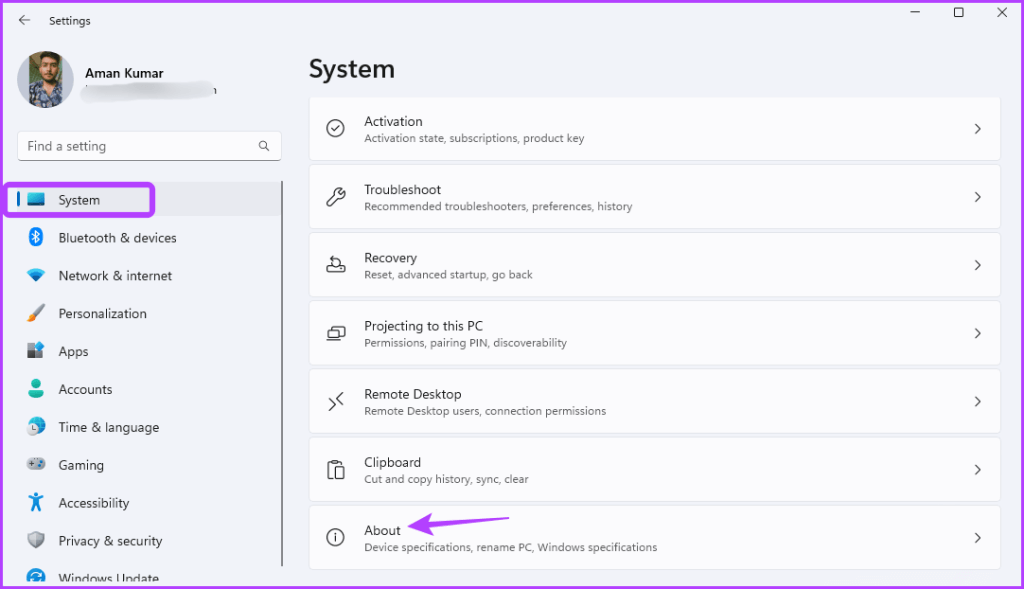
Step 2: Navigate to the About option within the System tab.
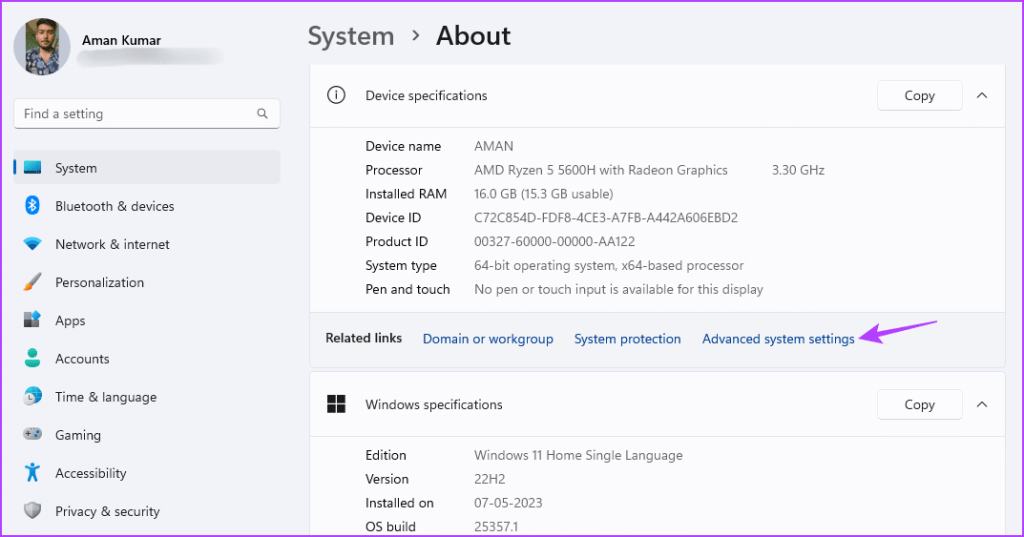
Step 3: Select the Advanced system settings.
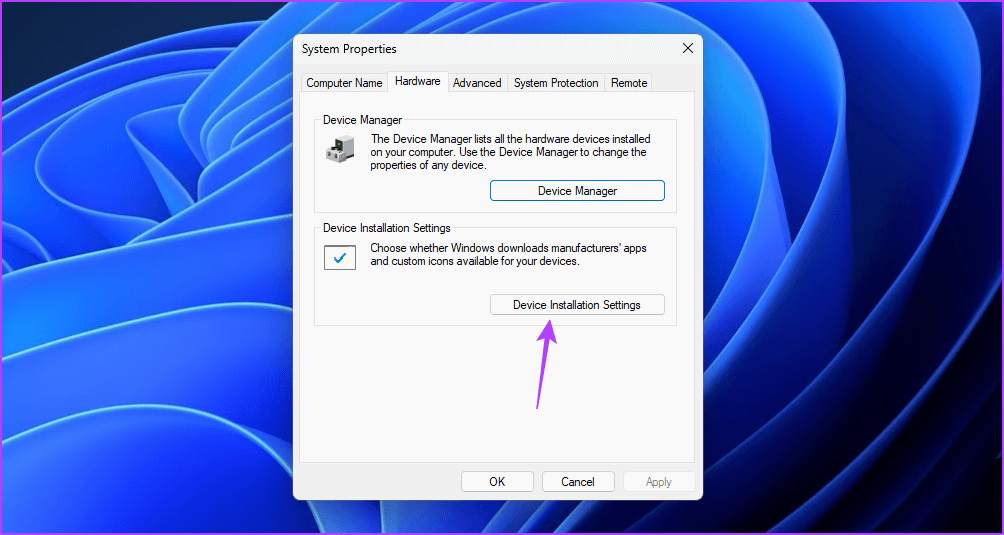
Step 4: In the resulting System Properties window, access the Hardware tab.

Step 5: Click on the Device Installation Settings button.
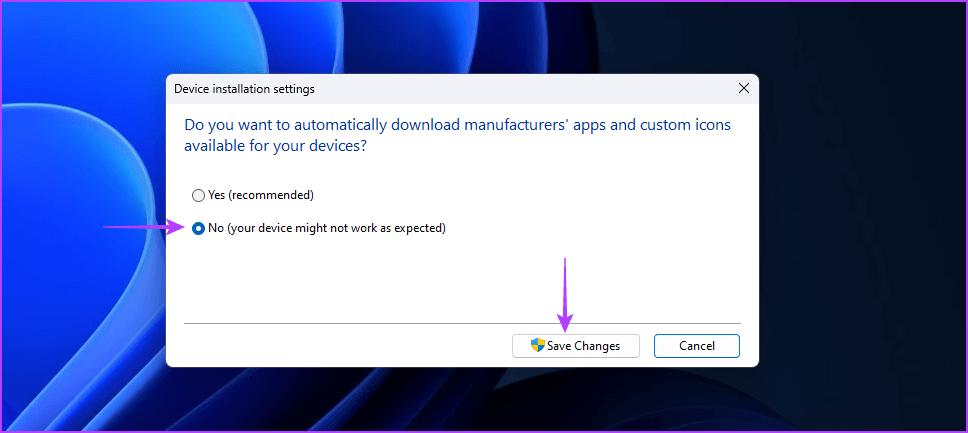
Step 6: Opt for the "No (your device might not work as expected)" option and then click the Save changes button.
By choosing the "No" option in the System Properties window, Windows will cease automatic installation of device driver updates.
An alternative method to turn off automatic driver updates in Windows 11 involves modifying the Windows registry.
However, it is crucial to create a backup of the registry to prevent potential data loss in the event of complications during the editing process. Once you've completed these precautionary measures, proceed with the following steps to prevent Windows from updating drivers automatically:
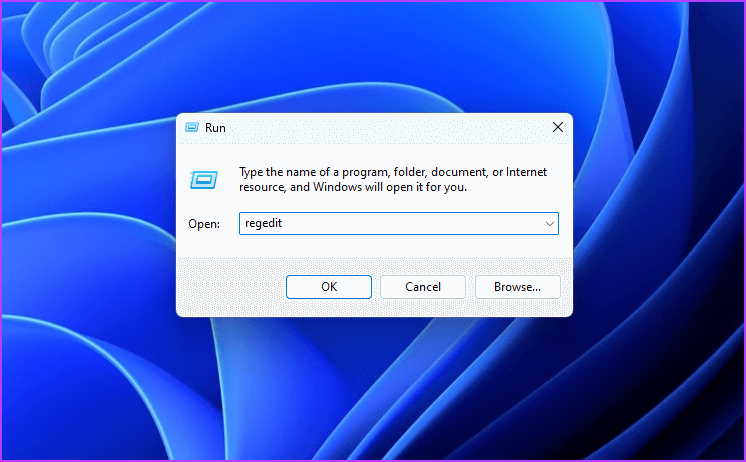
Step 1: Use the Windows + R keyboard shortcut to open the Run tool, then type "regedit" in the box and click OK.
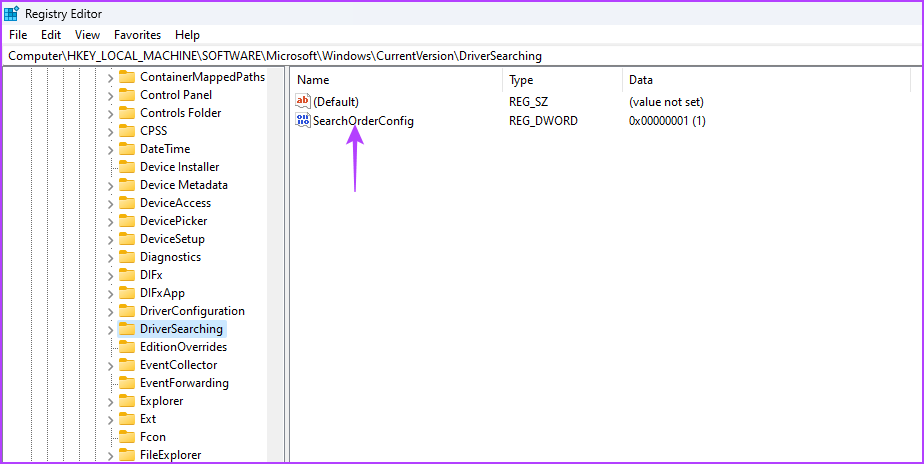
Step 2: In the Registry Editor, navigate to the following location by copying and pasting it into the address bar:
Computer\HKEY_LOCAL_MACHINE\SOFTWARE\Microsoft\Windows\CurrentVersion\DriverSearching
Step 3: Locate the SearchOrderConfig value in the right pane and double-click on it.
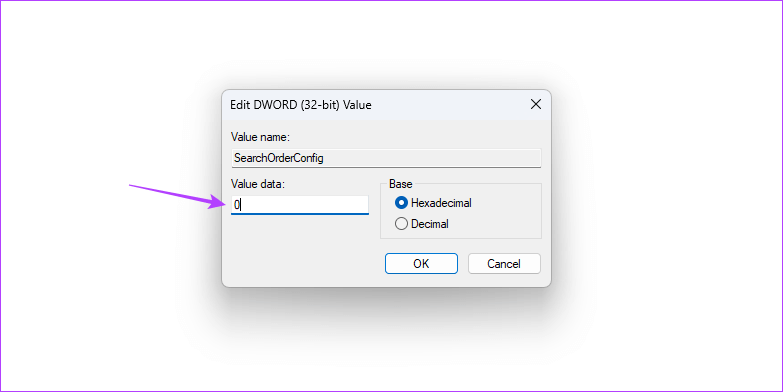
Step 4: Enter "0" in the Value data field and click OK.
By setting the SearchOrderConfig's Value data to 0, you prevent Windows from automatically downloading driver updates. If you wish to enable automatic downloads in the future, enter "1" in the SearchOrderConfig's Value data and save the changes.
Regardless of your reasons for wanting to disable automatic driver updates in Windows 11, it's prudent to take measures to safeguard your data. The loss of important data can result in system instability or unnecessary troubles in both personal and work life. Here we recommend a multifunctional tool, AOMEI Partition Assistant Professional. It is equipped with many practical functions for your data safe. In this part, we will share it in detail.
Taking precautions ensures the ability to restore your data from the backup in case of unexpected issues. It is important to regularly back up crucial data before any system updates. And, it's equally crucial to back up essential data before engaging in any system-related modifications, such as using the Registry Editor to turn off automatic driver updates in Windows 11.
The Clone Disk feature enables you to create a complete copy of your entire hard drive. This includes copying all files, data, and the operating system to another hard drive, serving as a backup.
Step 1. Install and launch AOMEI Partition Assistant, click "Clone" in the main interface and select "Clone Disk".
Step 2. Choose the hard disk that you need to clone as the source disk and click "Next".
Step 3. Select the destination disk to store the data on the source disk, and then click "Next".
Step 4. Then, you can check the source and destination disk in the next window or change to “Sector to Sector clone”, and click the "Confirm" button to continue if there is no problem.
Here, you can also click the "Settings" button to adjust the partition size on the destination disk or tick "4k alignment" to improve the reading and writing speed of SSD if the target disk is an SSD drive.
Step 5. At last, click "Apply" and "Proceed" in the main interface to start cloning the hard drive.
If you experienced data loss without creating a backup when handling disable automatic driver updates in Windows 11, don't worry; AOMEI Partition Assistant Professional provides a Recover Data function to assist you in swiftly and easily retrieving lost data.
This feature is capable of recovering over 200+ file types from common storage devices and excels in dealing with diverse data loss scenarios. Whether you encounter issues like virus attacks, formatting, system crashes, or others on SSDs, HDDs, SD cards, USB drives, etc., this powerful tool can effectively recover your lost documents, pictures, videos, and even emails.
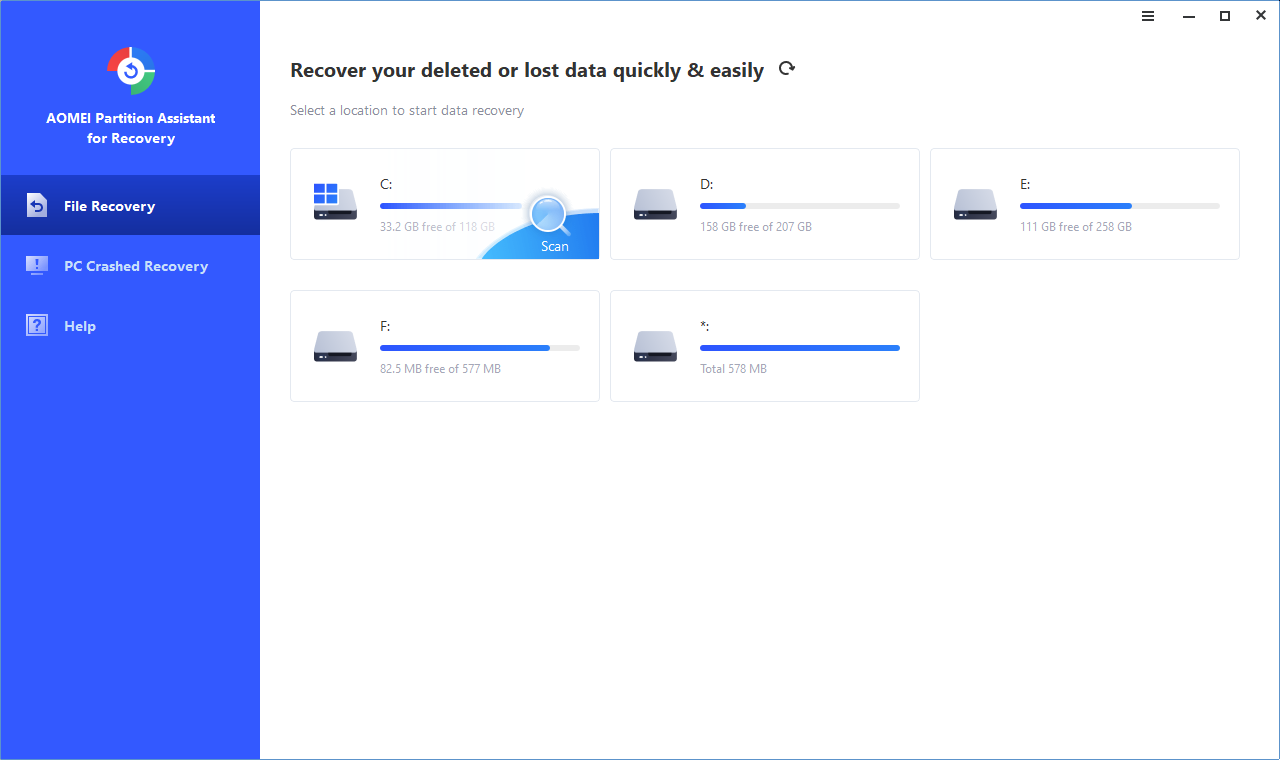
Step 1. Install and launch AOMEI software. In the Main Tab, click on "Recover" > "Recover Data".
Step 2. Access the Recover Windows Data tool. Select the partition location for the data recovery process, then click on "Start Scan" to initiate the scanning procedure.
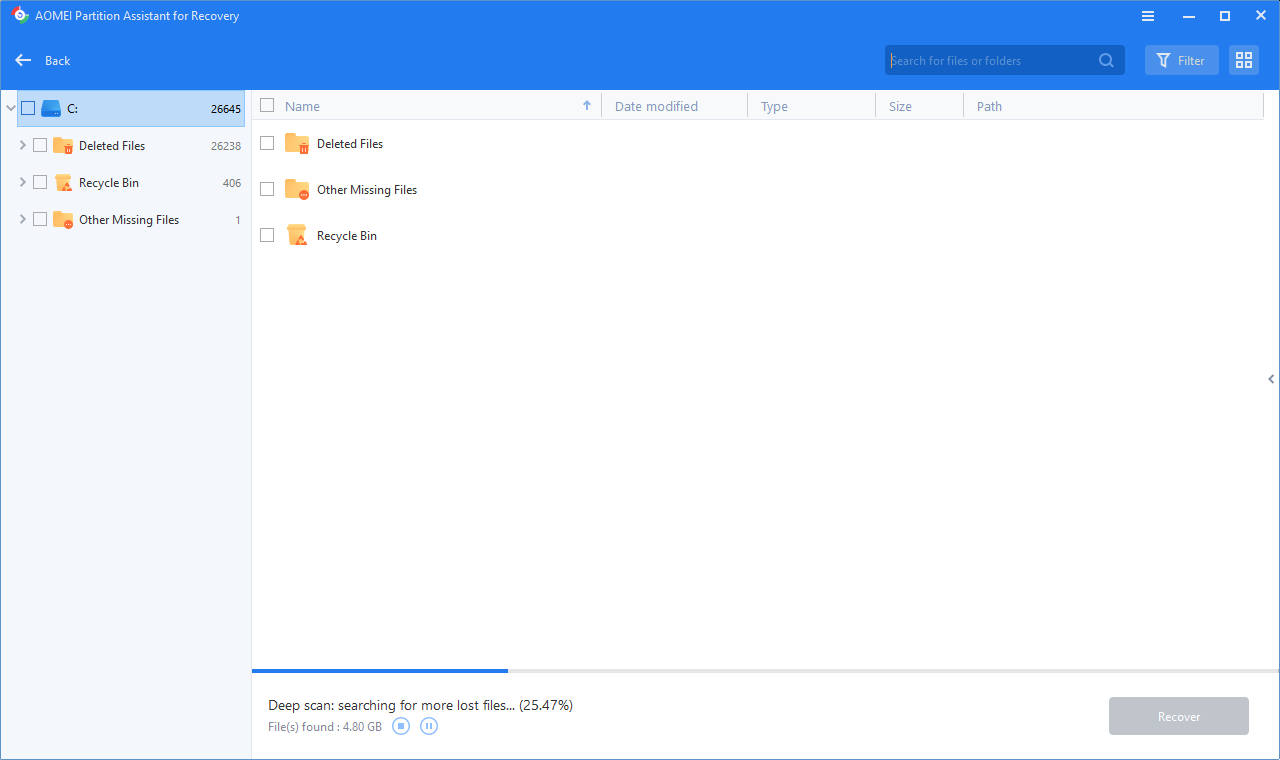
Step 3. After the scan is finished, you will see a list of all lost files. Choose the files you want to recover and click on "Recover files".
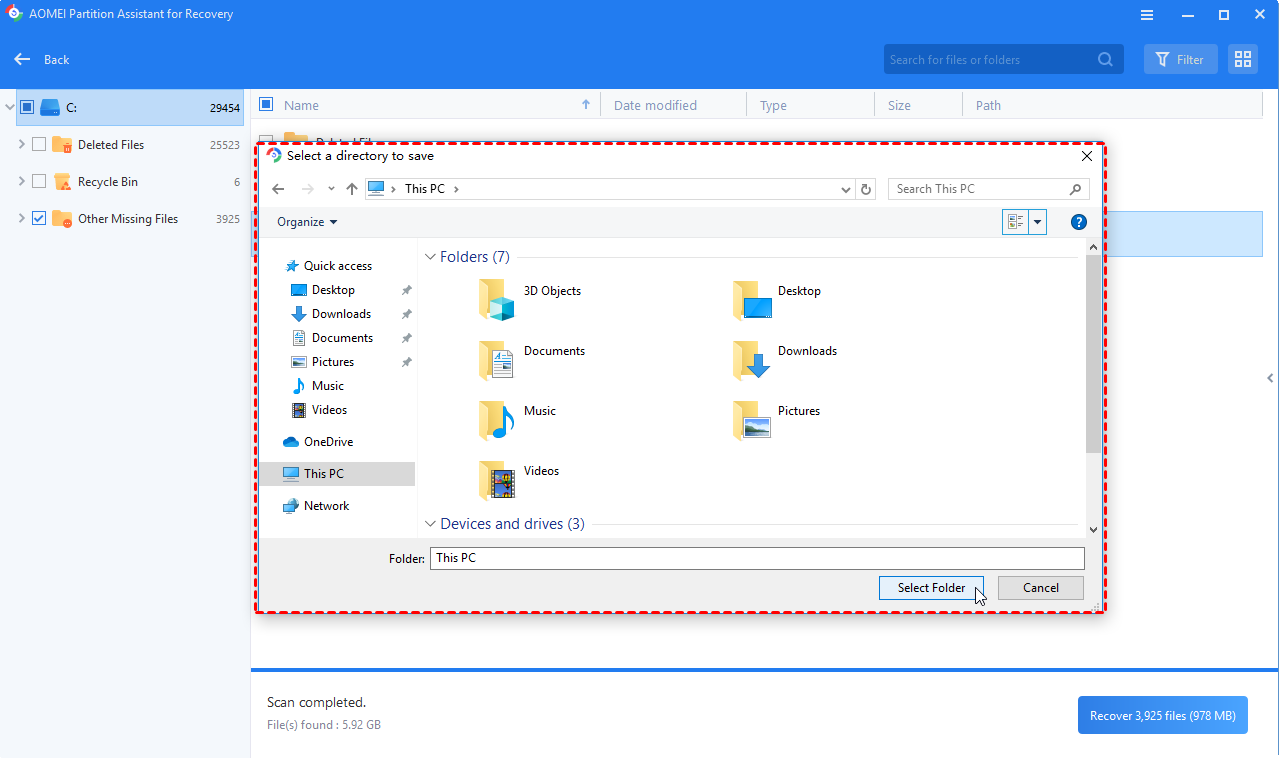
Step 4. Next, select a folder path on your PC to save the recovered files. The choice of where to find deleted files on the computer is entirely up to you.
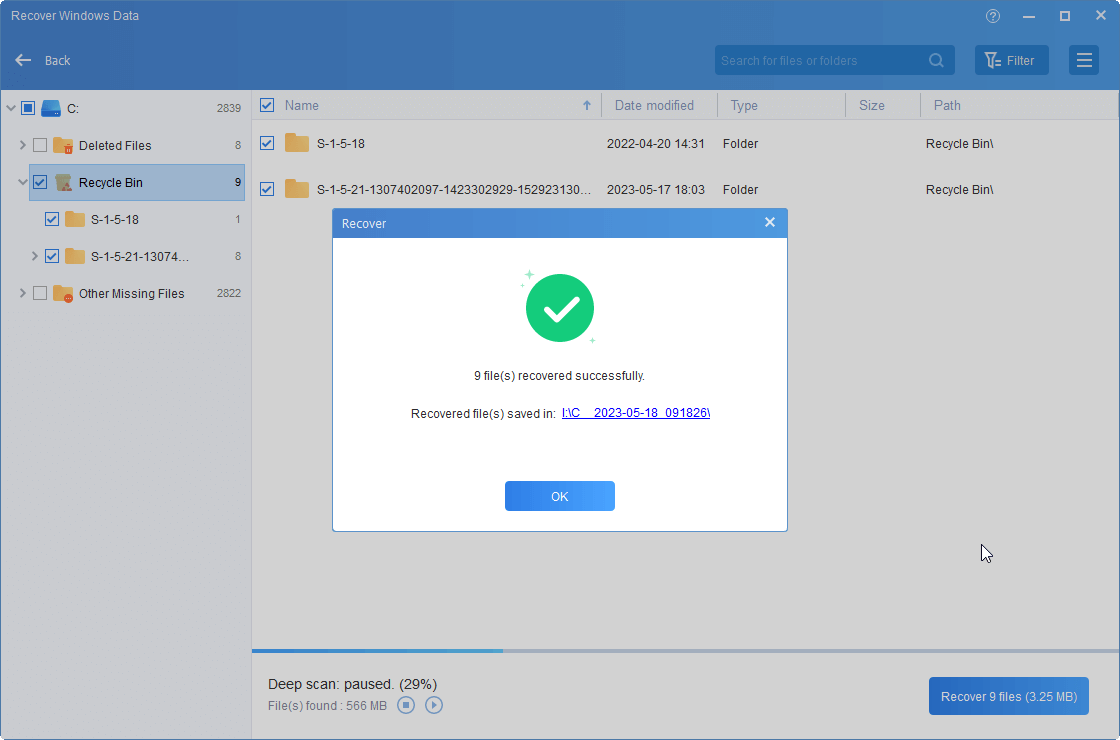
Step 5. Upon successful recovery, head to the path you selected to access and view your recovered files.
With the 2 methods and 2 tips, you can turn off automatic driver updates in Windows 11 with ease. Apart from creating a backup and recovering lost data, it’s a good idea to explore more functions of AOMEI Partition Assistant to effectively manage your computer.
If you need to expand storage space, Allocate Free Space, App Mover, Duplicate Files Finder, etc., can help you. When you encounter boot issues, the Rebuild MBR feature is worth trying. In the future, if you plan to upgrade your device, OS Migration can give you a seamless transition.