2 ways will be introduced on how to increase VRAM Windows 11. The stepwise guidance will guide you from check VRAM Windows 11 to increase it.

VRAM (Video Random Access Memory), sometimes also called Dedicated Video RAM, is like the memory in your computer (RAM), but it's specifically used by your graphics card. This dedicated memory ensures efficient and fast processing of graphics-related tasks, making it essential for smooth performance in games, video editing, 3D modeling, and other graphics-intensive applications.
For work tasks, having more VRAM means faster rendering of complex projects and the ability to handle larger projects. In gaming, it allows you to use higher-quality textures and models, as long as your graphics card can handle the increased demands for performance.

It's important to know that having more VRAM can be helpful, but it's not the only thing that affects graphics performance. The power of the GPU, the speed of the memory, and other factors also play a big role. Additionally, in desktop computers, VRAM is usually part of the graphics card. So, if you want more VRAM, you often have to get a new graphics card altogether.
About this question, we would like to say "Yes, Windows 11 does have VRAM”. VRAM is a crucial component for handling graphics-related tasks in any operating system, including Windows 11. If you are not sure about your VRAM capacity, you can follow us to check VRAM Windows 11 with Task Manager.
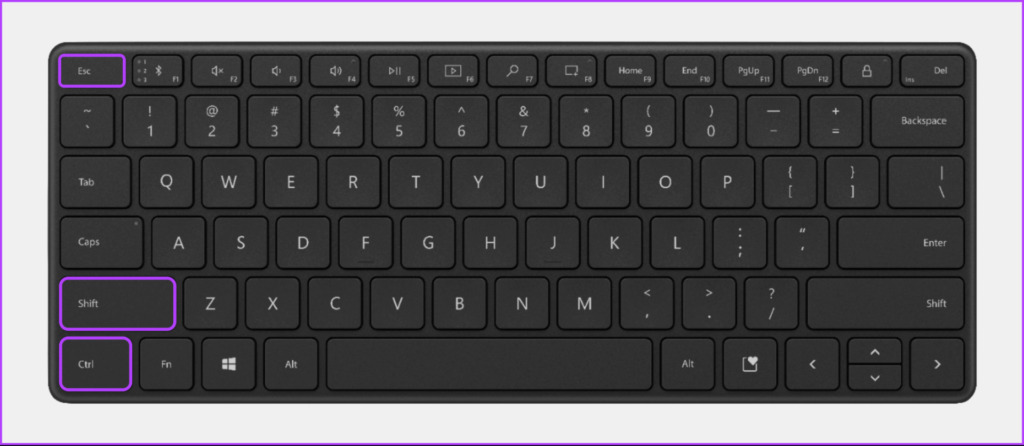
Step 1: Press the Ctrl + Shift + Esc keys together to open the Task Manager.
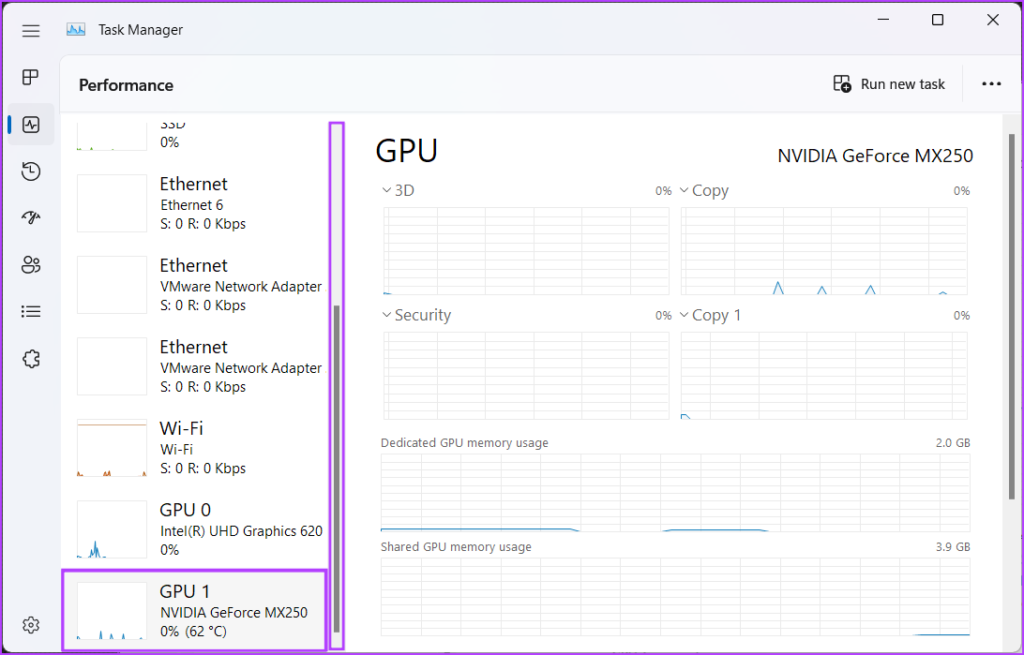
Step 2: In the Task Manager window, click on the second icon located on the left toolbar to go to the Performance tab.
![]()
Step 3: Use the left scroll bar to scroll down and choose the GPU you want to check.
Step 4: Scroll down using the right scroll bar, and you'll find three VRAM values listed in GBs.
Normally, you can use BIOS/UEFI and Registry to increase VRAM Windows 11. Kindly please be careful about every step, or it may cause system errors once make mistakes.
On some Windows PCs and laptops, it is possible to allocate more system memory to the onboard GPU through the BIOS/UEFI settings. To do this, access the BIOS or UEFI following the instructions in this guide.
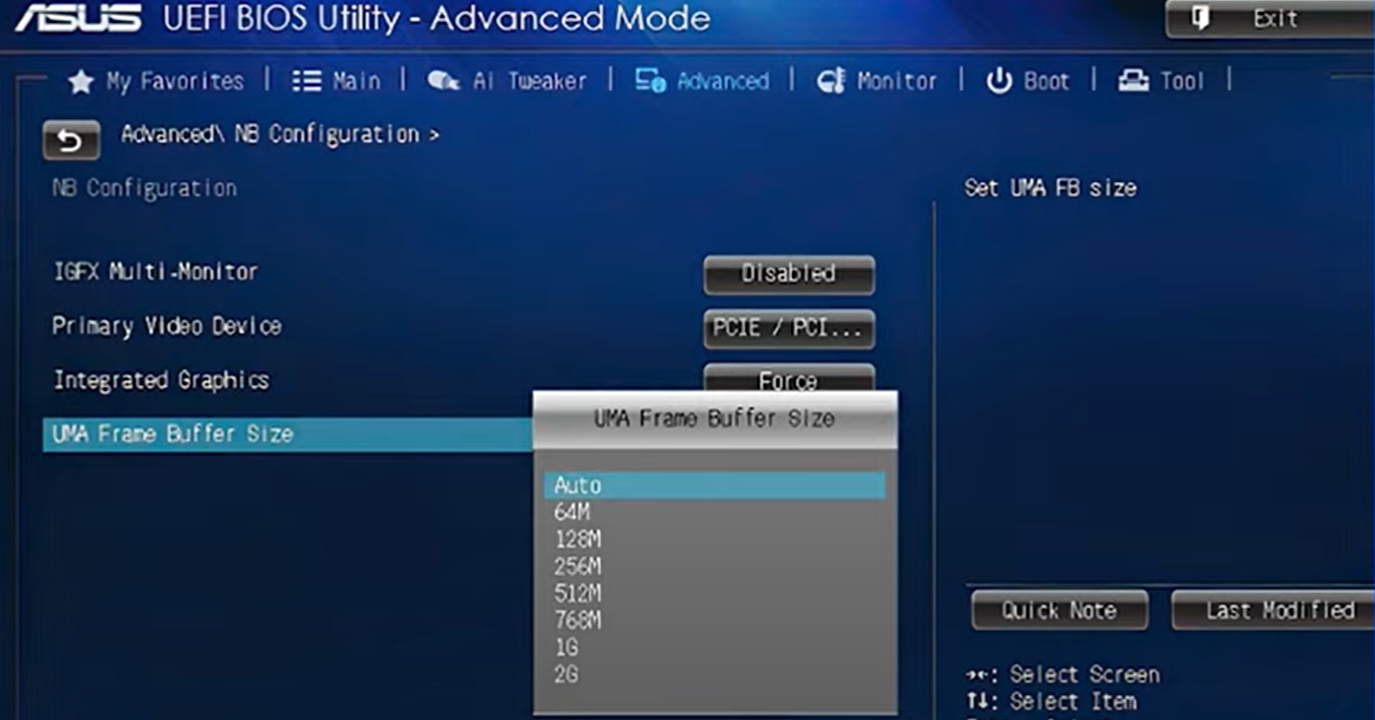
Within the BIOS/UEFI, look for menus like "Advanced Features" or "Advanced Chipset Features." Search for options related to "Graphics Settings", "Video Settings", or similar terms. Then find an option that allows you to modify "VGA Share Memory Size", “UMA Frame Buffer Size” or "VRAM Size".
If your BIOS/UEFI offers the option, you can select from memory sizes like 128MB, 256MB, 512MB, or 1024MB to allocate to your onboard GPU. For best performance, choose 256MB with 2GB of system memory, 512MB with 4GB, and 1024MB with 8GB.
Using Registry is also a method to increase VRAM Windows 11. However, this way is more complex and carries the risk of damaging your Windows installation if not done correctly. It is necessary to access more information about the Windows registry before attempting this procedure.
Step 1: To increase VRAM through the system registry, follow these steps carefully. Press the Windows key+R, type "regedit," and press Enter.
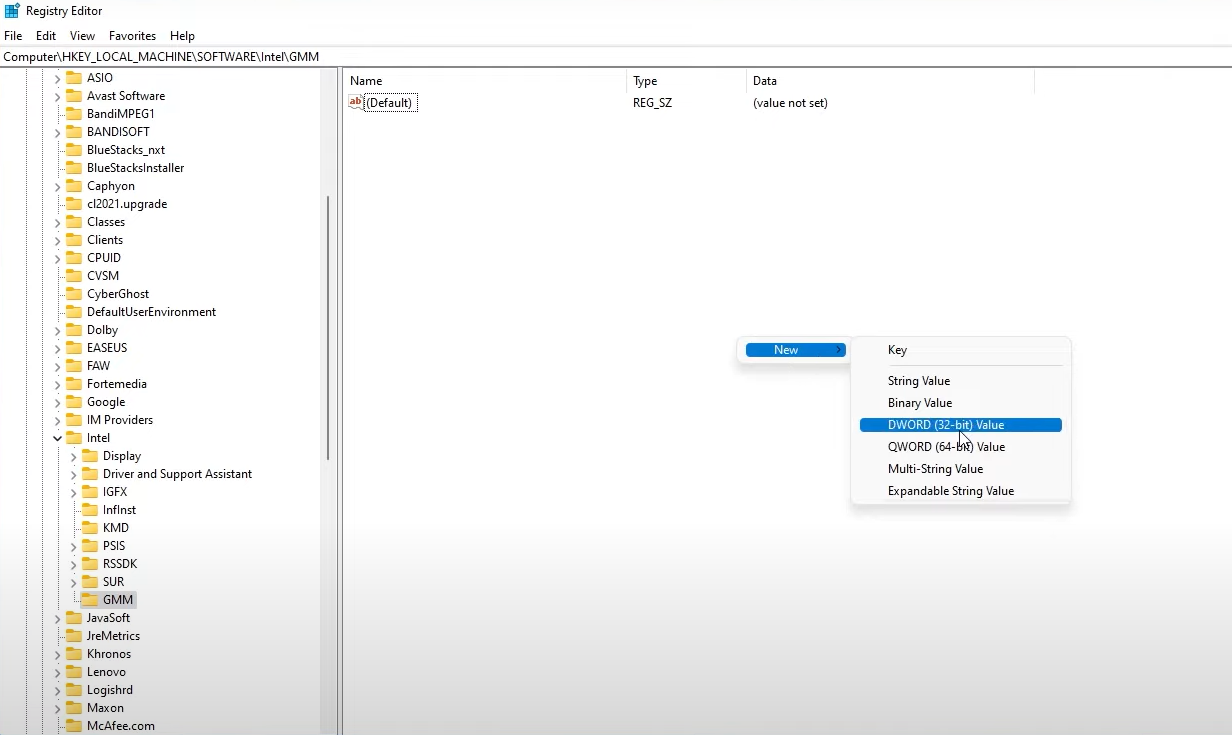
Step 2: Right-click (or tap and hold) on the Intel or AMD folder, choose New > Key, and name it "GMM".
Step 3: Select the new GMM folder, right-click (or tap and hold) in the right Windows pane, and choose New > DWORD (32-bit) Value.
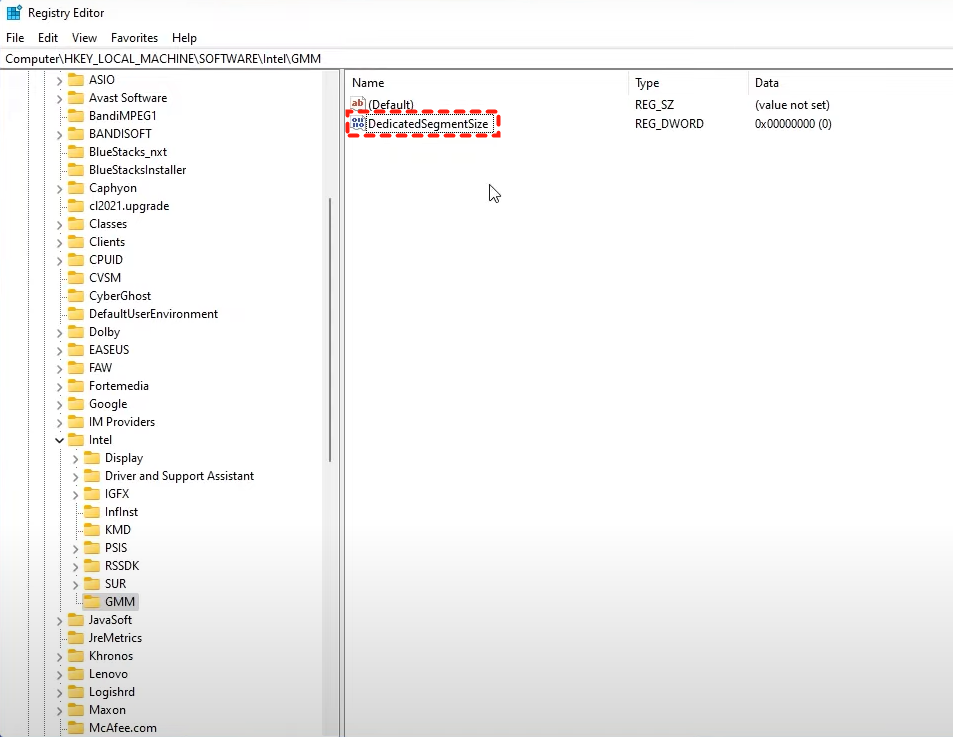
Step 4: Name it "DedicatedSegmentSize" and assign it a (Decimal) value that matches the amount of VRAM you want for your GPU.
Step 5: Restart your system and check VRAM Windows 11 with provided steps before. If it displays a higher value, you may have successfully increased VRAM Windows 11.
VRAM is important to graphics-intensive applications. For business or professional use, it is advisable to directly get new graphics for more VRAM. However, if you just want to enjoy smoothly gaming or video editing, here is a safe way.
If you are using a nice SSD, such as M.2 NVMe SSD, you can just migrate the operating system to it. This method can offer faster loading times, improved texture streaming and better multitasking performance.
AOMEI Partition Assistant Professional provides “Migrate OS to SSD” feature which boasts the Hot Clone technique. Compared to Cold Clone, this tool can save time and avoid incompatibility. Most importantly, as Cold Clone works in offline state, which excludes users to access real-time data changes, any unsaved data could be lost. But the Hot Clone can avoid this risk.
Step 1: Connect the target disk to your computer and ensure it is recognized. Install and open AOMEI Partition Assistant Professional. Then, click on "Clone" and select "Migrate OS". Click "Next" to proceed.
Step 2: Choose an unallocated space on the target disk as the destination. If there is no unallocated space, you can select "I want to delete all partitions on disk 2 to migrate the system to the disk" and click "Next".
Step 3: In this window, you can adjust the partition size and modify other partition information like location and drive letter on the new disk. Alternatively, you can keep the default settings.
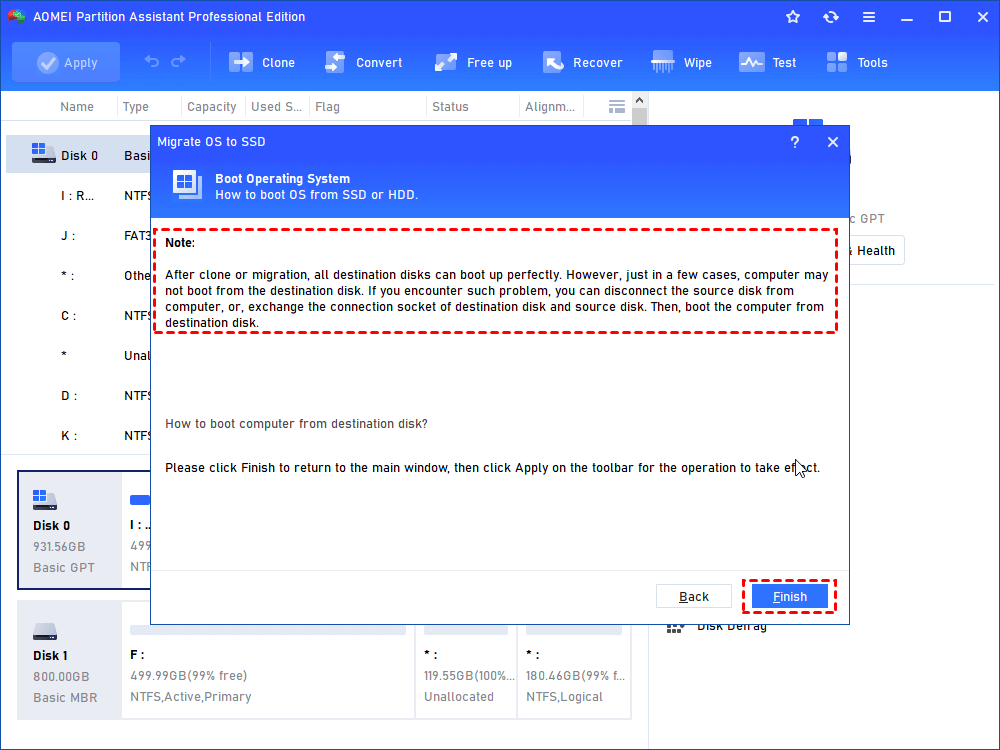
Step 4: A note will appear on how to boot the OS from the target disk. Take note of the instructions and click "Finish" to continue.
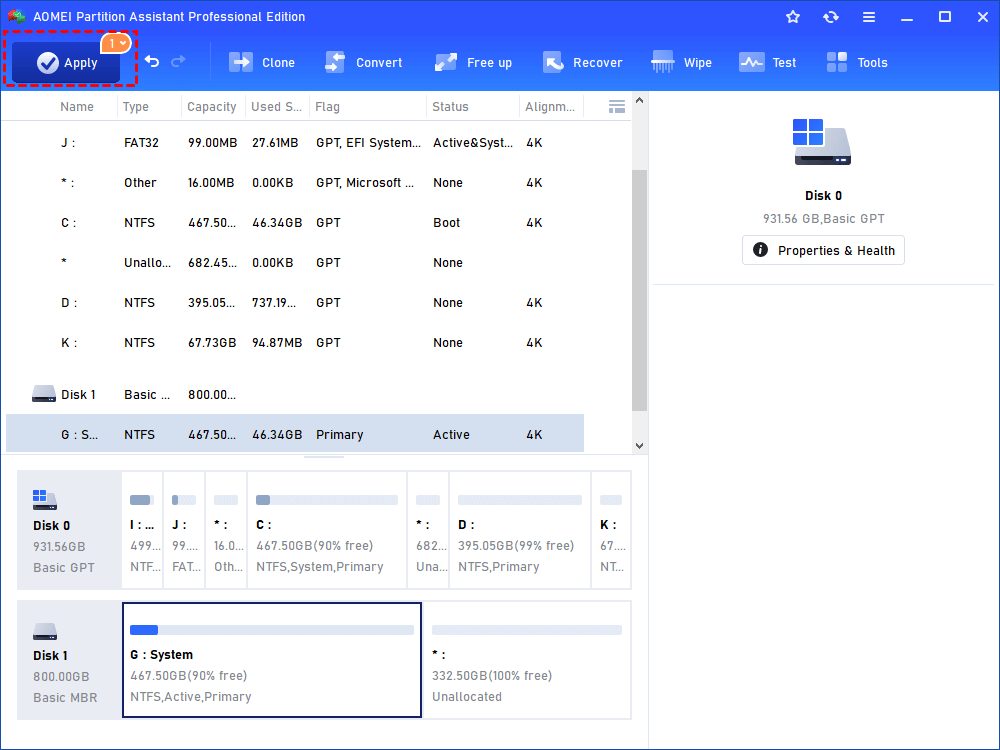
Step 5: You will return to the main interface where you can preview the operation's outcome. To apply the changes, click "Apply" and then "Proceed".
Afterward, your new disk will become the system disk.
How to increase VRAM Windows 11? You can use both BIOS/UEFI or Registry to reach the goal. If you just want to enhance gaming or video editing performance, it is worth trying the provided tip.
AOMEI Partition Assistant is an all-in-one tool. To further improve computer performance, you can also try the features like Allocate Free Space, App Mover, and PC Cleaner. If you are Windows Server users, you can choose the Server Edition.