When you see BCD missing on CMD window, have you ever wonder where BCD file location on Windows 10 is, and how to solve common BCD file issues? In this post, we'll answer your quetions in detail.
The Boot Configuration Data (BCD) file is essential for Windows 10 and Windows 11 operating systems. Acting as a database that stores important boot configurations, the BCD file is crucial in helping your PC start correctly. In this article, we will discuss the BCD file location in Windows 10, how the BCD file works, what issues may arise if BCD is missing or corrupted, and various methods to repair it. We’ll also introduce methods for managing and repairing BCD files.
The BCD file, or Boot Configuration Data file, is part of Windows’ boot management system. It contains information that the operating system needs to boot successfully, such as boot applications, device drivers, and boot settings. Located in the System Reserved partition, the BCD file ensures the correct OS configuration is loaded every time the system boots up.
By default, the BCD file is stored in the System Reserved partition, and is located in the \Boot\Bcd directory of the active partition.
This BCD store path allows Windows to reference essential boot data. Since the System Reserved partition is hidden from regular browsing, users may need to use a command prompt to access the BCD file directly.
To inspect your BCD files, follow these steps:
Step 1. Open the Command Prompt as an administrator.
Step 2. Type in the following command:
bcdedit /enum
Step 3. Press Enter.
This command displays the contents of your current BCD file, giving you a list of entries that Windows uses during startup.
If your BCD file is missing or corrupted, Windows may not boot, leading to errors such as the “Boot Configuration Data file is missing” or “No Boot Device Found.” Without the BCD file, Windows cannot reference the necessary information to boot properly, resulting in a startup failure.
If you encounter BCD-related issues, there are several ways to restore or repair the BCD file. Below are some common methods:
Step 1. Insert a Windows 10 installation USB or DVD and boot your computer from it (You need to enter BIOS to change boot order).
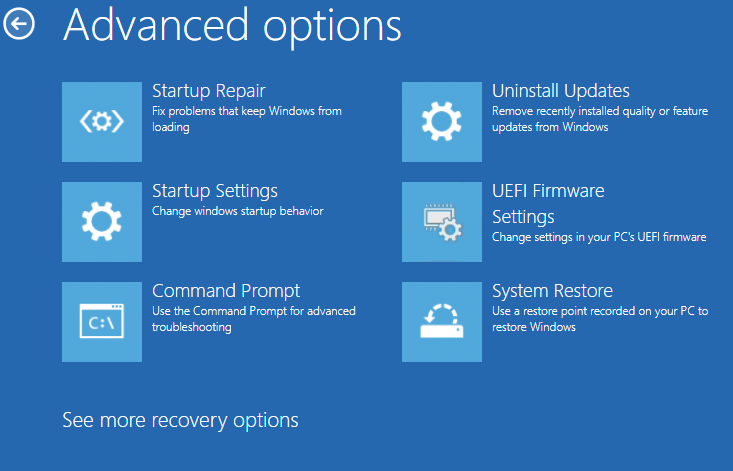
Step 2. Select Repair your computer > Troubleshoot > Command Prompt.

Step 3. In the Command Prompt, type: bootrec /rebuildbcd Press Enter. This command will scan your hard drive for any Windows installations and allow you to add them to the BCD.
System File Checker (SFC) and Deployment Image Servicing and Management (DISM) tools can also help resolve BCD issues by fixing system file corruption.
Step 1. Open Command Prompt as Administrator.
Step 2. Run the following command: sfc /scannow
Step 3. After the SFC scan, type: DISM /Online /Cleanup-Image /RestoreHealth then press Enter. DISM checks for corruption within the Windows component store and repairs it if necessary.
Startup Repair is an automated tool in the Windows Recovery Environment that can repair certain boot problems.
Step 1. Boot from a Windows installation media and select Repair your computer > Troubleshoot > Startup Repair.
Follow the instructions to let Windows automatically diagnose and repair any startup issues.
While the above methods may work for those familiar with Command Prompt, they can be difficult for users who are not comfortable with command-line tools. For these users, AOMEI Partition Assistant Professional provides an easier and more intuitive solution for fixing BCD issues.
Unlike traditional methods, This tool offers a user-friendly interface that allows users to navigate the repair process with ease. A clear interface provides guided steps, making it accessible to non-technical users. Additionally, traditional methods command-line, whereas AOMEI offers a more comprehensive toolkit that includes advanced boot repair via easily creating a bootable USB for system repairs.
Step 1. Install AOMEI Partition Assistant. Click the "Recover" tab and select "Boot Repair".
Step 2. Boot Repair tool will pop up. Please click "Next" to start the system’s boot entries scan process.
Step 3. On the window, you can see the scan result: system paths, system versions, and boot status. And, all repairable boot entries will be available to select.
Step 4. Select one/multiple repairable boot entries you want to repair and click the "Repair" button to start the boot repair.
Step 5. Wait for the repair process to finish. Once it is finished, you can check the repair result. If it succeeds, you will get a "Repair Successfully" result.
Step 1. Install and launch AOMEI Partition Assistant on a working PC, click "Recovr"-"Boot Repair" and then click the "create a bootable disk" option to create a WinPE "Boot Repair" disk.
Step 2. Insert the bootable disk you generated into the target computer to resolve the launch issue.
Step 3. Enter the BIOS on your computer and select the bootable disk as the launch drive to access AOMEI Partition Assistant.
The Boot Repair tool will be automatically loaded and the boot entries scan procedure will commence on the PC that is unable to boot into WinPE. The entire list of start entries will be displayed. Afterward, you may execute the same procedures as illustrated above.
The BCD file plays a vital role in your system's boot process, and any corruption or loss of this file can lead to startup failures. Knowing the BCD file location in Windows 10 and understanding how it operates is essential for troubleshooting. Traditional methods like Command Prompt or Startup Repair can help restore functionality, but they may be difficult for users unfamiliar with command lines.
For a more accessible and comprehensive solution, AOMEI Partition Assistant Professional offers an efficient way to manage and repair BCD files. Its user-friendly interface makes it a reliable tool for users who want an easy and effective way to fix BCD-related issues and maintain their system’s health.