It is the time to remove duplicate files on Windows 10 when you find your PC slows down. Follow the guidance to remove them and make your device run smooth and fast.

When your Windows 10 computer becomes sluggish, it's typically because something is taking up too much storage space. This could be caused by apps, big files, or things you don't need. But even after cleaning those up, the problem might persist. Why? It's because many people haven't realized that duplicate files can accumulate and also consume a lot of storage space.
So, let’s remove duplicate files on Windows 10 and get back the smooth and fast computer with the shard 3 methods.
To remove duplicate files on Windows 10, you typically have 3 available methods. Follow them to clean up the computer and make it run smoothly.
If you want to remove specific duplicate files on Windows 10, like photos or documents, Windows File Explorer is a useful built-in tool. However, using this approach may require your patience since it involves manually recognizing file extensions and comparing them to find the latest versions.
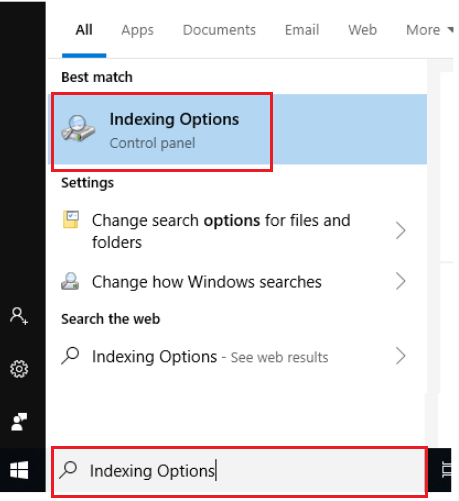
Step 1. On the lower-left corner beside the Windows icon, enter Indexing Options on the search bar, then click it.
Step 2. Click Modify, and then select Show all locations. A pop-up will appear to ask for your login details. Make sure that you are using an administrator account when doing any modification using this setting.

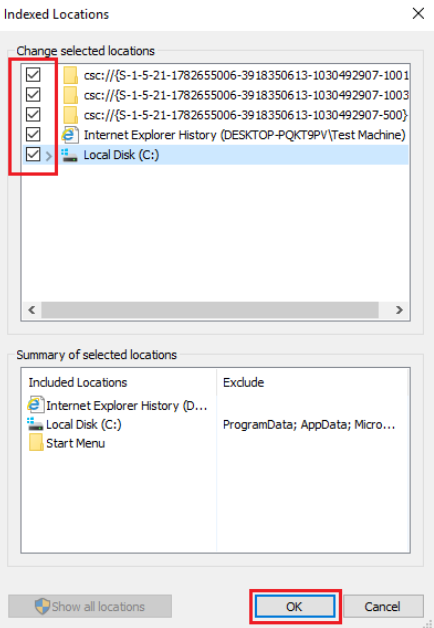
Step 3. Check if all of the boxes are checked under the Changed Selected Locations section.
If yes, click OK, and then click the Close button. If not, check all the boxes.
Step 4. On your keyboard, press the Windows + E keys to open the File Explorer. It is easier to find your files under your user account. To open your user account, go to Windows (C:), then select the Users folder.
Step 5. On the upper-right corner, click Search, and then enter the following extensions based on their format:
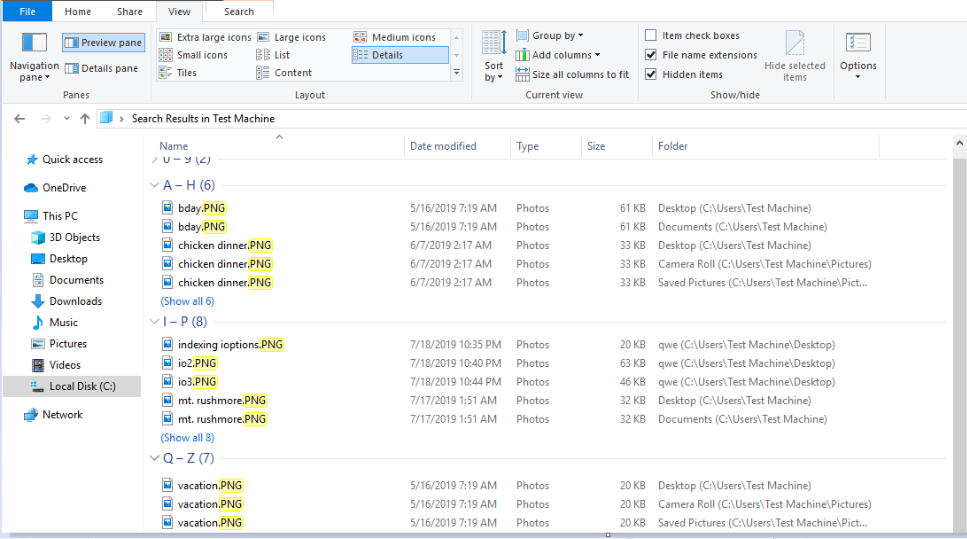
Step 6. Sort the search results by Name: Click the View tab > Under the Panes section, select Preview pane > Under the Layout section, select Details > Under the Current view section, click Group by, and then select Name.
To arrange the files in ascending order, click Group by, and then select Ascending.
Step 7. Check for the duplicate files that are saved in different locations and check the Date modified column to know which files you have the latest version.
Step 8. After checking the files, select the file you want to delete, and then press DELETE on your keyboard.
If you are familiar with command lines, you can also find and remove duplicate files in Windows 10 with CMD.
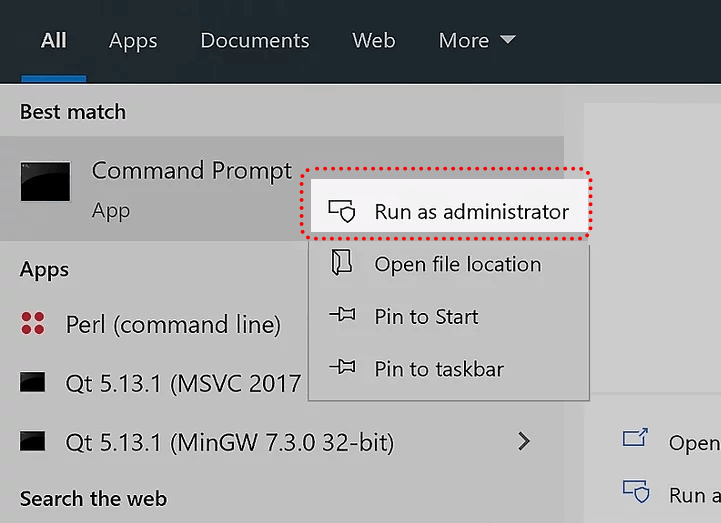
Step 1. Open CMD as an administrator. To do this, click on Start, then type "cmd" into the search bar, and choose “Run as administrator”.
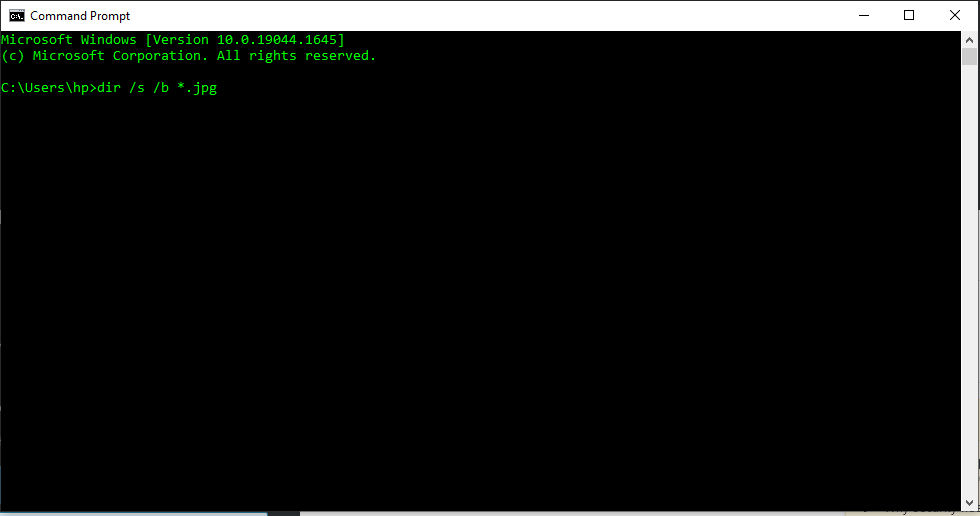
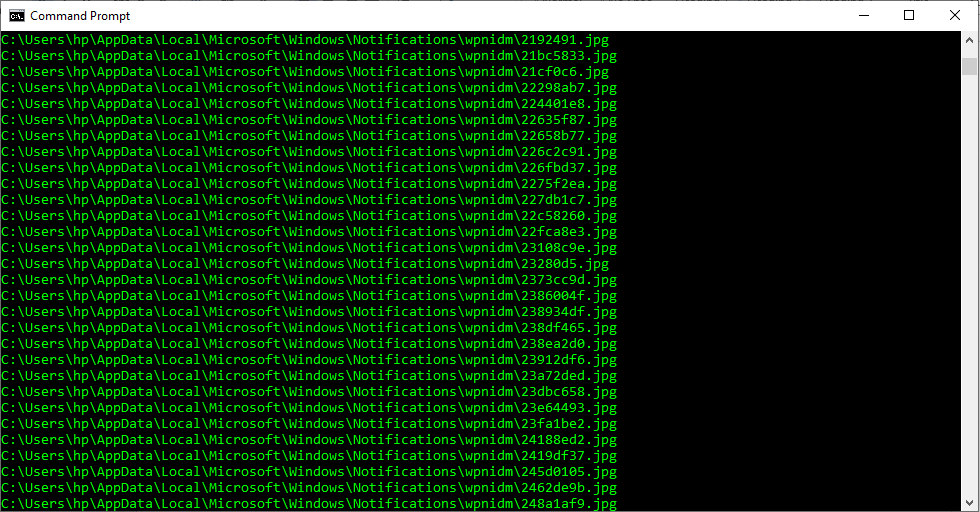
Step 2. Type this command into CMD: "dir /s /b *.extension". Replace ".extension" with the type of files you want to find duplicates of. For example, if you're looking for duplicate JPG files, type "dir /s /b *.jpg".
Step 3. Press Enter. CMD will begin scanning for duplicate files, and it will display the results with duplicated files in a list.
▌To remove duplicate files in a specific folder, follow these steps:
Step 1. Open the folder using File Explorer.
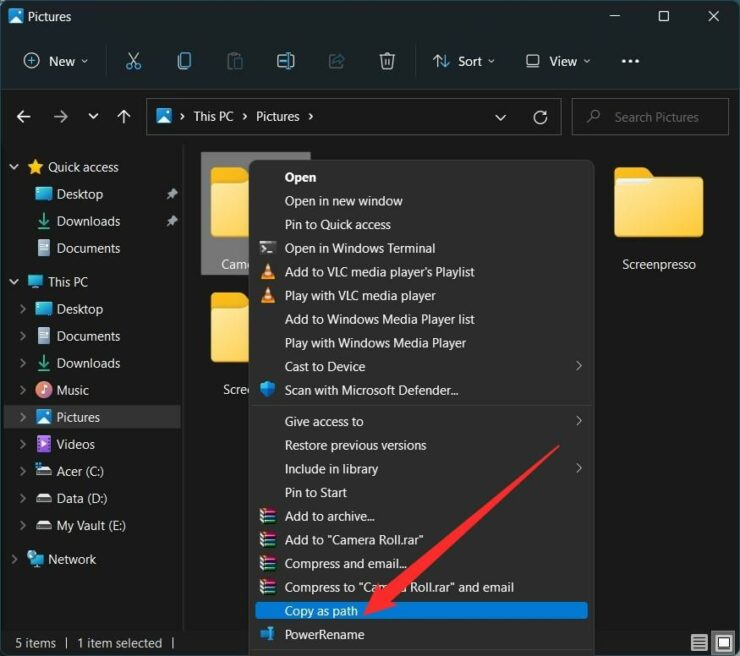
Step 2. Right-click on the folder you want and select "Copy as path".
Step 3. Open Command Prompt. Type "del /s /f *.duplicate" and hit Enter. This command will remove all duplicate files in the current folder and its subfolders.
For a more advanced file deletion, you can use wildcard characters with this command. Just type "rmdir /s /q DirName", and it will delete all folders in "DirName" and its subfolders.
To free up space, the results of using File Explorer and CMD can be not as effective as expected. When you want to remove a large amount of duplicate files, these two methods can be somewhat limited and potentially risky.
At this time, it is a good idea to use a powerful duplicate file finder and remover to effectively clean up your Windows 10 device. Here we recommend AOMEI Partition Assistant Professional. Its Duplicate Files Finder can effectively scan all drives of your Windows 10 PC and provide customized solutions for duplicate files.
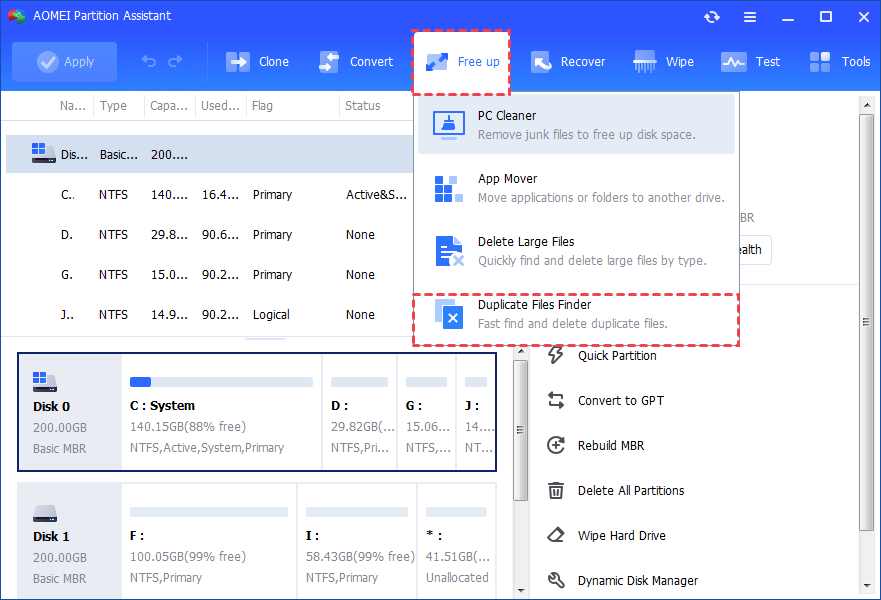
Step 1. Click the "Free up" on the main tab and select "Duplicate Files Finder".
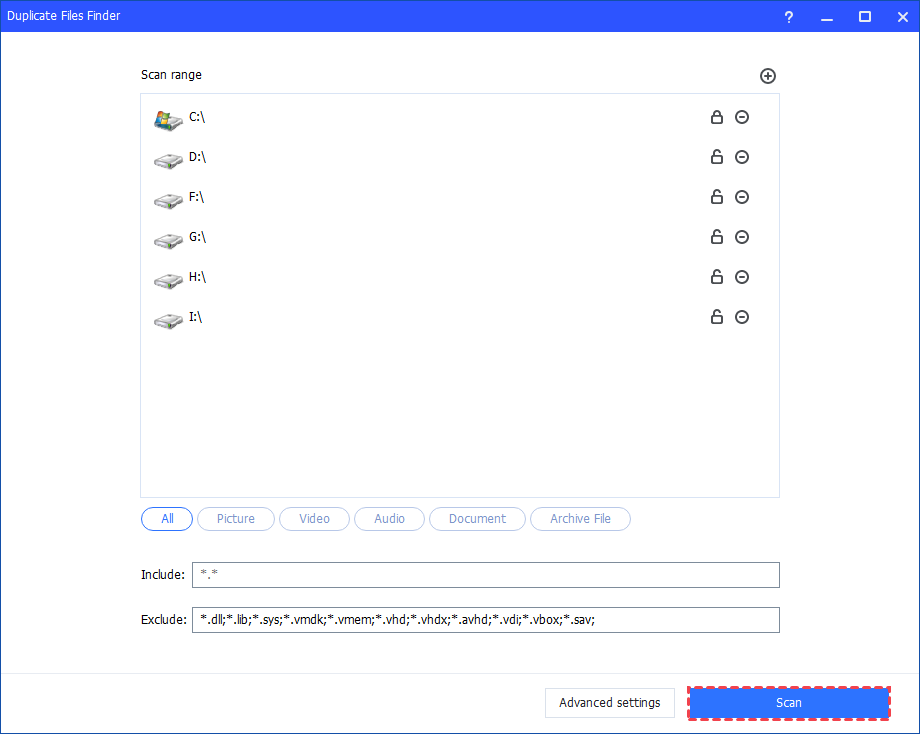
Step 2. Here, all the partitions on the computer are displayed. Click on "Scan" to start scanning. Also, if the partition is locked, the program will still scan it and display duplicate files on the partition. However, it cannot delete duplicate files on locked drives.
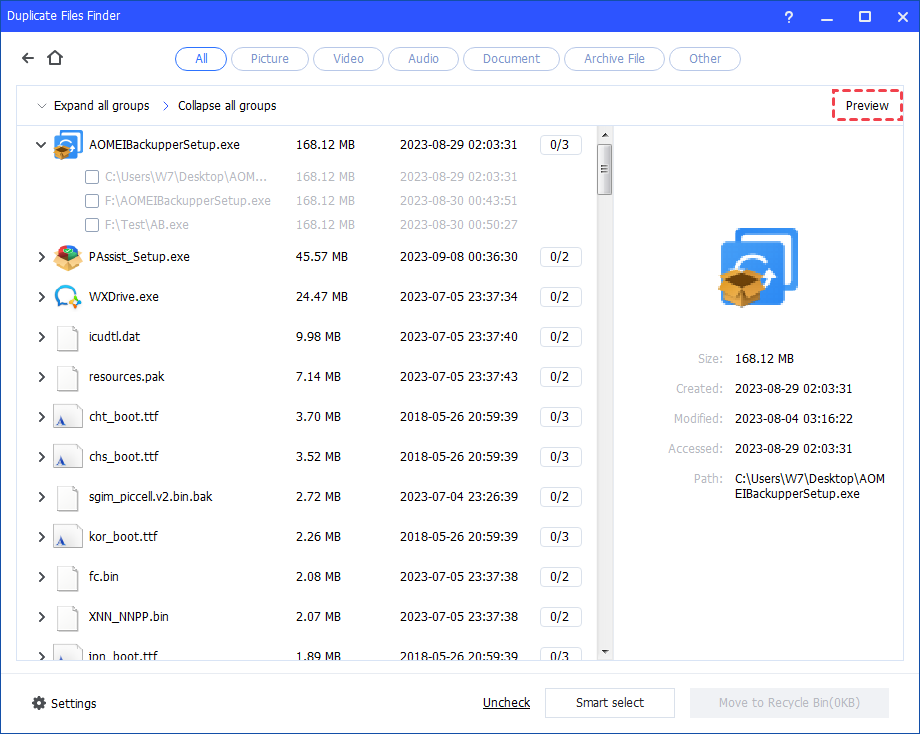
Step 3. After the process is finished, all duplicate files that meet the conditions you set will be displayed. You can click the "Preview" to see the duplicate files.
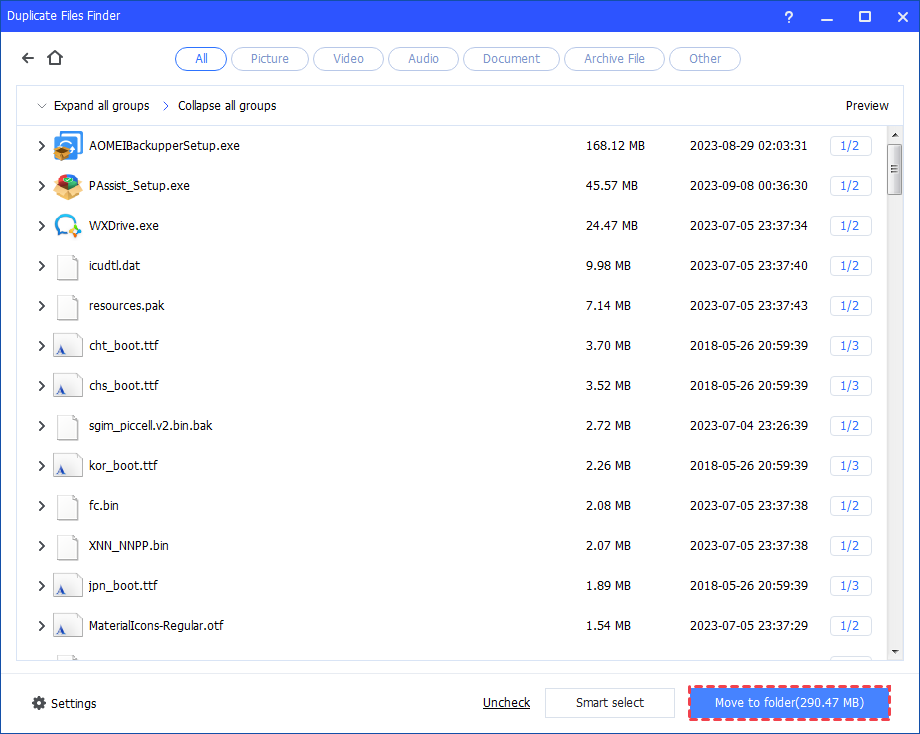
Step 4. You can select the duplicate files you want to delete. Or, click "Smart Select" to automatically select duplicate files. Then, click "Move to folder".
To remove duplicate files on Windows 10, the provided 3 methods will be helpful. If you want to effectively free up space, AOMEI Partition Assistant shares many practical functions as well. You can use it to move installed programs to another drive, allocate free space from sufficient space, or even secure erase SSD. For the Windows Server environment, here is also the Server Edition.