How to move a folder from one drive to another location if one folder takes a lot space on the current place? In this post, you’ll learn some methods to move folder to another location safely.

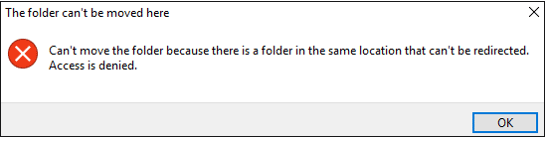
Many users complain that their C drives always become full quickly like our case, especially in Windows 11 PC, since this OS needs more space on the C drive to store the system files and folders. If you would like to try to explore some storage path to search for large files or folders that can be moved, the system will warn you that you can’t move them, or you may receive an error message as the following shows. So, sometimes, even if other drives have sufficient space, you can’t actually use it to release the C drive out of the dilemma of lacking of space.
Although moving folders from your C drive to another drive will help you free up space on your C drive, you should be aware of what you can and cannot transfer before proceeding. Because the C drive contains so many default folders, if you move or alter them in the wrong position, the OS may fail to boot.
Some folders and files in the "User" folder are moveable, such as Appdata, Documents, Desktop, Downloads, Favorites and so on. However, there are three directories that you cannot move: the Windows folder, the Program Files folder, and the Program Files folder (x86). These three folders store system files and the installation path. If you move them boldly, your system and programs will confront boot failure. (If you want to directly move an installed app, you can skip to "2. Move installed apps to another drive")
Besides the “Copy” & “Paste”, “Drag” & “Drop”, there are other methods to move folders and files safely. So in this post, we’ll show some other ways to move folders on a Windows computer.
In this method, we’ll move the Documents folder from the C drive to the D drive.
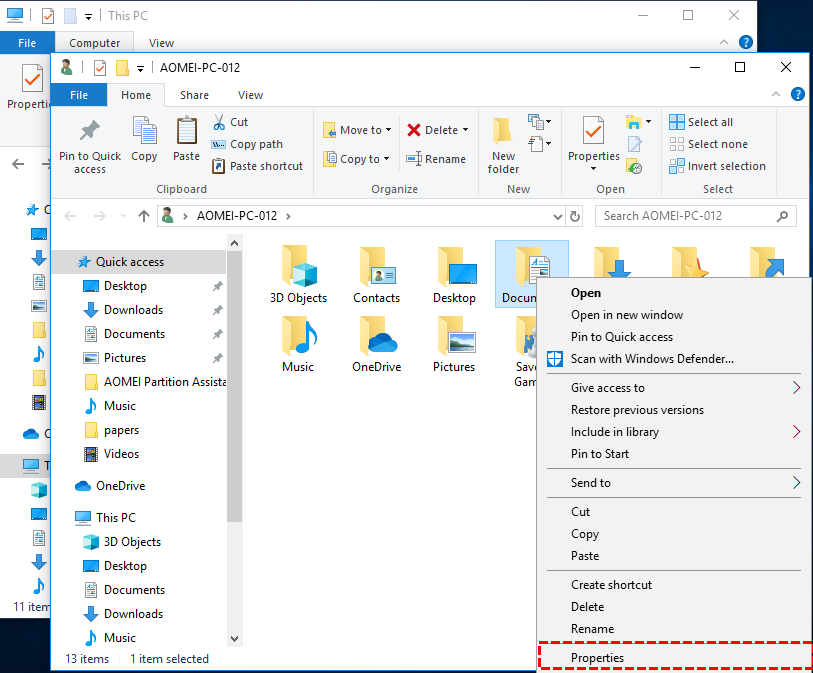
Step 1. Press "Windows + E" together to open "File Explorer".
Step 2. Right-click files or folders and choose "Properties".
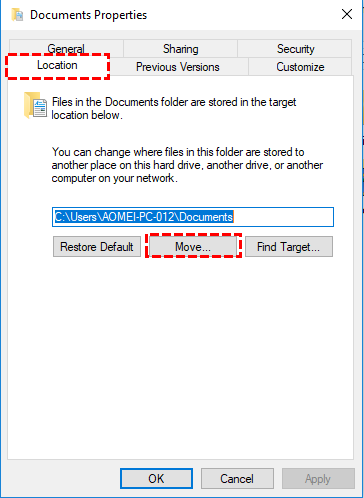
Step 3. In the "Document Properties" window, click the "Location" tab and then choose "Move".
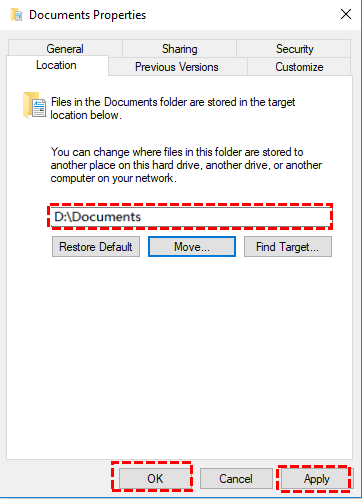
Step 4. Now, choose D drive as a destination location, and click "Apply" to finish the process.
▶ Note: Make sure you save the data in the folders with the same name as in the C drive, otherwise, the system won’t recognize the new path, and the programs in this folder won’t boot.
Registry Editor allows users to modify the storage path to move folders but the steps are a little complex. Please be cautious.
Step 1. Press "Windows + R" at the same time to open the Run box.
Step 2. Input "regedit" or "regedit.exe" and click "OK" to run Registry Editor.
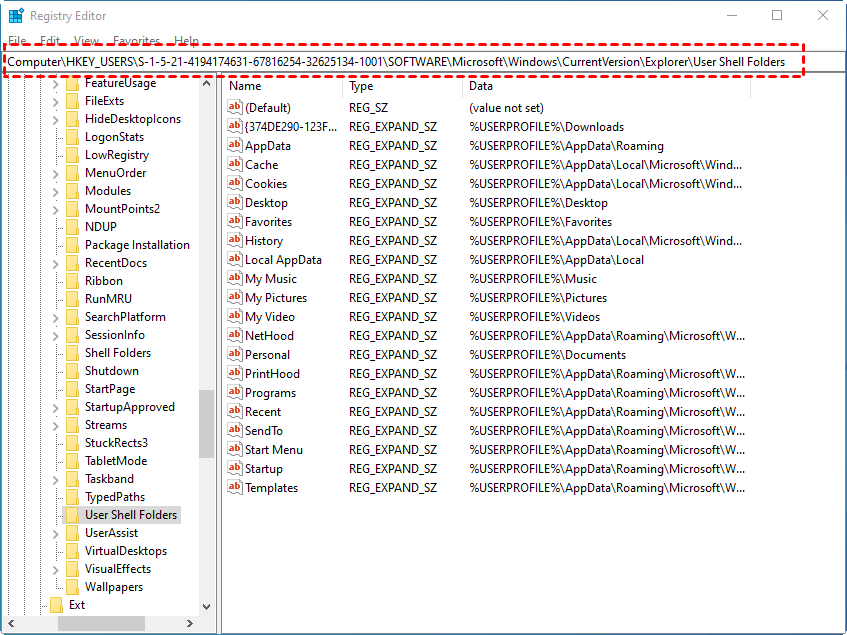
Step 3. Follow the path and you will see all the User folders are listed.
For Windows 7/8/8.1: "HKEY_LOCAL_MACHINE \ SOFTWARE \ Microsoft \ Windows \ CurrentVersion"
For Windows 10: "HKEY_LOCAL_MACHINE \ SOFTWARE \ Wow6432Node \ Microsoft \ Windows \ CurrentVersion"
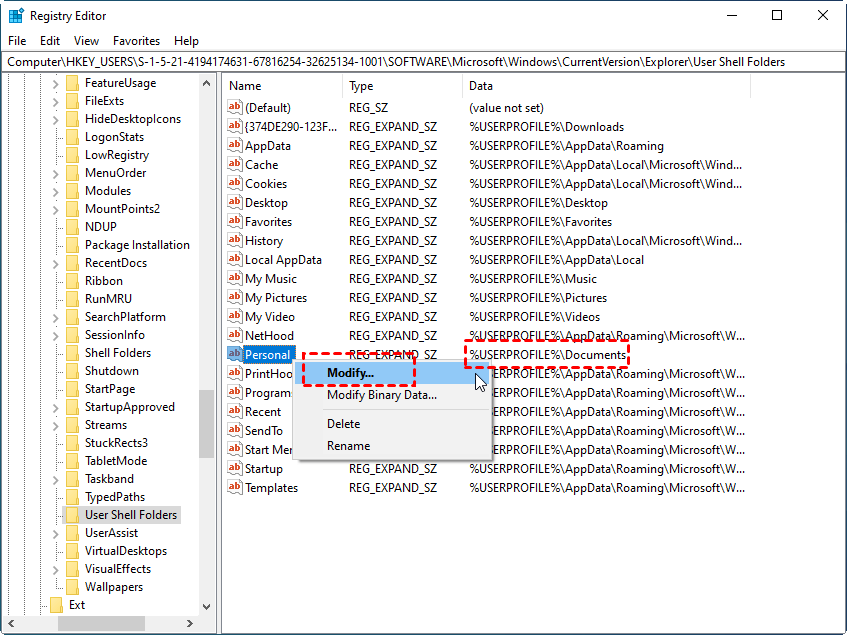
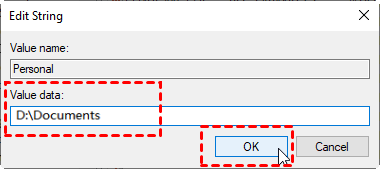
Step 4. Find the data or string named "%USERPROFILE%\Documents", right-click it, and then choose "Modify".
Step 5. Now, under "Value data", type the new location or path as you like (e.g. "D:\Documents") and click "OK". (You need to set the new folders in advance.)
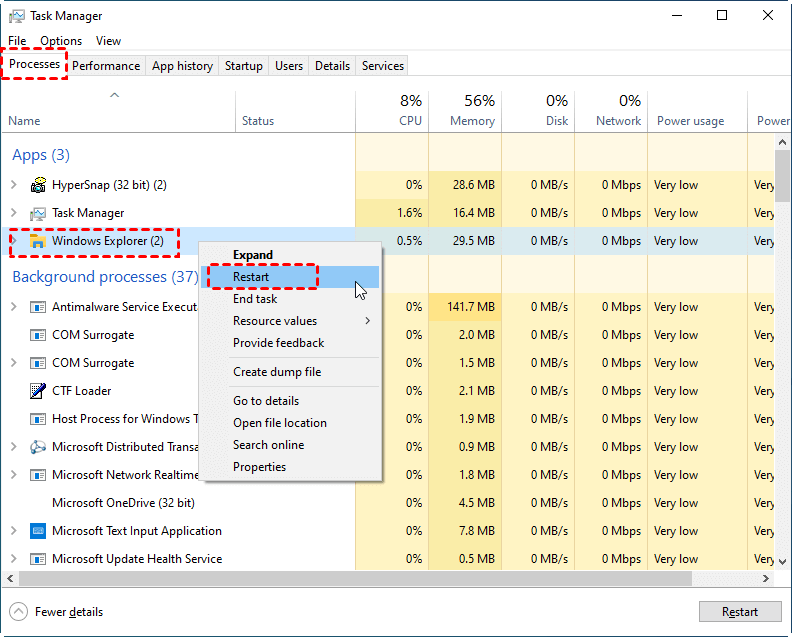
Step 6. Close Registry Editor and right-click "Windows" and choose Task manager to open it.
Step 7. Find Windows Explorer under the Processes tab, right-click it and then choose "restart".
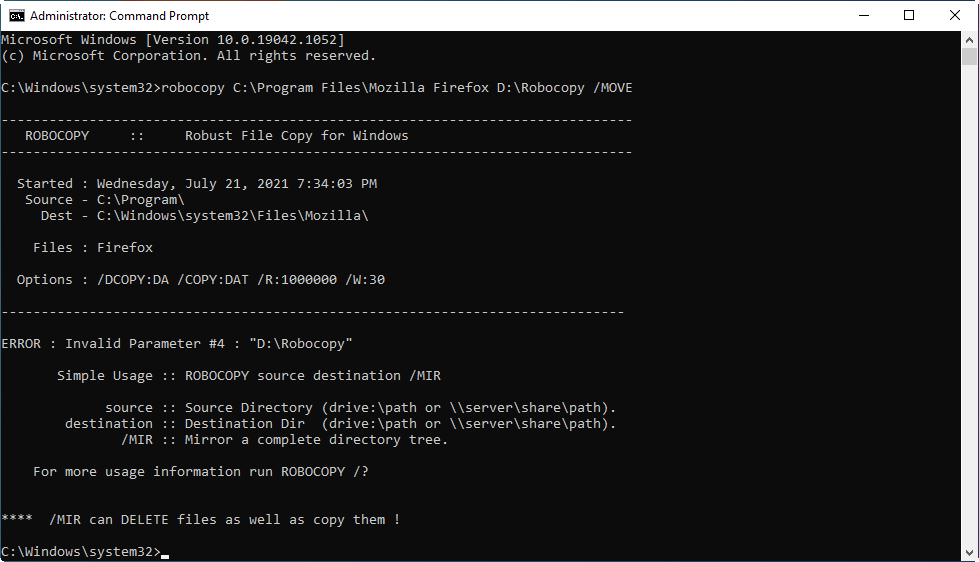
Some CMD commands can also move folders and files, here we’ll show you how to use copy command and robocopy commands to move files and folders.
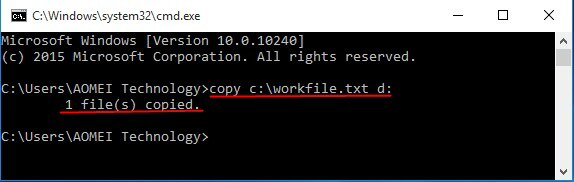
Step 1. Press "Windows + R" spontaneously, then type "CMD" and hit "Enter".
Step 2. Type "copy c:\workfile.txt d:" in the popup window.
Step 3. Enter "workfile.txt", and type "copy *.txt d:" to copy text to D drive.
▶ Note: Please be careful of the destination location, if you move the wrong folders or transfer to the wrong location, folders may be corrupted or damaged.
Robocopy is a Microsoft Windows directory and/or file replication utility. This software is far preferable for moving large datasets or numerous files across disks, and it is an outstanding data backup tool. It allows you to resume interrupted copies, as well as different options and logging during copying.
Although Robocopy has several syntaxes, each with its own set of functionality, if you only want to move certain folders, you just need to know two commands.
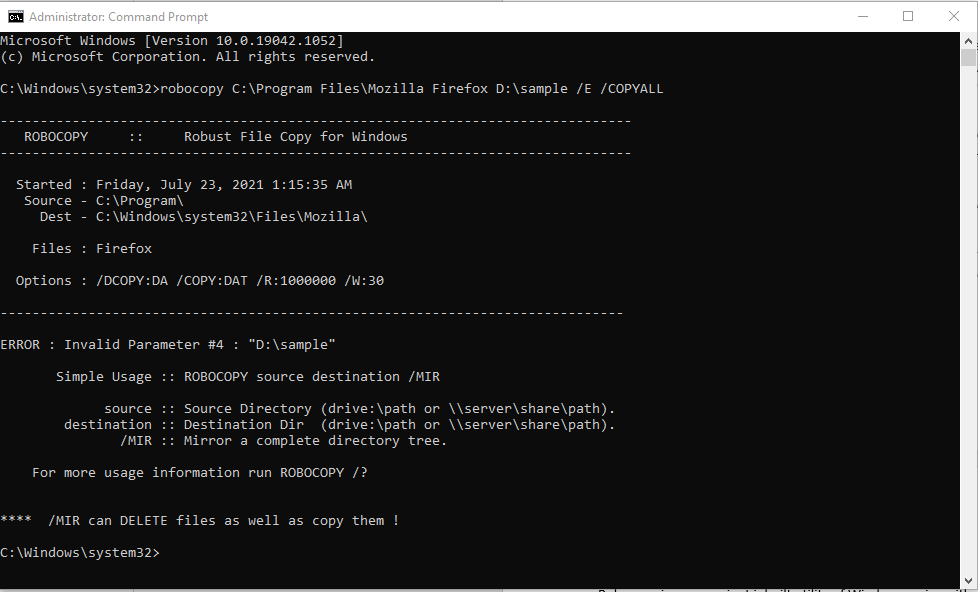
To copy all NTFS ACLs, file owners, subfolders, and file characteristics, you can use robocopy C:\src D:\dst /E /COPYALL.
Step 1. Search for “CMD” in the Start bar, right-click and select “Run as administrator”.
Step 2. After opening, copy the above instructions to CMD, and then modify the source drive and target drive according to your actual situation.
• C:src: the source drive. • D:dst: the target drive. • /E: Select all empty subfolders. • /COPYALL: Copy everything.
To move files and subfolders, you can use robocopy C:\src D:\dst /MOVE. This command will destroy files/directories from the source after copying.
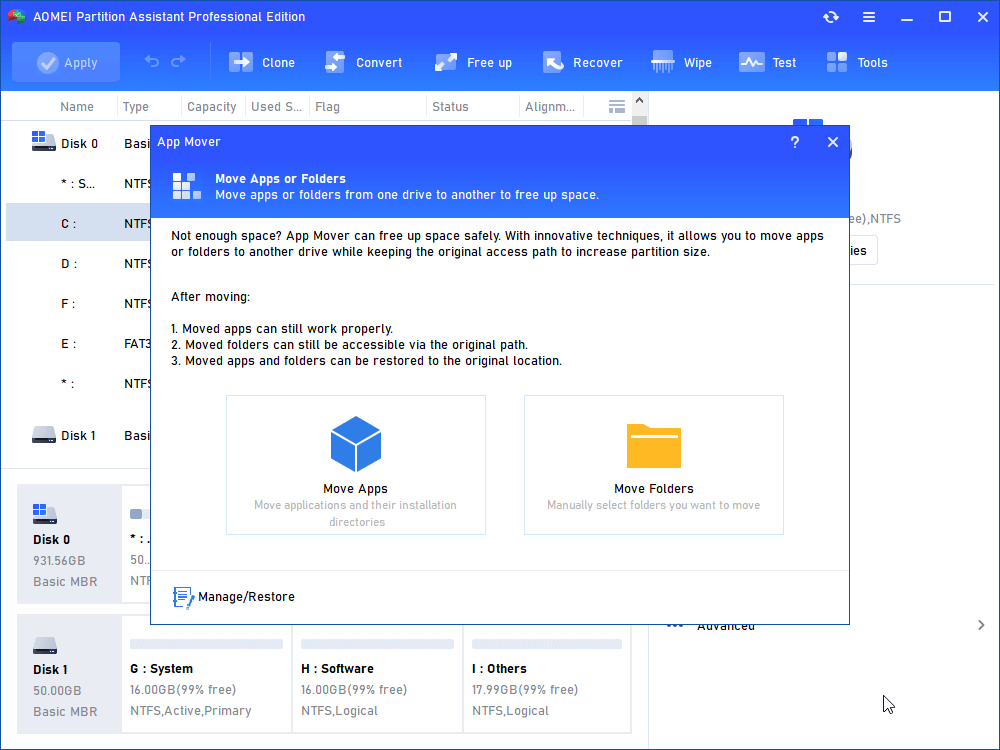
If you don’t want to move your folders with tiresome steps and complex commands, you can also turn to a third-party tool. AOMEI Partition Assistant Professional is a convenient tool for Windows 11/10/8/8.1/7 users to safely and easily move folders to another location. Its moving features can move installed apps and folders. With this tool, you can release large free space on your C drive. And besides moving folders and files, it can also delete junk files to help you clean PC and disks.
Step 1. Install and run AOMEI Partition Assistant, in “Free up”, select “App Mover”.
Step 2. In this window, you can choose to move folders or move installed apps. First, we’ll show you how to move folders. You can choose “Move Folders” to continue.
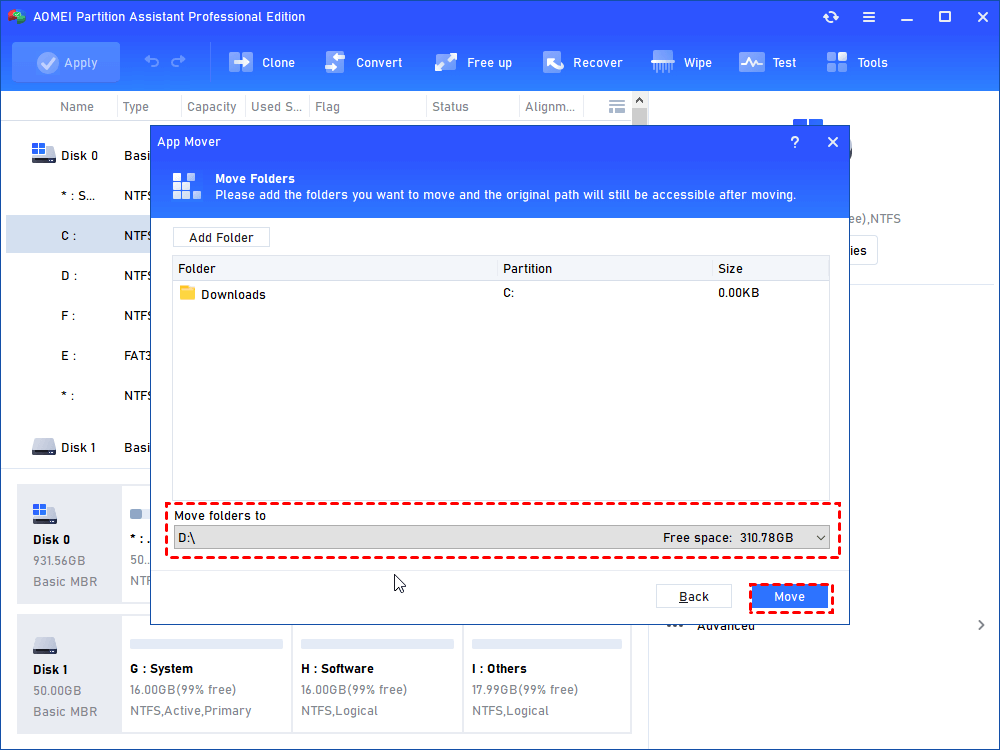
Step 4. Then add the folders you want to move and their new locations. Then click “Move”.
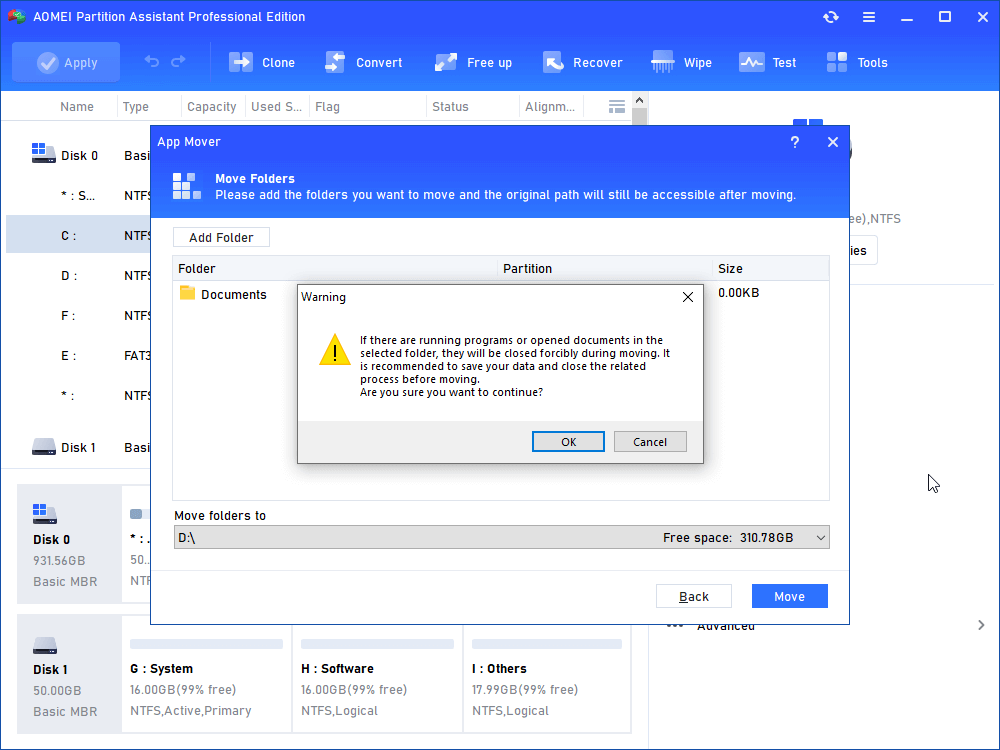
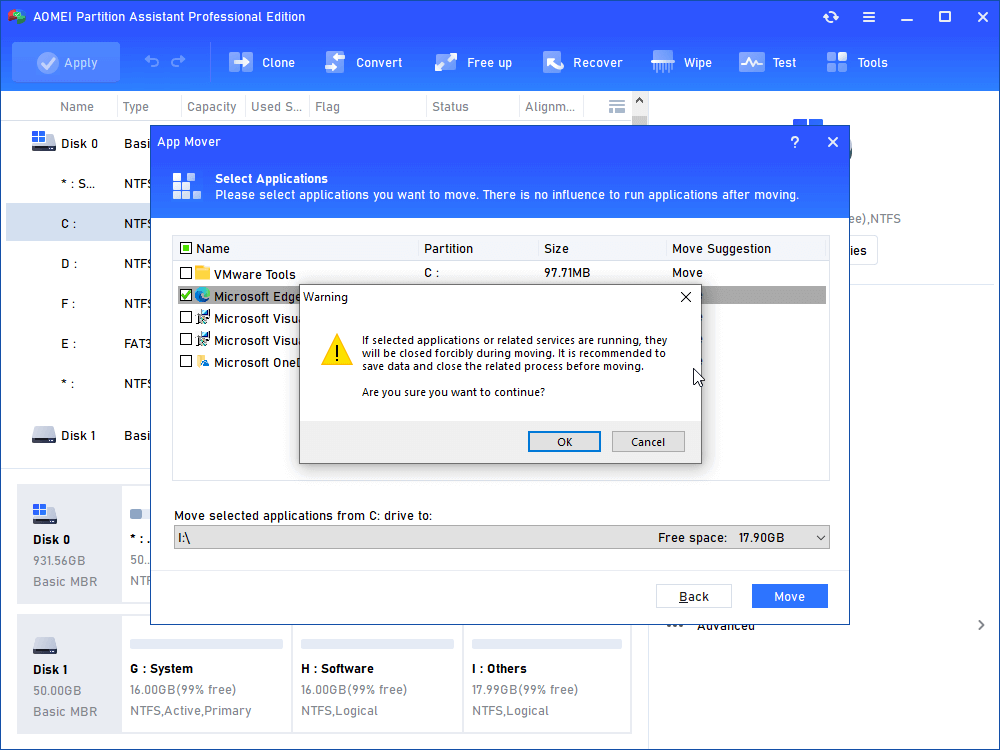
Step 4. You will see a pop-up message confirming the force closing of the running programs when the move starts. Click OK to start the process.
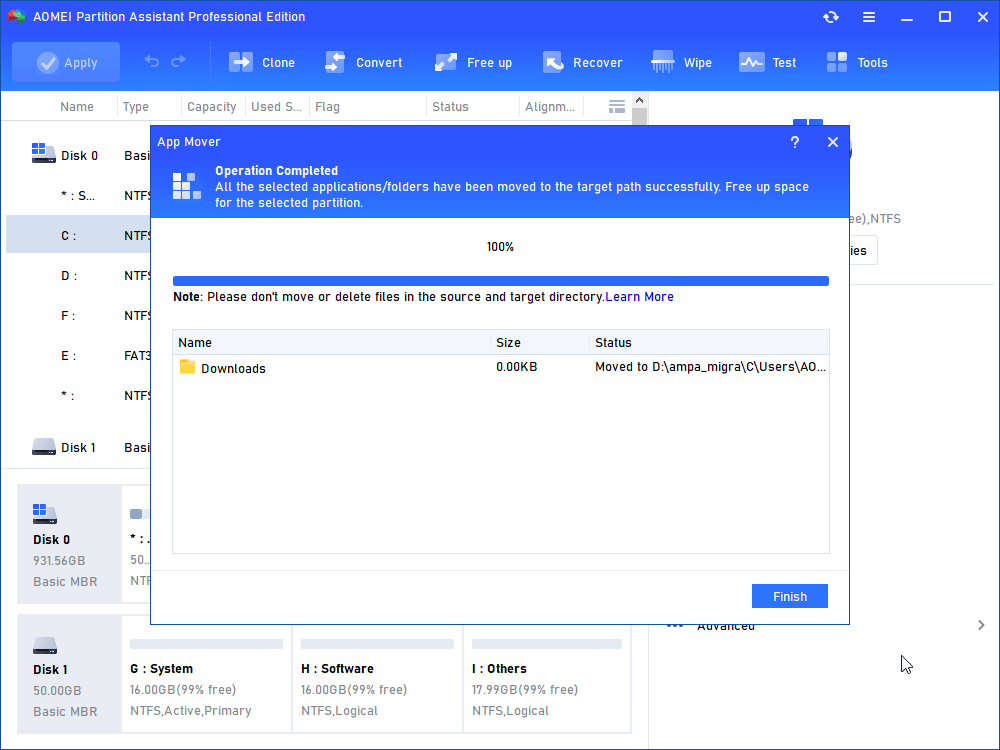
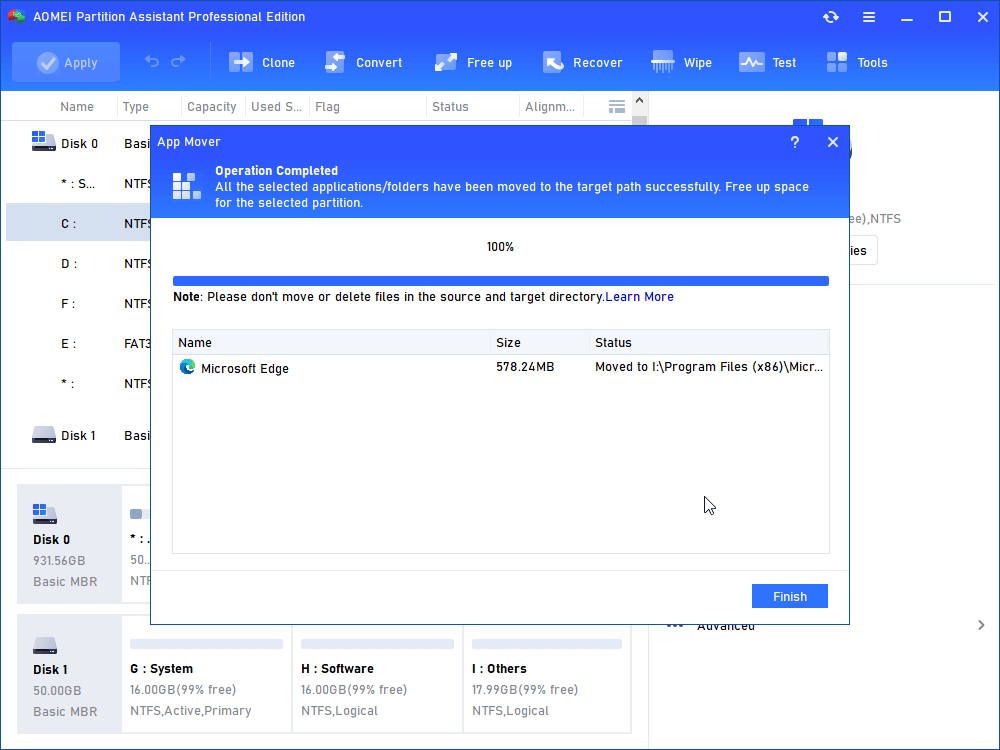
Step 5. Wait for a while and click "Finish" to complete the action.
If you find there are some large apps installed on the C drive, you can choose "Free up"> “App Mover” in step 2.
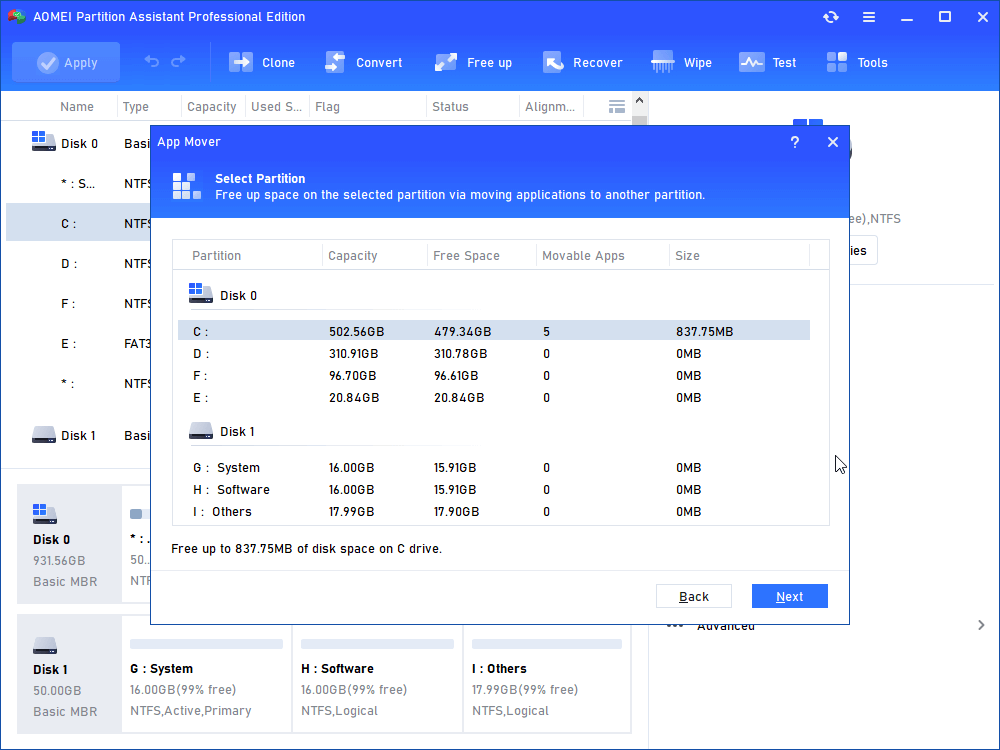
Step 1. In the pop-up window, choose the partition that you want to free up via moving apps (here is partition C) and click “Next”.
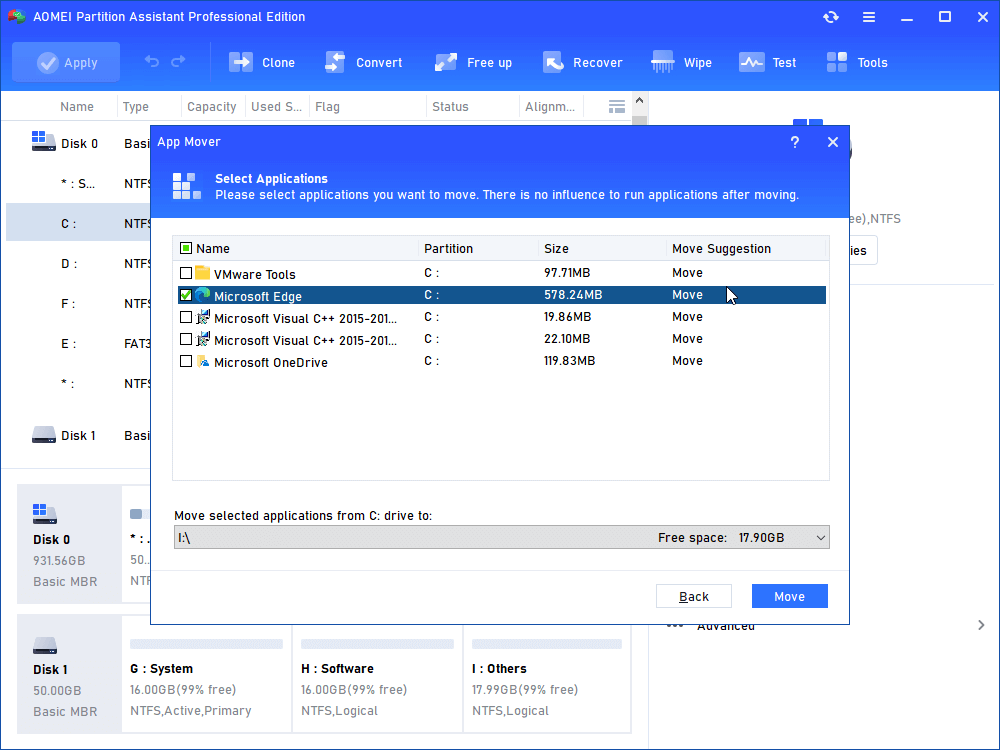
Step 3. In the window, all movable apps on the C drive will be listed. You can choose one or multiple apps that you need to move and the destination partition. Then click “Move” to execute the operation.
Step 4. Confirm that you have closed the apps and that you will move from C drive to D drive. Then, click "OK".
Step 5. Wait for the move process to complete. Then, click "Finish".
Then your apps will be moved and the C drive will have more free space.
If you don’t know how to move a folder safely, then this post is quite useful. Windows built-in tools are helpful but if you can’t handle the complex steps, you can choose AOMEI Partition Assistant to simplify the task.
Besides moving folders and apps, you can also allocate free space if there is more than one drive on the same disk to extend C drive space. And it can convert disks between MBR and GPT without cleaning partitions, clone disk, migrate OS to another disk, etc. What’s more, if you need a Windows Server manager, this tool also has the Server Edition for you.