This tutorial covers all probable causes and 8 effective techniques for resolving the Windows Photo Viewer can't open this picture issue. If your picture has been damaged or deleted, please restore it first.
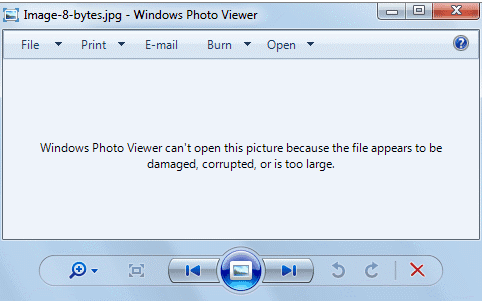
The error message "Windows Photo Viewer can’t open this picture" can appear on users' computers for several reasons, including limited file format support, insufficient memory, and outdated applications. Fortunately, there are various methods to resolve this issue, such as converting images to different formats, updating Windows Photo Viewer, increasing memory, or using alternative photo viewers.
In summary, the "Windows Photo Viewer can’t open this picture" error may be caused by the following factors:
❈ Outdated application: Windows Photo Viewer may need to be updated to the latest version.
❈ Unsupported file format: The image file format might not be supported by the Photo Viewer.
❈ Large file size: The image file could be too large, or it may be damaged or corrupted.
❈ Encrypted file: The image file might be encrypted, preventing it from being opened.
❈ Software conflict: There could be a conflict with other software installed on your system.
❈ Corrupted or missing system files: Some system files necessary for operation may be corrupted or missing.
Identifying the root cause will help you choose the best solution to fix the error.
Once you understand the root issue, you can resolve the problem more efficiently. Below are eight practical solutions that can help you troubleshoot and fix the error.
Before attempting to fix the error, check if your photo files are deleted or damaged. If they are, it’s important to stop using the storage device immediately to avoid overwriting the files. Recovering the photos right away is crucial, and a reliable data recovery tool like AOMEI Partition Assistant for Recovery can assist you in this process.
AOMEI Partition Assistant for Recovery is powerful software that can quickly restore photos and over 200 different file types on various versions of Windows, including Windows 7, 8, 10, 11, and Windows Server. Its user-friendly interface ensures that even those without technical expertise can easily recover their files.
Key features of AOMEI Partition Assistant for Recovery:
✎ Supports the recovery of various image formats, including JPG/JPEG/JPE, PNG, TIF/TIFF, HEVC/HEIC/HEIF, GIF, PSD, SVG, ARW, X3F, and more.
✎ Retrieves deleted photos from multiple storage devices such as SSDs, HDDs, USB drives, and SD cards.
✎ Offers two advanced scanning modes: Quick Scan and Deep Scan, both of which run automatically to locate lost files.
✎ Allows filtering by specific file types, modification dates, and sizes, making it easier to find and recover exactly what you need.
✎ Recovers images lost due to accidental deletion, system crashes, software errors, or virus attacks.
To recover your photos, simply download and install AOMEI Partition Assistant for Recovery on your computer. If your deleted images are stored on an external hard drive or USB device, make sure to connect it to your computer before running the software.
Step 1. Install and launch AOMEI Partition Assistant for Recovery. Choose the exact partition or disk where your data is lost and click Scan.
Step 2. Then, the recovery tool start to scan and search. lt will execute the “Quickly Scan" first for finding your deleted data fast, and then execute the “Deep Scan" for searching other lost data.
Step 3. Once the scan is completed, all deleted files, recycle bins and other missing files will be displayed. Please select the file you would like to recover and then click "Recover".
Step 4. Then, select a folder path to save your recovered files.
Step 5. Wait patiently for this process of recovery to end.
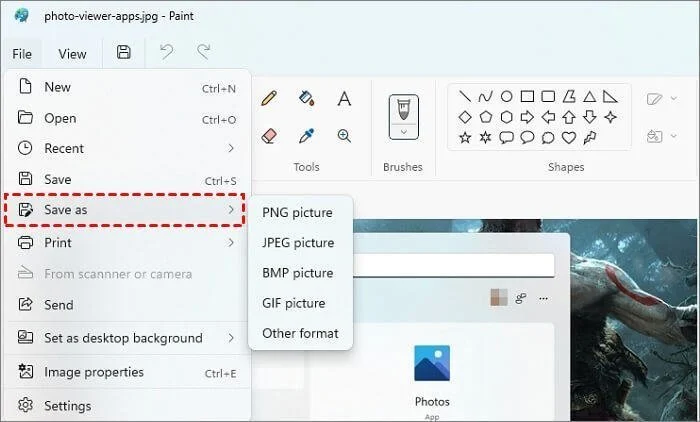
Windows Photo Viewer is limited to certain file formats, including .jpg, .jpeg, .png, .gif, .tif, .tiff, .bmp, .wdp, and .dib. If your picture is in a different format, you’ll need to open it with another program or save it using one of these supported formats.
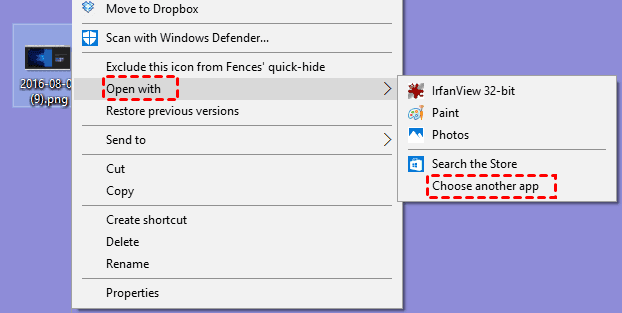
Step 1. Right-click on the image you’re trying to open and select Open with.
Step 2. Scroll down and choose Choose another app.
Step 3. A list of available programs will appear. Select a different program and click OK to open the image.
Step 1. Open the image using another program. For example, you can use Paint.
Step 2. Press Ctrl + S and save the picture in a format that Windows Photo Viewer supports.
Note: Changing the file format or extension can compress large, high-resolution images, potentially reducing their quality.
If you see an error message like "Windows Photo Viewer can’t display this picture because there might not be enough memory available," it may be due to insufficient system memory.
One short-term solution is to close applications that are consuming large amounts of memory using Task Manager. However, for a more permanent fix, you should consider increasing your computer’s memory (RAM) to 16GB or more.
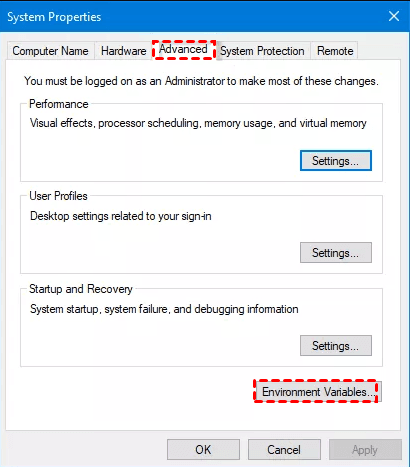
Steps to Change TMP Variable Value for More Memory:
Step 1. Open the Control Panel and navigate to System.
Step 2. In the System Properties window, go to the Advanced tab and click on Environment Variables.
Step 3. Find the TMP variable, double-click it, and change its value to another disk with more space. Click OK to save the changes.
Increasing memory or adjusting system variables can help resolve memory-related issues when viewing photos.
If your system has sufficient memory but Windows Photo Viewer still can't open the picture, resetting the color management settings may resolve the issue.
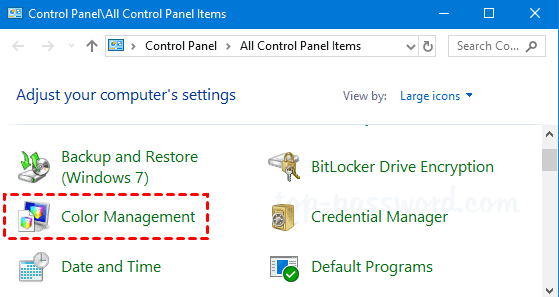
Step 1. Open the Control Panel and select Color Management.
Step 2. In the Color Management window, go to the Advanced tab.
Step 3. Scroll down to the Display Calibration section and click Calibrate display.
Step 4. Follow the on-screen instructions by clicking Next until you reach the final screen, then click Finish.
Outdated versions of Windows Photo Viewer or software bugs could also prevent you from viewing images properly. To fix this, it's essential to ensure that Windows Photo Viewer is up to date.
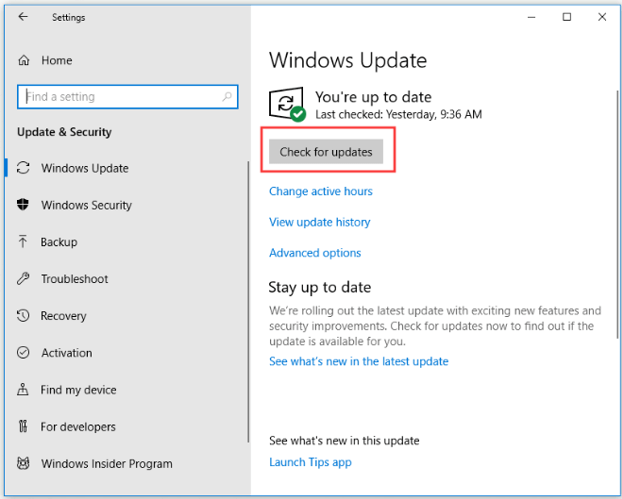
Step 1. Go to Windows Settings and select Windows Update.
Step 2. Click on Check for updates to search for any available updates, including those related to Windows Photo Viewer.
Step 3. If updates are available, tick the box next to Windows Photo Viewer and click Install Updates.
Step 4. Once the updates are installed, restart your computer to apply the changes.
Keeping your software up to date can help resolve compatibility and bug-related issues.
If your picture is encrypted, Windows Photo Viewer won't be able to open it. You'll need to remove the encryption before accessing the file.
Step 1. Navigate to the encrypted picture in File Explorer. Right-click on it and select Properties.
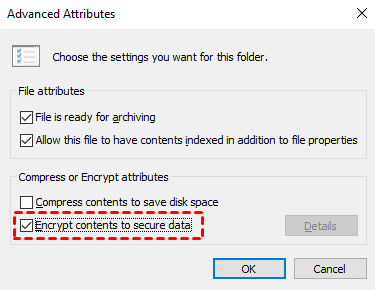
Step 2. Under the General tab, click the Advanced button.
Step 3. In the Compress or Encrypt attributes section, uncheck the option labeled Encrypt contents to secure data.
Step 4. Click OK to apply the changes.
If Windows Photo Viewer still isn't functioning properly, resetting the Photos app may resolve the issue.
Step 1. Open Windows Settings and go to Apps & Features.
Step 2. Find and select Photos from the list of installed apps.
Step 3. Click Advanced options, then select Reset to restore the app to its default state.
Resetting the Photos app can help resolve software glitches or settings that may be causing the issue.
If you've recently updated a phone backup suite on your Windows PC, it could conflict with Windows Photo Viewer, preventing it from opening your pictures. To resolve this, you need to uninstall the phone backup software.
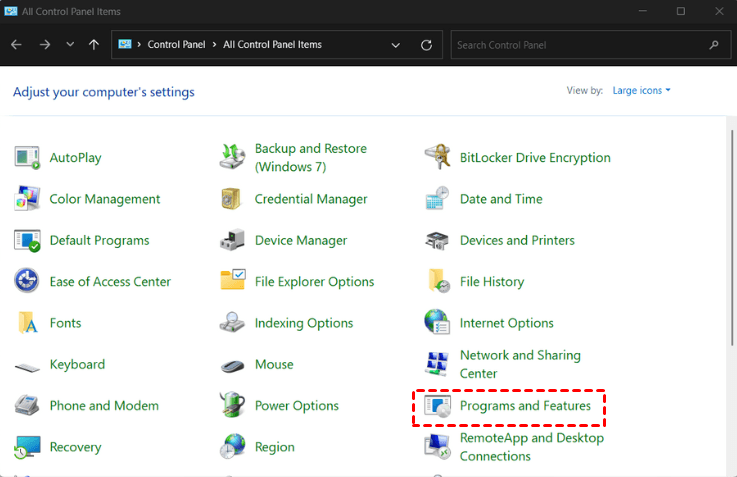
Step 1. Open the Control Panel and select Programs and Features.
Step 2. Look for programs related to your phone (such as Nokia, Samsung, or Huawei's HiSuite).
Step 3. Select the program and click Uninstall.
If you're encountering the "Windows Photo Viewer can’t display this picture" error when trying to open images from a USB drive, there may be a file system error. You can use the Command Prompt to check and fix it.
Step 1. Right-click the Start menu and choose Command Prompt (Admin).
Step 2. In the Command Prompt window, enter the following command and press Enter:
SFC /scannow /OFFWINDIR=F:\Windows /OFFBOOTDIR=F:\
Replace "F" with the correct drive letter of your USB device.
You can also run the following commands for additional repairs:
sfc /scannow
DISM.exe /Online /Cleanup-image /Restorehealth
If you're still facing the "Windows Photo Viewer can't open this picture" issue, try the eight methods mentioned above. In addition to fixing this error, these methods can help prevent future image access problems. If you've accidentally deleted your photos, it’s possible to recover them using recovery tools like AOMEI Backupper Standard. Regular backups of your pictures are the best way to safeguard your files from being lost or inaccessible.