Why does my PS4 keep beeping? In this article, you can learn the possible reasons about this issue and how to fix PS4 beeping.
“I've had my PS4 since December and as of the past week, it's been randomly beeping. The PS4 doesn't turn off or eject the disc, it just beeps. Hoping someone could shed some light on the situation. Anything will help! Thank you.
Although PS5 has been released for 2 a few years, some players didn’t abandon their PS4 console. All devices need good maintenance, however, some glitches are unavoidable. PS4 beeping death is not rare, why is my PS4 beeping? This article may help you fix your beeping PS4.
There are many reasons that may lead your PS4 to this beeping issue. In all, there are 3 directions we can take into consideration.
1. Outdated firmware This situation is mentioned by the PlayStation official. Make sure your PS4 is the latest firmware.
2. Physical hardware damage This point is the most likely cause of the PS4 beeping problem. Some users even summarize different beeping situations: • Beeping after you turn on—motherboard, GPU, or CPU might have something wrong. • Beeping in rest mode—this might be an error. • Beeping with ejecting discs—damaged disc…
And don’t forget the worst enemy that almost all electronic devices will confront--dust. Dust can cause serious heat dissipation problems. If the hard disk temperature is too high, it will cause bad sectors on the hard disk.
Now, the problem is how to repair the beeping issue. If a restart is unavailable for you, we list more solutions to help you.
Step 1. Enter “Settings”, and click “System Software Update”
Step 2. Check to see the update.
Step 3. Click “Update”.
If it’s unworkable, please keep reading to see more solutions.
To overcome the dust problem, you have to disassemble your console. Please read the instructions carefully to avoid manually physical damage to any components.
Warning: If your PS4 is still in warranty, please send your device to Sony to repair.
Please gently brush those panels, interfaces, and fan, and then use an air pump to clean deeply.
AS we mentioned that the dust can cause bad sectors on the hard drive, it’s necessary to check the hard drive to see whether it has bad sectors or not, since you’ve already disassembled your PS4.
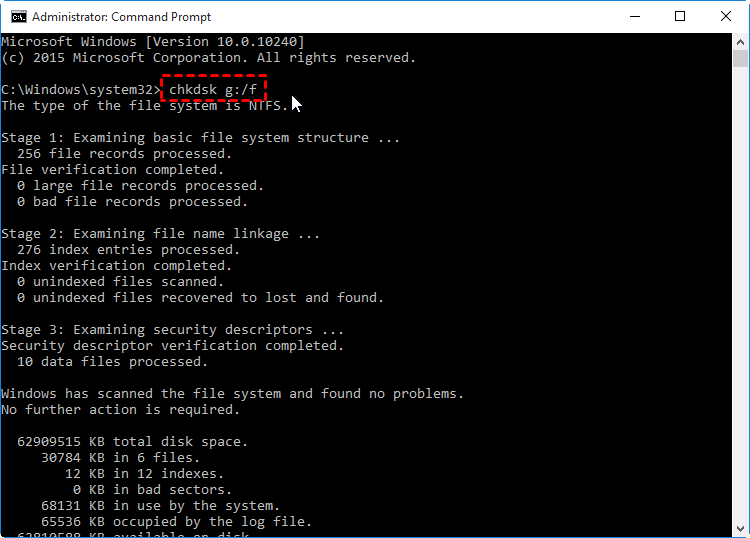
You can unplug your PS4 hard drive and connect it to your computer and run “CHKDSK” to check the error.
Step 1. Press “Windows” + “R” simultaneously, type cmd, press Enter.
Step 2. In the command prompt windows, and you can start to check the disk with the command line. Type the command in the prompt: "chkdsk g:".

However, not everyone can use CMD successfully anytime. If you enter the wrong commands and execute them, there’s a huge risk to make it disable. Thus, here we recommend you a secure software—AOMEI Partition Assistant Standard to check your hard drive and safely repair the bad sectors. This powerful tool supports Windows 10/8/7/XP/Vista system and its Server edition suits Windows Server users. All users can check their hard drives without laborious operations.
Step 1. After you connect your PS4 hard drive to your PC and finished the installation of Partition Assistant, launch this software. You can see some basic information of all hard disks, right-click the PS4 disk, and choose “Advanced” > “Check Partition”.
Step 2. A small pop window will appear, you can choose the first way to check and repair the errors, then click “OK”.
Tips: If the partition you selected is being used by another process, you cannot continue the operation. A window will pop up to tell that you can continue the operation again if this partition is dismounted. But it will make all the running programs invalid. When asked, “would you like to force a dismount on this partition”. Click “Yes”, it will execute the task, click “No”, it will cancel the operation.
Step 3. Then you can see the procedure in the window. If there’s any damage to your disk, the little block will become red.
Step 4. After that, you will see all details of the hard drive in the window. After the progress is completed, click “OK”.
Then, you can remove the PS4 hard drive and plug back into the PS4, turn it on to check if the beeping problem is solved or not.
If you’re sure that the beeping issue is the hard drive problem and “Check &Repair” cannot help you, you may think about formatting. Full formatting will wipe all settings on that hard drive, so the beeping may disappear.
AOMEI Partition Assistant can also help you quickly format the hard drive. Its “Format Partition” functions can format hard drive into various types.
Step 1. Launch the AOMEI Partition Assistant Standard. Then, all disks and partitions will be displayed on the main interface.
Step 2. Right-click on the partition you want to format and select “Format Partition”.
Step 3. Preset a partition label and a file system and click on “OK” to proceed.
Step 4. After returning to the main window, hit “Apply” on the upper left and click on “Proceed” to finish the task.
Within several seconds, the operation will be finished.
You can also use the “Wipe Hard Drive” feature, but this may need more time.
If you search “why does my PS4 keep beeping” on the Internet, you will find out this is really a common issue for PlayStation players, so don’t be panic. AOMEI Partition Assistant possesses many practical functions, like “Surface Test” to check the entire disk to keep the healthy status of your disks. it’s truly convenient.