This article explores three effective methods to shrink an SSD partition on Windows 11/10. Each method is accompanied by detailed steps below, making it easy to manage your SSD partitions.

Shrinking partitions refers to the process of reducing the size of a partition on a storage device. It allows users to reclaim unused space and allocate it for other purposes. What are the benefits of shrinking partitions? By doing so, you can achieve greater flexibility in managing disk space, optimize storage, and improve overall system performance. Additionally, it helps mitigate the risk of data loss and system failures by enabling the creation of separate partitions for critical files and applications.
You might be wondering, "Is it safe to reduce partitions on an SSD?" The short answer is yes—shrinking SSD partitions is safe, provided you follow the proper steps and take the necessary precautions. While SSDs have a limited number of write cycles and frequent data modifications can slightly affect their lifespan, occasional partition resizing is unlikely to cause significant harm. This article explores three effective ways to shrink an SSD partition on Windows 11 and 10. Keep reading to discover how to better manage your SSD storage.
This section outlines three practical tools to shrink SSD partitions on Windows 10 and 11. Before proceeding, remember to create backups of your important files in case of unexpected data loss. Once you've completed the necessary preparations, follow these steps to resize your SSD partitions safely.
AOMEI Partition Assistant is a user-friendly and powerful disk management tool and partition software for Windows. With its "1-Click Adjust Space" feature, you can effortlessly modify a partition’s size by simply dragging the dots at the beginning and end of the partition. In this way, you can easily and quickly change the disk layout.
Here’s how to shrink an SSD partition on Windows 10/11 using AOMEI Partition Assistant:
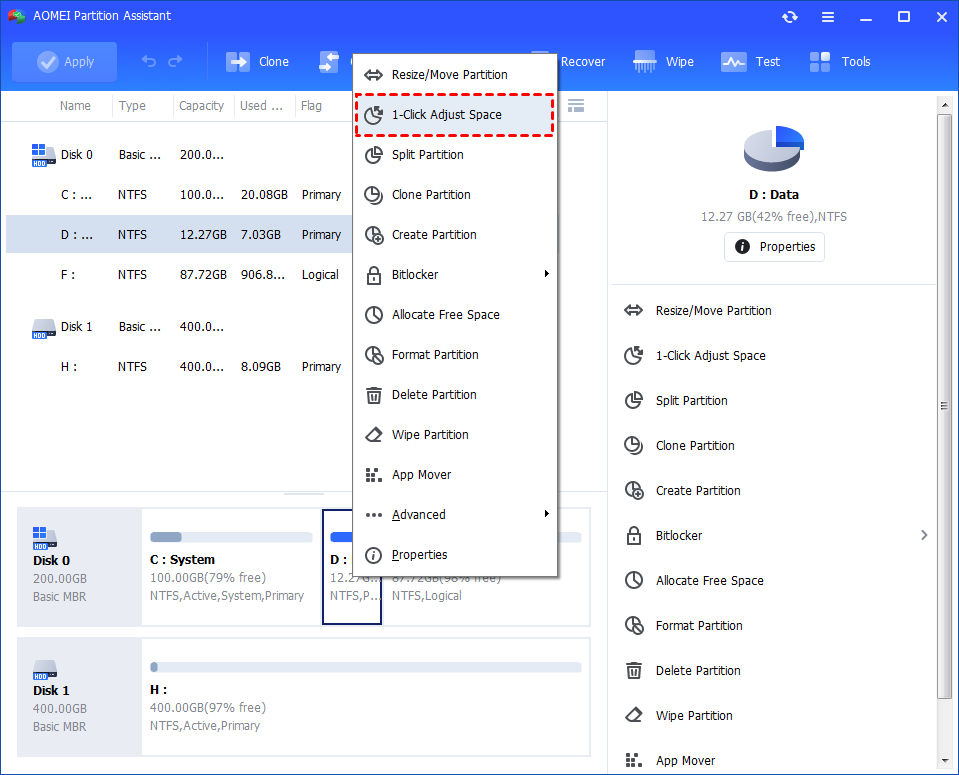
Step 1. Install and launch AOMEI Partition Assistant. Right-click the partition you want to shrink and select the 1-Click Adjust Space option.
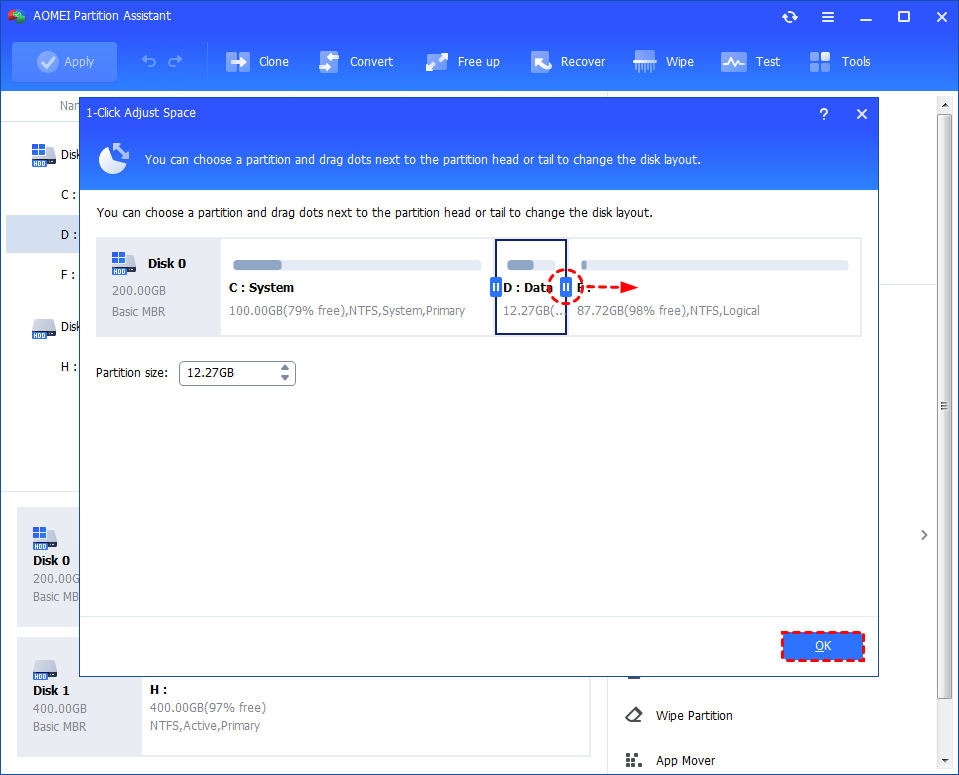
Step 2. For this example, we’ll use the F: partition. To shrink it, simply drag the marked dot to the right. Then, click OK to proceed. This will reduce the F: partition size and expand the D: partition.
Step 3. After making your adjustments, preview the changes in the Pending Operations window. If everything looks correct, click Apply and Proceed.
Step 4. The operation may take some time, and the program will display an estimated duration. The time required depends on the amount of data being processed.
Step 5. Wait for the process to complete. Once finished, you will find the F: partition has been successfully shrunk.
Disk Management is another tool for resizing partitions in Windows. It is easy to use but can only shrink partitions formatted with NTFS and doesn't support FAT32 or other file systems. Moreover, the unallocated space must be located directly adjacent to the partition you want to shrink. Follow these steps to shrink SSD partitions on Windows 10/11:
Step 1. Press Windows + R, type diskmgmt.msc, and hit Enter to open this tool.
Step 2. Right-click the partition you want to shrink and select "Shrink Volume"; or select "Extend Volume" if you want to extend it.
Step 3. Specify the amount of space to shrink and click "Shrink".
Step 4. Click "Finish" to complete the task of resizing the partition on SSD. Then, the unallocated space will now appear next to the partition.
In addition to the tools mentioned above, DiskPart is another excellent option for advanced partition management. If you're confident working with command-line tools, you can use DiskPart to resize partitions effortlessly. Here's how to shrink an SSD partition on Windows 10/11.
Step 1. Press Windows + R, type cmd, and hit Enter to open Command Prompt.
Step 2. Type the following commands and hit Enter after each one.
Step 3. Type exit to close the window and finish resizing partitions on SSD.
★ Before proceeding with any changes, it’s crucial to create backups of your important files. Although shrinking partitions is generally safe, unforeseen issues like power outages or system crashes could result in data loss.
★ Check the available space on your SSD beforehand. This helps you plan the partition shrinking process more effectively and avoid potential errors or complications.
★ While resizing SSD partitions is typically safe, performing this operation too frequently can negatively affect your SSD’s performance and lifespan. It’s advisable to avoid making partition adjustments regularly.
★ If you're using advanced SSD management tools, consider temporarily disabling the TRIM feature during the resizing operation. This prevents interference and ensures a smoother process. Once the resizing is complete, re-enable TRIM to maintain optimal SSD performance.
In conclusion, after comparison, we’ve found that AOMEI Partition Assistant is the top choice for shrinking SSD partitions, which allows you to easily adjust disk and partition sizes with just a few clicks. In addition to that, it offers other useful features such as splitting partitions, allocating free space, or merging partitions. If you are dealing with a similar problem, why not give it a try?
Q1: Will shrinking my SSD partition affect its performance?
While SSDs have a limited number of write cycles, occasional partition resizing is unlikely to significantly affect their performance.
Q2: Can I resize the system partition on an SSD?
Yes, you can resize your system partition on an SSD, but it requires extra caution since the partition contains critical system files. It is highly recommended to back up your data before proceeding.
Q3: How much space can I safely shrink from an SSD partition?
The amount of space you can safely shrink from an SSD partition depends on the available free space and the location of files on the partition. You can check these details using Disk Management beforehand. However, it's important to leave sufficient free space for system operations to avoid performance issues.


